Tuesday, March 29, 2022

Shupatto Folding Shopping Bag

Hello sweet shoppers. This is a fun and useful shopping bag to have.

I read eSheep's latest blog posting a couple of days ago and found out about a bag that I hadn't heard about before. I was intrigued and had to Google Shupatto to see more. You can buy Japanese style bags online at places like Amazon, etc. (usually made from a nylon material) and there were also some YouTube videos that show you how to make this style bag too. 

I found a video (from Owl Be Sewing) for making a lined or unlined version and opted for the lined version since I prefer a more finished looking bag and I have plenty of fabric already. So I chose my fabrics and cut out the pieces according to the video and was going to sew it another day. But I went ahead and watched the video and thought it was easy looking enough to make and wouldn't take me that long, so I decided to start sewing it.

Well it looked easy and was until I tried to follow her pinning the pleats and while it made sense what she was doing, I couldn't quite figure out after the second pin what she was matching the pins to exactly. So my pleats aren't perfect and I struggled with that part of the bag. Still it turned out really nice and I like it a lot! I really like the strap closure with the Kam snap to close the bag. I opted to use webbing for the handles. 

Another thing I thought was odd, was that the casing for the handles was too narrow for the size handles she made. I even used 1" webbing which was narrower than her handles, and I had to fold over 1/4" of the webbing and sew it, so that it would fit into the casing. So on my next bag, I will make the casing large enough to fit my handle width.

After my Shupatto Bag was done, I watched a few other DIY videos and found one I prefer better. While I was struggling to make the pleats on this bag because of how complicated it seemed to do, I was thinking to myself, I would have preferred if she showed measurements to mark and fold and press the pleats accordion style instead as that would seem easier to do to me and then lo and behold one of the next videos I watched did the pleats just like that, so I will make that version next, but I will sew the strap closure on with a snap instead of the elastic closure that I have seen on many of these bags.

The reason I don't like the elastic closures is that elastic loses it's elasticity over time and would need to be replaced, so I would rather make a fabric strap with a snap and fold the bag and snap it closed, instead of rolling the bag and putting the elastic over it to close it. And making my bag lined made it thicker and it can't be rolled up. I also prefer to fold it in half twice than to roll it anyhow. 

The beauty of this style bag is that you don't have to remember how or where to fold or roll it up. Just grab the ends of the bag and pull and the pleats all come together. Then fold it in half and in half again and wrap the closure strap around the folded bag and snap it closed.

The bag folded with the snap strap closure.

Unsnap the closure and this is how it looks. Grab the handles to use it. Later, you don't have to remember how or where to fold or roll it up. Just grab the ends of the bag and pull and the pleats all come together like in the photo. Fold in half twice and wrap the strap closure around the bag and snap closed.

For a folding shopping bag it is quite large and holds a lot, but looks so stylish at the same time. The strap with the snap gets looped around the handle and snapped to keep it out the way and from dragging, which give it a nice look at the same time.

I lined my bag, which I prefer to an unlined bag, but it does make the bag a bit thicker when folded up.

I grabbed some bears to show you how roomy this bag is. I could fit even more into the bag.


Another view of the roomy inside.

Grab the ends and pull and it becomes flat like this. Then fold the two ends together in half and in half again and wrap the strap around and snap the bag.

Here it is snapped and closed again.

This bag is great for using non-directional fabric. If you used a directional fabric, you would have to cut it in half plus the seam allowance and sew the pieces together so that one side wouldn't have half the fabric upside down. However, that would create a seam in the bottom of the bag putting more stress on the seam, so I wouldn't recommend doing that either for this style of bag. Other bags I have made I add interfacing, and stabilizers and stitch the bottom more to make it sturdy, but this is a lightweight bag to take with you when you shop, so it's best not to put a seam at the bottom where most of the stress of the bag would be. I also used polyester thread for extra strength as cotton thread could break if you carried heavy items for too long.

This bag would make a great beach bag too as it holds a lot. I will make a couple more of these bags for sure next time using the 2 videos combined and what I like best from each bag to create my own version. 

Happy bag sewing!


Pin It Now!

Thursday, March 24, 2022

Zip & Clip Cross Body Bag

Hello shutterbugs. I tested this cute little bag from Around the Bobbin. It is an updated version to the original pattern, which I did not test, so I have no comparison to see what is actually different in the instructions. 

I chose a camera print to highlight on the flap and I used Heat 'n Bond's Liquid Vinyl on the flap to waterproof it and keep it clean. I used denim for the body of the fabric. I chose to use a slightly wider strap than called for because my hardware is 1-inch wide and I don't have anything smaller. I used webbing for the strap.

This cute little bag measures 7" H x 6 1/2" W x 2" D. It is perfect for the minimalist or when you don't want to carry everything with you. Not only can it be worn across the body, but unclip it and adjust the strap to fit around your waist to wear as a hip bag too.

Under the flap there is a zipper pocket as well as a slip pocket (perfect for a phone. Inside the bag is another zip pocket and inside the zipper pocket are credit card pockets where the cards stand vertical for easier access, a slip pocket with a flap tab that opens to hold a passport or whatever you have that will fit inside it, like a small camera. This is the perfect little bag to take while traveling when you don't want to carry a lot. It also can be worn as a waist bag. Just unclip the clips and adjust the strap and clip the clips together around you waist. Check out Lisa's Blog blog to see how that is worn.

Also, check out the tester's versions here. Zip & Clip Cross Body Bag pdf and paper pattern is on sale for 25% off today through Sunday March 27 (midnight CDT) and no code is needed, so grab yours today. Shop here.


The instructions call for using 2 magnetic snaps, but I chose to use one snap and it works fine for me on this bag.

I used a Kam snap instead of Velcro for the tab.

The pocket with the tab flap holds a Passport, a smallish camera or a phone, etc.

Hard to photograph inside a small bag like this.

Since the flap had a lot of white on it, I added Liquid Vinyl to make it waterproof and stain proof. It's a great product by Heat 'n Bond.


The bag back side.


The side view.

Both a slip and a zippered pocket are just under the flap. Great for your phone or keys.

The zipper pocket with the slip pocket with a tab flap across from it.

Unzip the pocket and safely tucked away are 6 credit card pockets. You can keep your cash and coins in the pockets too and zip it closed for security.

For a limited time only this pdf or paper pattern is on sale 25% off at Around the Bobbin, so grab your copy while it's on sale. Sale ends midnight March 27 CDT.


Pin It Now!

Tuesday, March 22, 2022

Gnome Fabric Postcard

I made this Thank You postcard to mail to Karen who so generously donated fabric to me to make purses for the Sew Powerful Purse Project. She sent fabric to me about 3 times and I thanked her on Facebook, but I wanted to send her a more personal thank you card, so I made this cute little gnome (I hope she likes gnomes). I used scraps of fabrics from some purses I made already (not her fabrics though). 

I glued that butterfly sticker in place so it would stay. I wrote on the back of the postcard. I mailed this wrapped in bubble wrap and placed it in an envelope to protect that button.


Pin It Now!

Monday, March 21, 2022

Gifts for a Beekeeper: Wall Quilt & Composition Notebook with Cover

Hello my Bizzy Bees. A good friend of mine bought a beehive so she could raise bees in her backyard. My husband assembled the beehive for her and she will pick up the bees in April to put into her new hive.

So of course that got me thinking about making her something for her new beekeeping adventure. I wanted to make a cover for a composition notebook so she could take notes and jot down important bee things to refer to later. So I went with Sotak Handmade tutorial for a composition book cover. I love her patterns and have made several of her bags and other things. Thanks Svetlana for the tutorial!

Well, I forgot about turning the fabric under for the book cover to place the book into later and so I placed my Beekeeper gnome too close to the right edge of the fabric I cut out. Oh well, I thought I can make this into a small wall quilt to match the book cover and I will pay closer attention to the making of the book cover when I start to make that later. So I made the quilt (scroll down a bit to see it) first and then made the book cover next.

I love how they both came out and I knew Tara would love them both too. 

The front of the composition book cover with a gnome holding a beehive.
 I added the word, "Bee" because that was all that would fit there. 

I found a little bee embroidery appliqué in my things and added it to the cover. I pieced together scraps of blues for the background, since I didn't have a large enough piece of the blue fabric that I used for the back of this cover and for the wall hanging. I love piecing backgrounds as it adds more interest and uses up more scraps. All the fabrics I used for the appliqué were scraps too.

This is the back of the notebook cover. Isn't this the cutest little bee? I found this on Pinterest, but the head was made out of denim. Since I already had some circles cut out of felt (using the circle die cuts from Crafter's Edge), I only needed to cut out the pair of wings and the black stripes.

 I hand blanket stitched around the felt pieces and added the embroidered antennae, stinger and smile. I used little black buttons for his eyes and red buttons for the ends of the antennae. He makes me smile he is so cute!

Inside the book. See there is the folded over sides to hold the book that I forgot about when I started the beekeeper gnome that later became the little wall quilt.

I used All Sew Petite's Pen/Pencil Bookmark Holder (a free tutorial) to add over the notebook so Tara will always have a pen handy. Thanks Monika for this great pen holder tutorial and video!

Here is the pen holder that can be made using scraps of vinyl, cork, or other non-fraying material. 

This is the small size pen holder that will hold 2-3 pens. Monika also includes a wider pen holder that will hold more pens.

The pen holder is made with elastic (I used fold over elastic for this one) and you slide it over the page to use as a bookmark or over the entire outside of the book, however you want to use it.

Here is the little wall quilt that I started making first as the book cover, but had to make it into a wall quilt as I explained earlier. Tara scored double because of my mistake, lol!


I had more space to put the word, Beekeeper on the quilt, so that was nice.


Here they both are together, with the pen holder over the book (the pen is on the back side). I made each gnome in a different direction.

Happy Beekeeping Tara!

Pin It Now!

Sunday, March 20, 2022

Sew Powerful Purses #56-62

I made 7 more purses for the Sew Powerful Purse Project. Some were made upcycling denim jeans from hubby, some were made with fabrics that were generously donated to me by a woman from the FB Sew Powerful group, thanks Karen! I have a lot more fabric from Karen and hubby's jeans, so I will be making many, many more purses using those again.

These purses are all the intermediate style with the gusset, but I used the beginner flap because it is plain and allows me more room to get creative, which I love and the flap making is my absolute favorite part of making theses purses! I really love the intermediate purse and it's great that you can mix or match from each purse style. I made well over 100 purses in the beginner style and once I switched to the intermediate, I knew this would be the purse I would continue to make as I find it actually easier than the beginner style. I like to topstitch on both sides of the gusset to make the purse look better and to really secure those 1/4-inch seams too. I have added a back pocket to some of these purses, which I will do if I have enough fabric that matches the exterior fabric that I have used.

I cut out all of the fabric pieces needed for these purses, except for the flap. Since I don't know if I will have enough fabric for the flap, I would rather wait and see what exterior fabric is left after cutting the other exterior pieces first. Then if I don't have a large enough piece, I will use the scraps of exterior fabrics I have along with maybe the lining fabric scraps or other fabric scraps that might look good with it and then I will create the flap by sewing a scrappy free form (also called crumb quilt) piece. Sometimes I will sew it quilt as you go (QAYG) or sew the flap and then quilt it afterwards. I also tend to add one or more appliqué shapes (flowers mostly) and embellish with buttons. All this tends to take a bit more time than just cutting out a fabric for the flap, but I love doing the flap as I mentioned and it fulfills my creative side at the same time. The flap is mainly the part of the purse that you see and so I want to make it fun and happy as well as functional. Bonus is that I am using up some scraps! 

I even started making the notecards by fusing fabric appliqué motifs to cardstock. I just did that yesterday, so these purses don't have those cards in the pockets, since I had made other cards already. Including a notecard is required for each purse, but some people only make notecards, so then those purse makers who don't like to make the notecards will still have a notecard included.

Anyhow, on to the purses~

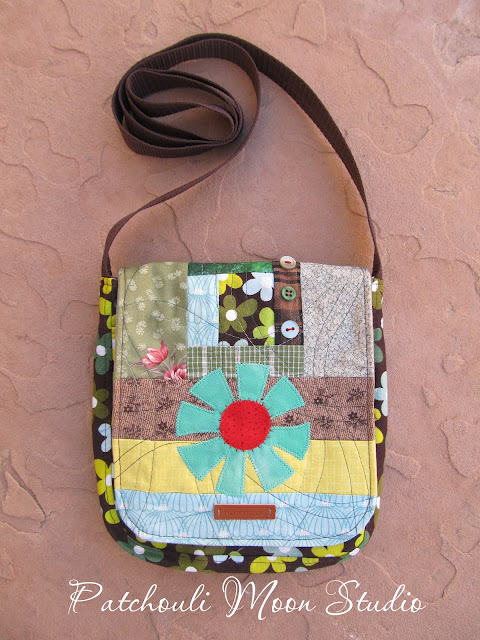
Thanks to Karen for the main exterior fabric. I created the flap using some scraps of the main fabric and other scraps that went with the main fabric. Added a few appliqué flowers and circles and buttons. 

The back of the purse shows the main fabric better.

Thanks to Karen again for the main fabric for this purse. Another scrappy flap with a larger flower appliqué. I sewed the scraps first and then quilted this flap. (Check out my Tip of the Morning Tuesday at the top menu of my blog to see how to make this style flower from a circle).

A better view of this flower fabric. A notecard is peeking above the front pocket.

I did add a back pocket on this purse as I had enough of the main print. 

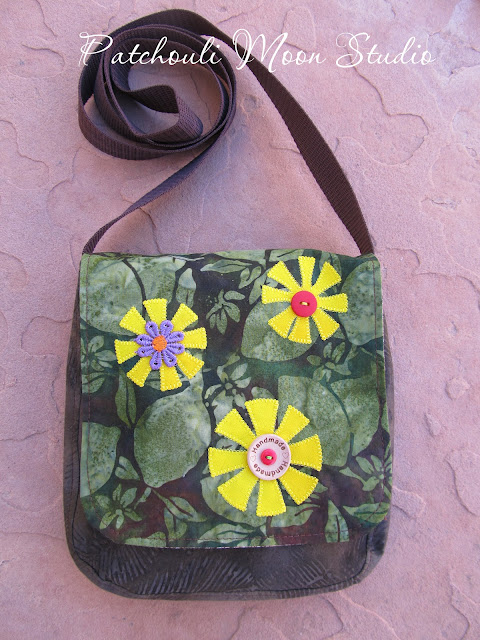
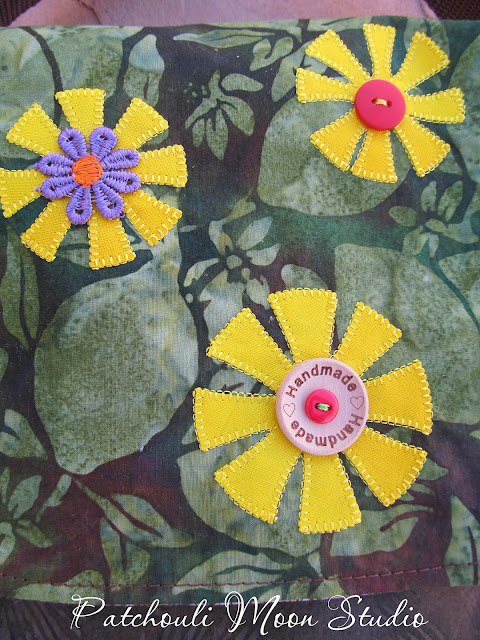
Karen gave me a lot of beautiful batik fabrics and this is one of them. I used this green print to cut out a flap, but it needed a bit of pop, so my circle appliqué flower technique worked great here. Embellished with buttons and an appliqué flower trim piece.


This brown batik print was also from Karen and paired nicely with the lemon or lime batik flap. The shape of that print looks like lemons to me, but they are green like limes, so you decide which citrus they are, lol!

An added back pocket on this one too.

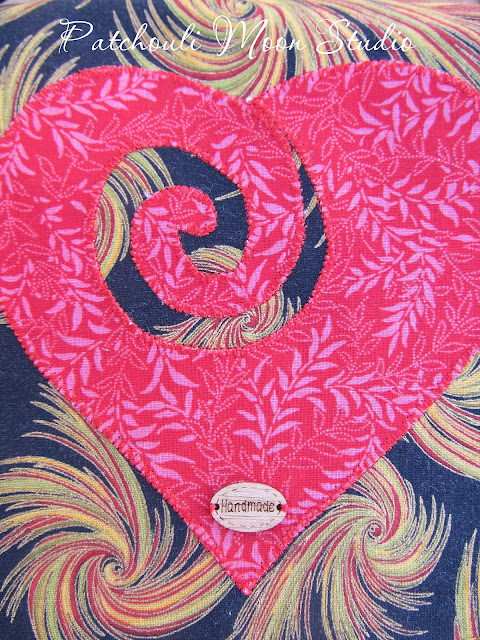
Another exterior print from Karen. She gave me quite a bit of this print, so I will be making more purses with it. I just had to add something to the flap and I had this appliqué heart already cut out in my cut appliqué box so I added it to the flap. I think it was just what it needed. 


Kind of reminds me of fireworks.

A back pocket too. Oh and that strap I had made already, so I used it on this purse.

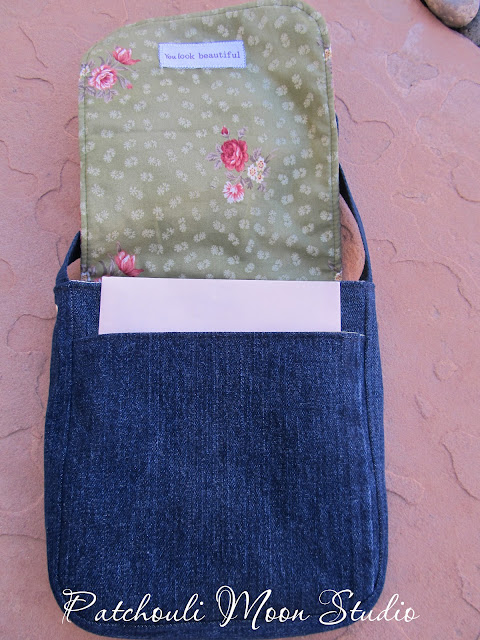
Upcycling denim jeans for the body of the purse, so I added some denim scraps to create the flap. Then a large flower appliqué was just the ticket.


.
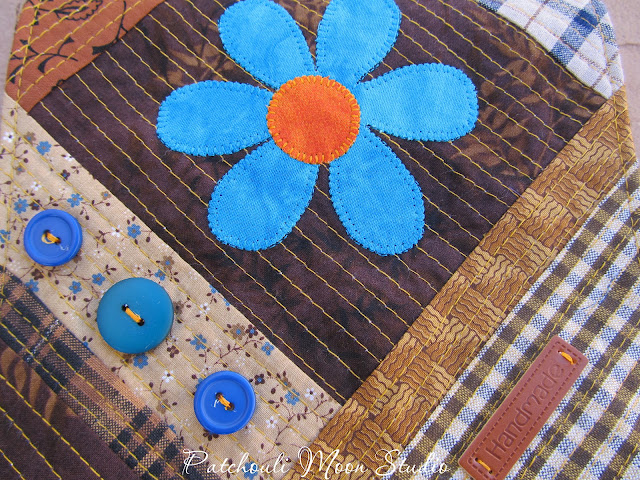
I really love how this QAYG flap turned out. Mostly brown scraps
 to go with the brown print exterior and brown webbing strap, so it needed a bit of a punch and that flower color was the pop it needed, along with a few blue buttons.


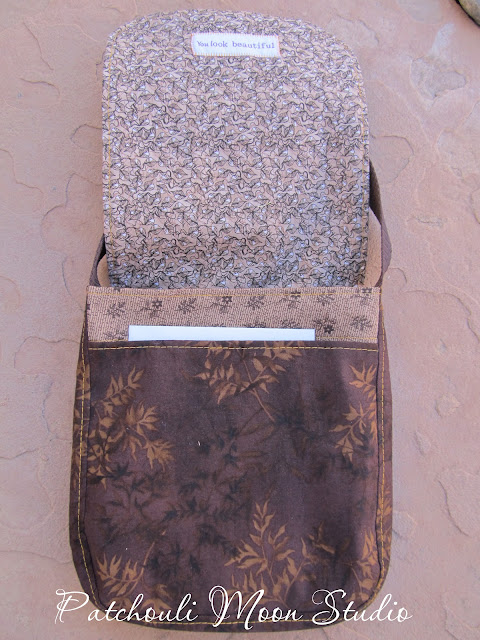
Back of purse, but no pocket. Not enough of this brown print left.

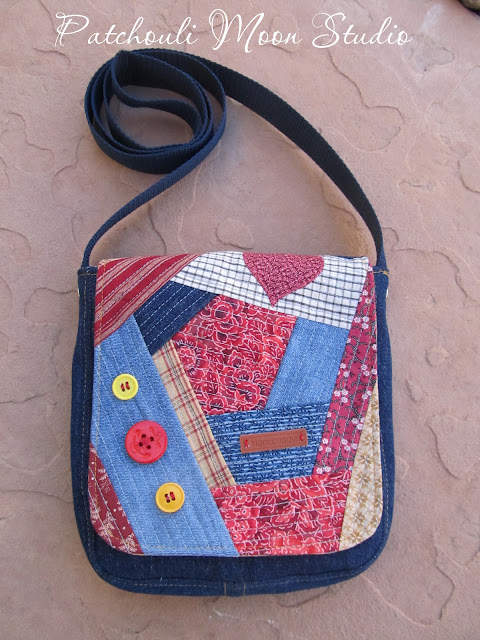
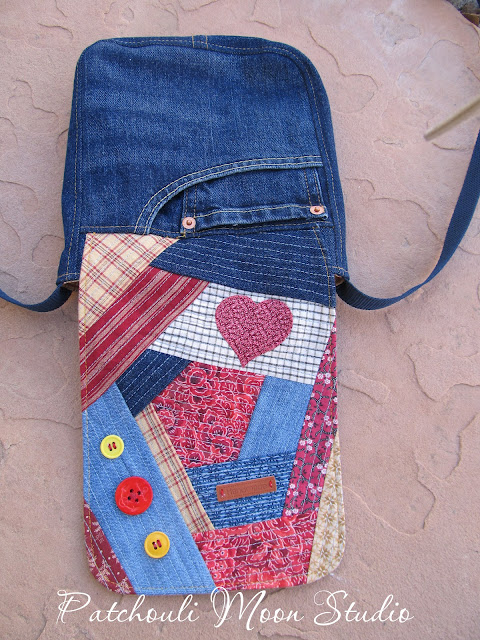
Upcycled denim again, so this flap I used 2 shades of denim scraps in it, along with red and gold fabrics.

I even used gold thread for the topstitching to match the original gold thread jean stitching.

The fun pocket on the back of this one is the front pocket from the jeans. The back pockets unfortunately are larger than the size I need to cut for the back of the purse, so the front pocket works here! This is the 3rd purse I made like this. 

I did add a heart appliqué on the flap, but on the first photo of this purse you cannot see the heart, so I wanted to show it here, along with the back pocket.

So there are 7 more purses that will be making their way to Zambia to help out 7 more girls. I really enjoyed making these purses. Maybe you want to try making a purse for yourself or to donate to Sew Powerful too? You might get hooked on making them like I did or maybe just want to make one. Every purse counts and every one helps a girl to stay in school.
Pin It Now!
Related Posts Plugin for WordPress, Blogger...