Saturday, October 30, 2021
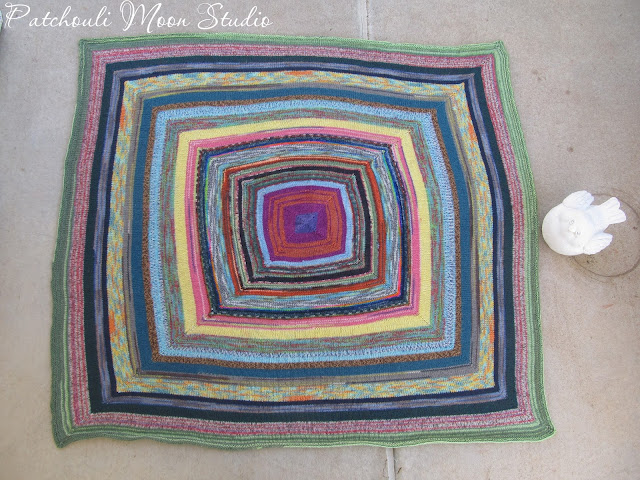
Giant Square Scrap Knit Blanket in Sock Yarn
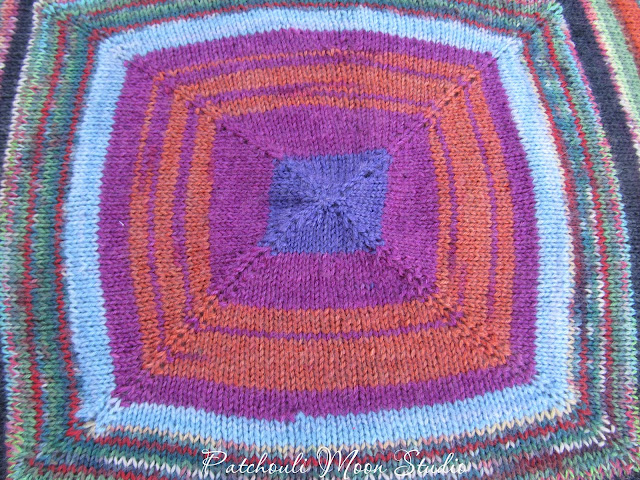
I had lots of leftover bits of sock yarn piling up and so I wanted to knit something to use up all the bits and bobs I had and I found this knit blanket pattern and decided to use up sock yarn by knitting this square mitered blanket.
The blanket is knit in the round starting in the center and continuing outward until you reach the desired size that you want. Increases are made every other round. I didn't have a long enough circular needle, so I knit this on 2 circular needles like I knit socks using 2 circular needles, which make to easy to knit. But by knitting on 2 circular needles it made it impossible to see how this large this blanket was getting. I would measure it from one corner to the center and double the number I got to visualize how large it was getting, but even so I wasn't quite sure when to stop knitting. The larger the blanket got the more yarn I needed. Some of those outer stripes were nearly a full skein of yarn just to knit about an inch of stripe. This was beginning to defeat the purpose of using up smaller bits of sock yarn. So I decided I would end knitting this blanket when it got to about 50" square.
Most of the sock yarn is a self patterning yarn making strips it other patterns as I knit, I also had a few solid colors of yarn. Since sock weight (also call fingering weight) yarn is so fine and narrow, it took me about 4 months just to knit this and I knit it from 2-4 hours each evening while I watched a movie or show on Netflix or Amazon. I might make another blanket like this in the future, but I will use my worsted weight or heavier yarns to knit it so it knits up quicker is thicker and warmer. While I love the drape the sock yarn has, it's not as warm as a thicker yarn would be.
This blanket is called, Giant Square Scrap Blanket, by Laura Peters. It is a free pattern on Ravelry.
Sunday, October 24, 2021
The Mini McFly Backpack
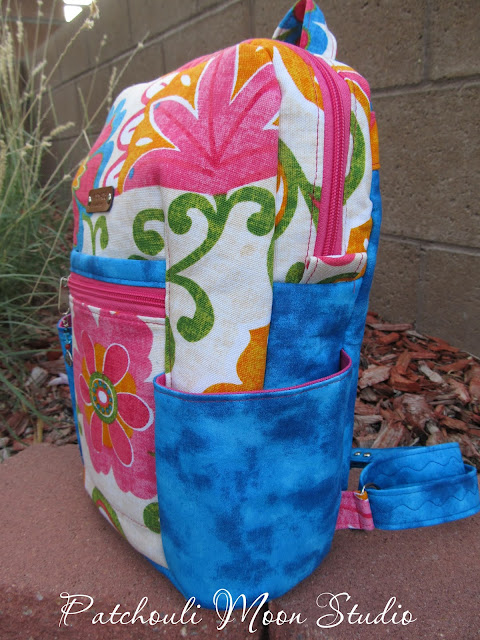
I tested this Mini McFly backpack recently from All Sew Petite. For a limited time the pdf pattern for the McFly Backpack is on sale for £8.00 £6.40 (or about $8.80 in USD).
The measurements of the Mini McFly backpack: 25 cm / 31 cm / 13 cm (10” / 12 1/4” / 5”)
(The regular McFly backpack measurements: 31 cm / 36 cm / 15 cm (12 1/4” / 14” / 6”)
The pdf come with a regular size backpack and the mini size that I made too. The mini is the perfect size to carry for running about town, or on short hikes where you only need to carry a few items with you. The mini is still quite roomy inside and sports 2 exterior side pockets, a front zipper pocket and an interior zipper pocket with a divided slip pocket, making 2 slip pockets inside too. (I also added an extra front slip pocket to my bag behind the zipper, but that is not in the instructions). There is a hanging loop and 2 adjustable straps, and of course a zipper closure to close the main compartment.
The bag is sewn in an ingenious way and there are no binding of any seams! I loved this so much, I am keeping this bag for myself!
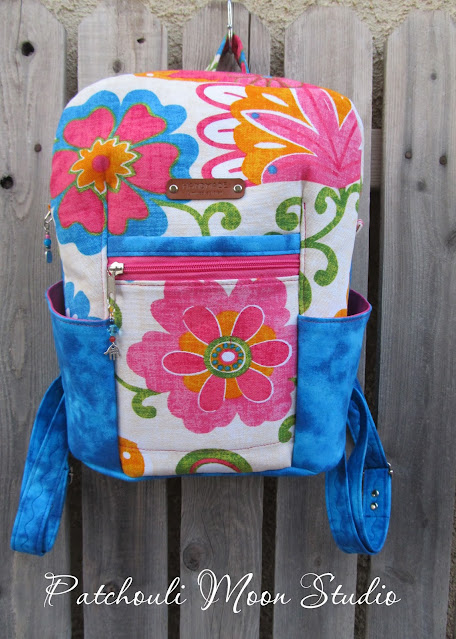 |
| I chose a large floral cotton canvas material for the main exterior fabric and a blue |
 |
| I made a zipper pull with beads and a charm in the shape of a hand that has handmade stamped onto it. |
 |
| Side view showing more of the side pocket and the main zipper, also with a beaded zipper pull. |
 |
| The main zipper is unzipped showing the inside of the bag here. I used a fuchsia color water proof canvas for the lining with the blue accent on the slip pocket and around the zipper. |
 |
| A closer look at the slip and zipper pocket inside. |
 |
| A label I added inside across from the pockets. |
 |
| The back side of the bacpack |
 |
| The backpack has an oval bottom, so it sits nicely. I didn't add purse feet to this bag, but you could. |
If you want to make your own McFly Backpack or Mini Backpack, then buy your pdf pattern now while it's on sale. No code is needed to get the sale price, but time is limited for the sale. Go here to purchase pdf. Oh and there is a video in several parts showing you how to make this for the visual learners. So join Monika's YouTube channel.
Testers McFly makes HERE
If you would like me to make you a backpack, contact me and we can discuss it.
Monday, October 18, 2021
Spider Web Table Topper~ Ghastly Ghouls Blog Hop
Thanks Carol of Just Let Me Quilt for hosting this blog hop. As we all know Carol loves Halloween!
Pin It Now!
I have wanted to make a spider web table topper for a long time and decided this was a good time to get it done for this blog hop. I used scraps in purple, yellow, orange, lime and black to create the blocks. The hardest part was trying to square up those quarter square wedges after the scraps were sewn on the muslin base. My spider web is definitely NOT perfect, but then real spider webs in general are not perfect either (see last photo in this post), but both a real spider web and this topper get the job done.
 |
| I did make my son a lap quilt in a spider web about 20 years ago and don't recall that it was as difficult as this one was to square up those triangles. Still I love the overall look of this topper. |
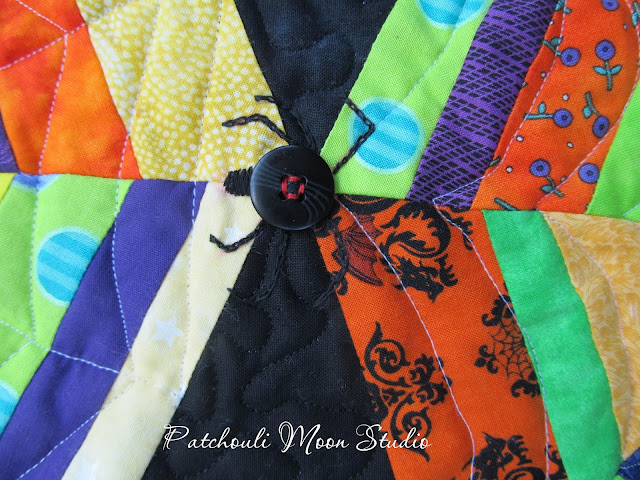 |
| I had to add a spider, so I used a button, added some red thread on top and embroidered some legs and a head. |
 |
| The backing fabric is lots of tiny pumpkins. |
 |
| As you can see this real spider web is not perfect, (neither is my spider web quilt), but it looks great and gets the job done for the spider. |
Be sure to visit all the other bloggers to get some ghoulish ideas!
Labels:
scrappy quilt,
spider web quilt
Sunday, October 17, 2021
Another Blog Hop Starts Monday October 18th: Ghastly Ghouls
The Ghastly Ghouls Blog Hop starts Monday October 18th. Be sure and come back and hop along each day as the participants share their
Creepy,
eerie, spooky, wicked,
bizarre, Ghostly, Ghastly,
Mysterious Projects with us.
You might just find some of the following on this hop:
Haunted Houses, spiders,
Ghouls, witches, ghosts, Jack O’
Lanterns, coffins, graveyards,
black cats, Full moon, bats
broomsticks, & Ravens.
Don't be frightened, just be inspired by all that you see.
Carol is hosting this blog hop (of course) and is the Queen of Halloween (or the witch of Halloween? LOL!!!)
Here is the schedule~
See you soon….if you dare!!!
Sunday, October 10, 2021
Sew Powerful Purses #88-93 (for 2021)
6 more completed purses for the Sew Powerful Purse Project. Again, the flaps on these were quilt blocks that I added strips to in order to make them large enough to cut out the flap shape. I added some buttons for embellishments on all of them too.
Once I get through all of the purse kits, I will cut out only a few at a time to sew. I also want to try the other bag style with the gusset, but still use the beginner flap because I can be more creative with the plainer flap. Then I can compare which I prefer to make. While the boxed corners are easy to sew, the gusset can allow me other design possibilities like sewing a decorative stitch along the gusset, or make a scrappy gusset, match or contrast the gusset fabric. Once I make a gusseted purse, I can see if I have a preference or if I just want to sew a few in each style. It might depend on the fabric amount I have to cut out as to which style I choose?

Pin It Now!
Thursday, October 7, 2021
Sew Powerful Purses #84-87 (total made by me for 2021)
4 more purses made for the Sew Powerful Purse Project. I think I will reach at least 100 purses made this year. I mailed 30 purses a few weeks ago, but I am not sure how many I will have to mail before the year's end? They want them by November 1st, but I don't think I will have another 30 made by then, so they may get mailed before the end of December? Or early next year? I'll just have to see how much time I have to spend on making them right now. The plus is I have kits made, lots of kits, so I won't have to spend any time cutting out. I can easily sew 3 purses in a day if I don't have anything else to sew. But there seems to always be something else to sew. The thing is the need is always there and there will be purses made each year no matter how many get made, so I feel good making so many purses and using up my scraps, quilt blocks, fabric, buttons, etc., as my fabrics are being put to use for a good cause and I also get to be creative at the same time.
 |
| This was a little quilt block I made from Pat Sloan's |
 |
| Hopefully a girl who enjoys sewing will choose this purse. |
 |
| This a lightweight denim material with silver glitter dots embedded into the fabric. |
 |
| All four purses together. |
Off to finish sewing some more purses.
Labels:
cross body bag,
Sew Powerful Purse Project
Wednesday, October 6, 2021
Tea Time Mug Rug (Crafter's Edge Sale too)
I made this mug rug using the Tea Time die cuts from Crafter's Edge. I included this mug rug in a custom order for a water bottle sling (that I posted yesterday). Kindness a word in her user name so I added the words, "Pour a Cup of Kindness" to the mug rug. Found out after she received this that she loves tea and collects teapots. Was it just dumb luck on my part for serendipity?
 |
| This is the fabric I used on the back of the mug rug. |
 |
| This mug rug traveled to it's new home in Texas from New Mexico. |
Subscribe to:
Posts (Atom)


