Showing posts with label Crossover II die cut machine by Crafter's Edge. Show all posts

Friday, December 29, 2023

Quilted Table Topper made from Crumb Piecing & Equilateral Triangles

A while ago I had so many scraps that I decided to grab some pink fabric scraps and sew the scraps together free form style, which some call crumb piecing. I had several blocks made in various sizes and no real plan for what I would make from them.

I decided to try cutting out the largest equilateral triangle on the Crossover II Die Cut Machine, and it cut so nicely, that I cut out 5 more. I pieced them together to form a hexagon shape. Quilted it and sewed on the binding. It needed a little something else and so I sewed on a stacked button in the center. I like the scrappy look.

This little topper measures 12 3/8", measuring from the straight top to the straight bottom and 14" measuring from the pointed tip on one side to the other pointed tip on the other side.


Pin It Now!

Tuesday, November 1, 2022

Chevron Quilt in Scrappy Greens with Flannel Bear Appliqué

Hello Scrappy Quilt Lovers! I made this quilt by first digging through my green scraps, Next I pressed the scraps and got out my Crossover II Die Cut Machine by Crafter's Edge and cut 1/2 Square Triangles. I arranged the triangles to be sewn in a light & dark Chevron pattern. I quilted it down the center of each triangle, so the backing looks like a zigzag (but forgot to photograph that). 

While I liked the all green quilt, it needed something else, so I cut out a bear with a scarf all in flannel fabric and appliquéd the bear onto the quilt. This quilt will be donated to Project Linus this month.


I did add button eyes to the bear, so this will be given to a child over the age of 3 years, since under 3 years old the buttons could be a chocking hazard. I did stitch the buttons on well and even added glue over the thread to be more secure.

This is my November project for Crafter's Edge.


Pin It Now!

Sunday, October 16, 2022

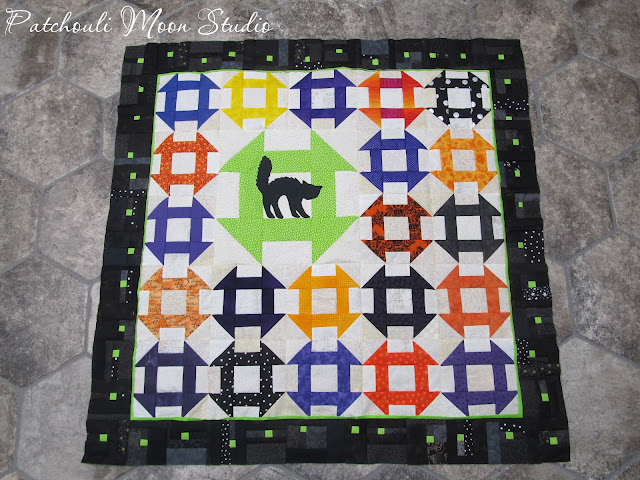
Scaredy Cat Churn Dash Quilt

Hello my pretties and to all of you cat lovers, Halloween aficionados, scrappy quilt appreciators and Churn Dash quilt block admirers. Welcome to the GG&G Blog Hop (aka Gremlins, Goblins & Ghouls Oh My), hosted by Joan of Moosestash Quilting. Thanks for hosting Joan!


I didn't get too mysterious or creepy or spooky, but I did use a scaredy cat and Halloween colors.

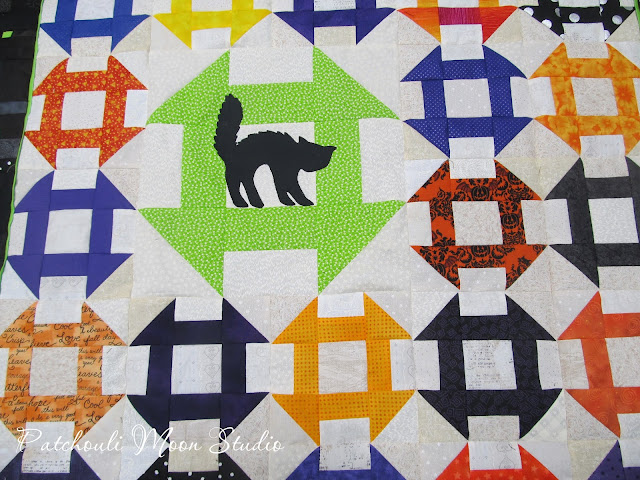
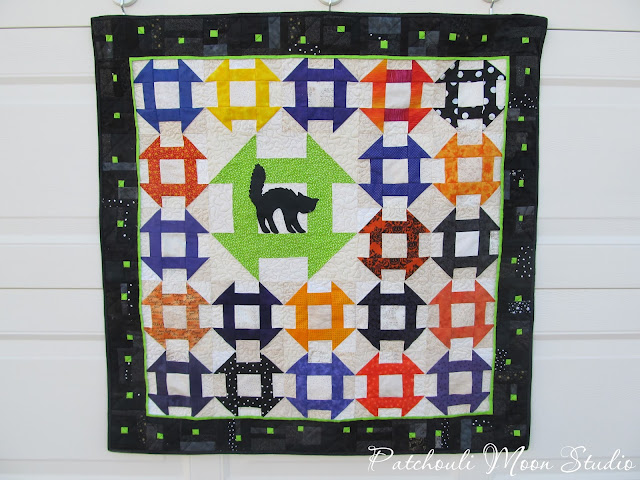
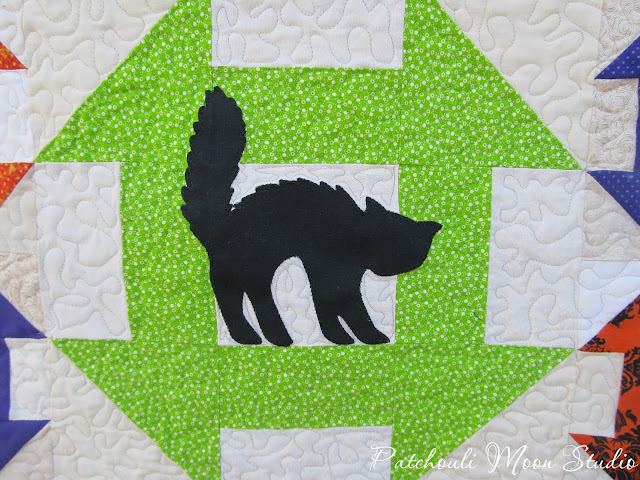
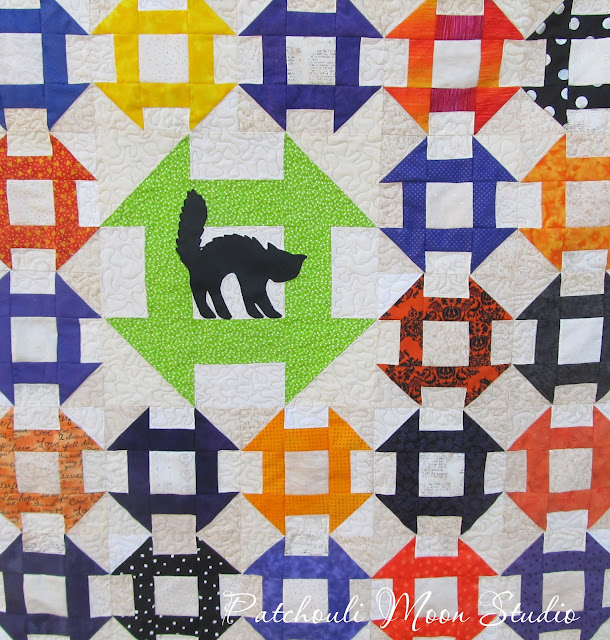
I created this quilt using Crafter's Edge die cuts of squares, rectangles, and half square triangles. Then I added the appliqué black cat in the center of the large Churn Dash Block. I added a folded inner narrow border of green and then the outer border I created by sewing scrappy black pieces around a 1" green square until I got the size block I wanted for the border.

Here is my Scaredy Cat Churn Dash Quilt~

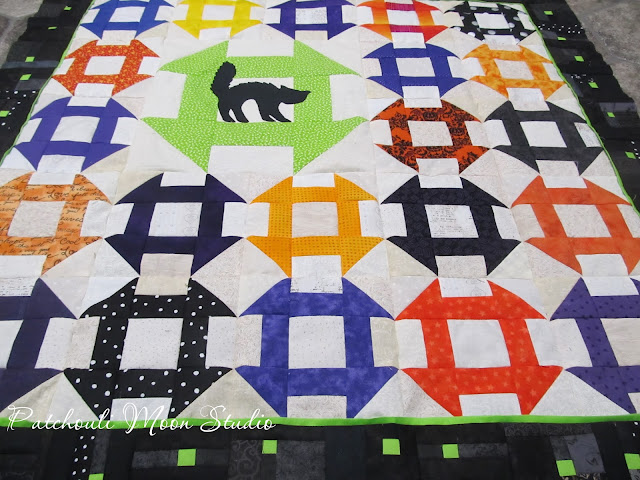
This is just the top I laid out on my floor.


Here is the quilted and finished quilt with black binding. 
This quilt measures 35 3/4" wide x 36" high. The Churn Dash blocks are 6" square, with the large Churn Dash measuring 12" square. The cat is 5 1/2" x 5 1/2" at it's widest and tallest parts.


I actually made this quilt last year and never posted about it, so this blog hop was the purrfect (I couldn't resist) time to get this quilt posted on the blog and participate in the hop too at the same time. I used Crafter's Edge 1/2 Square Triangle Die Cuts, Square Die Cuts and Rectangle Die Cuts to create this quilt.

Here is the full schedule of GG&G Participants:
Pin It Now!

Monday, August 8, 2022

Flying High in the Sky in a Hot Air Balloon; Flag Pennant That Is

Hello hot air balloon aficionados, I am here to share my latest project using Crafter's Edge die cuts and the Crossover II die cut machine, also by Crafter's Edge. I used the Flag Pennant die cuts, the Letter die cuts, the Nested Clouds die cuts and then added 3 appliqué hot air balloons. With the annual International Balloon Fiesta in Albuquerque, New Mexico starting the first Saturday in October (and lasting 9 days), I wanted to create something for the occasion. 

What word(s) should I use? Well I wasn't sure and just thought, "Flying High" seemed suitable. Well that meant 13 pennant pieces and 10 letters, which when completed stretched out quite a ways and I didn't know how I was going to photograph this. So I have a couple of magnetic hooks and I just put them on the garage door and hooked the pennant to that. I stood back quite far in order to get the entire pennant in the photo. Then I took closer shots of the letters and hot air balloons.

The Flying High Flag Pennant with hot air balloons.

Closer look at a part of the flag pennant.

I used cotton fabric for the inside smaller flag pennant, the letters and the hot air balloons and clouds, and the pale yellow larger flag pennant is felt. I also backed each flag pennant with another piece of felt.

I love how using a couple of the Nested Cloud die cuts added to the hot air balloon
 look.


Thanks to the die cuts I used from Crafter's Edge, the cutting was a breeze. Get it? Flying high, breeze? LOL!!! Okay I am being a bit punchy this morning.
Pin It Now!

Wednesday, July 20, 2022

Life's a Kick on Route 66: Panel Quilt

Hello lovely people. Have you ever gotten your kicks on Route 66? Well I must say I got a kick out of making this panel quilt and giving it a fun punch by adding the 8 state names (that Route 66 passes through) all around the panel using the Crafter's Edge Alphabet die cuts not only made the cutting of the letters fast and easy, but they look fabulous too! 

My good friend bought 2 of these Life's a Kick on Route 66 fabric panels; one for each of us. She wanted me to come up and idea of what to do around the panel. The panel sat marinating in my mind for about 9 months! I had some ideas, like make a Twister border or partial border around the panel, but nothing really sounded that great or looked good in my mind. 

Meanwhile, I applied again to be on the Crafter's Edge Design team and got accepted again, yay! So I knew I wanted Alphabet die cuts in order to create this panel using the 8 states along Route 66. I didn't plan all the math, just figured the names would fit. Well, when laying out the state names around the panel onto the black border, no matter how I configured the names they wouldn't all fit! So that's when I decided to make 2 of the states in smaller sizes. It worked! So 6 state names were made with Crafter's Edge Alphabet die cuts, and 2 were not. It adds more interest to the quilt, right? LOL!

I was born in one of these states, grew up in another of these states and have lived in New Mexico for almost 1/4 of a century! Yikes that sounds longer than saying 2 1/2 decades.

My Life's a Kick on Route 66 panel quilt with the 8 states that are along Route 66.

Had to use smaller alphabet letters to fit the big state of Texas onto the border of the quilt. 


The Land of Enchantment is home to me and the place I have lived longer than anywhere else in my life (and I moved a lot).


After living in The Beaver State (Oregon) for a few years when we moved from MO, I grew up in The Sunshine State (California). Didn't leave CA until I was in my early 20's.

I was born in the Show Me state, but moved when I was a toddler so I don't remember anything.

The Crossover II Fabric & Paper Cutting System.

I used the various die cut letters that I needed to create this quilt, from letter A to...

...to letter Z.

Thanks Crafter's Edge for making it so much easier and faster to cut out all those letters! I still have the letters for Texas and Illinois cut out of the larger Crafter's Edge Alphabet die cuts, so I might be using those letters for another project one day.

Now as for my friend, I showed her this finished quilt and she loved it, but I have no idea if she will want to do the same thing around her quilt panel or not? I guess I will wait and see what she decides to do. Tara, if you want the bigger letters I already cut out of the states of Texas and Illinois, I can give those to you if you want them. Let me know.

Happy die cutting, sewing, appliqué and quilting!
Pin It Now!

Monday, May 23, 2022

3 Fabric Postcards

Hello my postcard loving friends. I created 3 fabric postcards using the Crossover II Die Cutting machine from Crafter's Edge and the Tea Time Set die cut and the 0.5" Increment Circle set die cut.


I used some scrappy pieced neutral colored backgrounds for all 3 postcards and then fused the appliqué pieces on top. Satin stitched the edges all around the postcards in white thread. All 3 postcards measure 5" x 7". I usually make 4" x 6" postcards, but I like this slightly larger size. They would be suitable to frame in a standard 5 x 7 frame or a mat with an opening size that's 5 x 7 with a larger frame.

A single teacup and saucer.

I stacked 2 teacups here.

Appliqué circles.

I stamped all the backs of the postcards like this.

These were a fun little project made faster by using the die cuts. I like to have a few postcards on hand to send out for birthdays and other occasions. 


Pin It Now!

Friday, April 22, 2022

Gingham Tea & Friends: Tea Cozy Shaped Wall Quilt

It's Gingham week over on the Therm-O-web blog. So I created this tea cozy shaped wall quilt using Crafter's Edge Tea Time die cuts and 1/2 Square Triangle die cut too; along with HeatnBond® Lite for fusing the appliqué pieces and StitchnSew High Loft sew-in fleece (which now comes 60" wide by the yard). 


Products I used to create this wall hanging. I love that cute turquoise Oliso Iron to help me fuse the appliqué shapes in place.


Be sure and check out my tutorial over on the Therm-o-web Blog.


Pin It Now!
Related Posts Plugin for WordPress, Blogger...