Thursday, February 28, 2013

Savannah Bag

 Christine of Chris W. Designs designs and sells pdf bag patterns online. (She also has a free pdf bag called the Coco Bag. If you download that bag, you will see how well she writes instructions). Chris also has a blog. The Savannah Bag is one of her designs. It's a large messenger style lap top bag with lots and lots of pockets! I told Christine I would blog about this bag after I made it, so here it is. This bag took me 5 days to make, including the time to choose fabrics and cut them out. I chose 2 large upholstery fabric samples that I had and then chose cotton fabrics that coordinated well with the colors in the upholstery fabric. I am very happy with the results, not only how this bag looks, but it does indeed hold my computer and other items too.

Christine's excellent instructions have lots of photos for visual sewers and well written text too. There were a lot of steps to making this bag, so it's not one you can whip together in a day and it's not for beginners either. It seems way too hard if you look at all the steps, but as long as you take each step one-at-a-time, it goes together really well. Of course I did make a goof because I'm a dumb s--t! silly person who didn't read the directions properly in one place. But even so, it worked out and you'd never know unless I tell you where to look, which I will as you look through the photos below.
The front of the Savannah Bag. I loved that swirl design of the upholstery fabric, so chose to  make it a focal point on the flap of the bag.
Pockets galore. There is the pen/pencil pocket as you can see. The turquoise fabric is 3 pockets. Okay now here is where I fess up to my dumb mistake. There is a zippered pocket that is supposed to show above the upholstery pocket. It's there, but you cannot see it, because I read the directions wrong and measured from a different place. The back of the bag also has a zippered pocket made the same way and of course I measured it the same as this pocket so it's a bit lower as well. At least I was consistent with my mistake. So I could have had 3 more pockets if I had sewn the zipper correctly because I would have sewn from the turquoise fabric up to the burgundy fabric. But I knew I couldn't do that, so I ended up with a large pocket in front of the zippered pocket. That's okay because I like the large pocket and in fact Chris even mentions that you can make one large pocket by not sewing or make 2 or 3 pockets by sewing to create the pockets. So whew, no need to rip out and start all over!
Inside view of my lap top and the cord to plug it in. It fits nicely in place.
Can see those pockets on the gusset too? I Love those. I keep my reading glasses in one of the gusset pockets.
Another inside view. There is another zippered divider pocket.
The back of the bag. This is where my zipper was positioned a bit lower than the instructions because of my mistake. But on the back of the bag it didn't really matter that much and I like it there. I made a zipper pull for the zipper using some glass beads and a Saguaro cactus charm. 
I really love the strap on the flap with the hook closure. It looks great and stays closed so nicely, keeping the contents of the bag secure. The carrying strap is just the right width and feels good on my shoulder. Plus, I like the adjustable strap when I want to wear the bag across my body, I can make the strap longer to fit me.
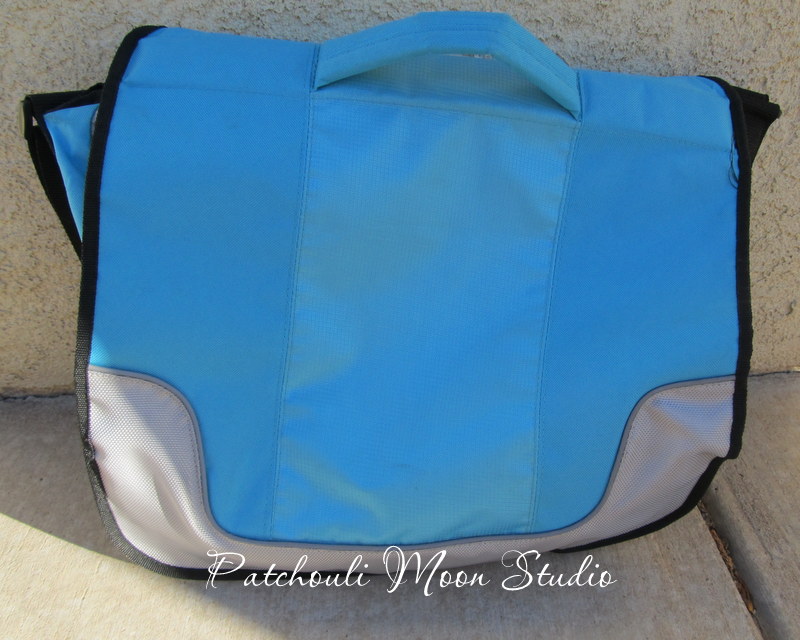
Okay so I have to show you what lap top bag I had been using before I made my lovely pretty Savannah bag.  This bag here is not so pretty.
There are lots of pockets in this bag too, which I like. And it holds my lap top just fine. But see those 2 large Velcro pieces? Well they are supposed to keep this bag closed. They stick when the bag is sitting there, but the minute you pick it up the Velcro pulls away and the flap is not attached anymore. I never liked that about this bag. 
You can see there are plenty of pockets.
Back of the bag has a pocket that Velcro closes too. While this pocket stays closed, I much prefer my new Savannah bag with the zippered pocket. This old bag has a padded strap, but it's not very comfortable wearing it. I think it's too wide.
I will give this old bag to my daughter if she wants/needs a place to keep her lap top as she never takes it outside her home.
I really love my new Savannah Bag so much more! Thanks for designing the fabulous Savannah Bag Christine!
ChrisW Designs
Pin It Now!

Monday, February 25, 2013

Knit Socks

I knit these socks with a self-stripe yarn. I knit a lace rib knit on the leg and the top of the sock.  The yarn was from Knit Picks.

How it looks on my foot.
Pin It Now!

Friday, February 22, 2013

It's All About Me! Blog Hop

It's all about ME! Cause that's the way Me likes it! Lol. (I sound like that commercial for Me TV, lol)

I am so glad Madame Samm asked Amy Bradley to design us a cute little applique for this blog hop. I love applique and have made a few of Amy's patterns too, so I knew I would love making this little quilt. A big thanks to our cheerleader Marlene.

I thought the humor of this little quilt was so cute. The striped fabrics are cut on the bias and the dual meaning made me laugh.
Isn't she cute? Well I am a little biased you know.

I changed the hair a little bit and on the wrist pincushion I sewed silver -colored beads for the pins.

I added button earrings and a flower brooch with a button center.  I added a  little rouge on her cheeks and I changed the mouth a bit too.

I hand blanket stitched the letters and fused them on a bit tipsy.

I hand stitched these letters on by hand with a back stitch.  This fabric looks like barbed wire to me.

Friday, February 22~

Patchouli Moon Studio (that's me...it's all about me, he, he)
  Pin It Now!

Tuesday, February 19, 2013

Stella Pleated Bag

Samantha from At Home With Mrs. H. designed this Stella Pleated Bag and sells it as a pdf download at her Etsy store. It's a medium sized bag, not too large and not too small. You can make this bag with an adjustable strap or a fixed strap like I made. The bag is really great looking and closes with a magnetic snap. Inside there is a zippered pocket and a slip-in pocket. 

I don't know about you, but I am always looking for the perfect bag (for me). I sometimes want and need a medium sized bag like this and sometimes I need to schlep around more things and need a larger bag. Over the years I have wanted and needed different sized bags, like when my children were small or when I am traveling I need to have a larger bag. I still haven't found the perfect bag for all my changing needs, so that's why I like to make and use all kinds and sizes of bags. We all have different tastes in terms of style too. I am more of a hobo style bag person I suppose. I like simple but practical bags that look good and hold what I need. The Stella Pleated bag is a shape that I really like and the medium size does work for me, but there are times when I could use a slightly larger bag too. 

I really love the look of the Stella Pleated Bag. The flap was a perfect place to add an applique or a bit of embroidery.
 The bag in this photo contains my wallet and eyeglass case and coin purse, so you can see it is more rounded with things inside of the bag.
This is a photo of the bag when it is empty.
This is the Stella Pleated Bag shown with the adjustable strap. It's the photo on the cover of the pdf  pattern that Samantha sells.
The felt applique heart with embroidery that I added to the flap.
Inside the bag there are 2 pockets.
What I like about the Stella Pleated Bag~
  • The nice rounded shape of the bag
  • The pleats give a nice look
  • The flap is a nice way to close the bag with a magnetic snap, plus you can jazz it up a little with an applique or embroidery
  • The instructions are written with both cm and inches
  • You can choose an adjustable strap or a fixed one
  • The inside zippered pocket is optional, but it was so easy to make
  • The fleece adds a nice feeling to the bag
There was a part of the bag instructions that was a bit confusing to me, but I think it could have been the wording that threw me or something lost in translation? The difference of American English versus British English can mean different things or be interrupted differently I suppose. I am sure Samantha would help you out if you needed any additional help with making any of her patterns.
Pin It Now!

Monday, February 18, 2013

It's All About Me Blog Hop Schedule~


Tuesday, February 19~


Wednesday, February 20~


Thursday, February 21~


Friday, February 22~


Monday, February 25~


Tuesday, February 26~


Wednesday, February 27~


Thursday, February 28~

Pin It Now!

Thursday, February 14, 2013

Knit Socks for Hubby

I knit these socks for my husband.

This is a twisted rib stitch. I knit these on a size one needle.

I used Lion Brand sock yarn. 
Pin It Now!

Monday, February 11, 2013

Hugs and Kisses Blog Hop~

Thanks Madame Samm and Jane for this blog hop. I love hearts and heart quilts....can't you tell?
"All you need is love....love is all you need..." (Lennon & McCartney)
Applique quilt block. I used machine embroidery stitches on this.

Mug rug I made for a mug rug swap.

This is a potholder and I added a heart to one side.

Pinwheel heart quilt I made.

From the red, white & blue blog hop. A block I made.

Larger purse (I enlarged Madame Samm's coin purse pattern) I made and added the hearts I made out of felt and embellished with sequins and beads.

The other side of the purse with another felt heart.

A little quilt I made several years ago. I made one for each person in a small group that I belonged to. 
Kool-aid dyed batting quilt. I was experimenting with dyeing one day and tried dyeing cotton batting. I got pastel colors. I embroidered by hand and added sequins and beads.
A closer look.
I made this cone hanging from a book by Nancy Halvorsen of Art-to-Heart. All done by hand. I placed some fun little things inside the cone.
Closer look.

These are paper-pieced hearts I made using fabric scraps.
Heart quilt. Mostly made with batik or hand dyed fabrics.
Here's one heart close-up.
I designed an Alphabet Quilt and created a pattern that is sold on Craftsy and here on my blog. I used the same pattern and made this LOVE quilt (as well as the Patchouli Moon Studio quilt I made that hangs in my studio and is also the header name on my blog above)
Close-up of one of the hearts from the corner of the quilt.
Turned it into a neon photo, just for fun.


~Monday February 11th~


Pin It Now!
Related Posts Plugin for WordPress, Blogger...