Sunday, June 27, 2021

Sew Powerful Purses #64 & 65

Here are my latest purses I made for Sew Powerful. There is a story behind the flaps I made for these purses.

Many, many years ago (in a land far, far away...oops, I got getting carried away, sorry), now back to the story. I wanted to make a quilt using Fortune Cookie quotes on them. I was saving those little papers from the fortune cookies that had the fortunes or quotes written on them and my family would also save them for me when they ate at a Chinese Restaurant too. I chose a couple of similar quilt blocks to make and wrote the fortune in the center of the quilt blocks. I used Asian fabrics that I had and white fabric to write the words on. I made at least 15 or more blocks. I wasn't sure what size quilt I was going to make, so I just continued making blocks, each with a different fortune written on them as I didn't want to repeat any of the fortunes.

Well those quilt blocks along with other quilt blocks ended up in the UFO box and I forgot all about them. I really got in to making the purses for the Sew Powerful Purse Project and thought I should use up some miscellaneous quilt blocks that I had in my UFO box, so I went to take a peek and see what I had that was the right size to use (9" or under in size). I found so make blocks of stuff I had started and never finished that I decided I will take all the quilt blocks I found and turn them into the flaps for the purses. That's when I found those Fortune cookie quilt blocks. So I started making those into the purse flaps. I have about 10 I need to cut the fabric out for the rest of the purse pieces and sew them. But I also have been making more purses in the miscellaneous UFO blocks I found too. 

It is a long process because I had over 130 quilt blocks of all kinds that I first made into the flaps and I have been slowly cutting out fabric kits for each purse and then I will be sewing them up here and there. I shared one of the purses with the fortune cookie flap along with a few others I made recently and these are just a couple more I finished.  These purses are ongoing, so there is no deadline for making or sending them, and no specific number that needs to made from each purse maker, so I will always have several in various stages of completion. The finished purses I share here in blog posts as I finish them, and the tab at the top of this blog that says Sew Powerful Purse Project, I share all of the purses I have made to date there (since Dec. 2020, when I first started making the purses).

It feels good knowing these purses will go to such a worthwhile cause and especially to help young women and the older ones too. Plus, I am able to put all those fabric scraps to good use and fabric I want to use up too.

So that is my story behind these former Fortune Cookie quilt blocks and now Fortune Cookie Purse Flaps. Stay tuned to see more purses made with these quilt blocks as I work my way through making them.

2 purses with Fortune Cookie quotes on them.

Close up of purse flap

Close up of purse flap

Flaps up to see the lining and front pocket of purses
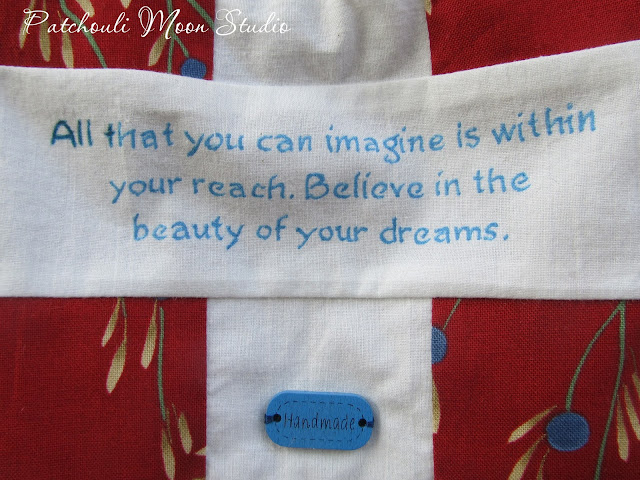
And the "You look beautiful" label on the flap lining.


Pin It Now!

Wednesday, June 23, 2021

Dresden Sunflower Table Runner ( & the Fairy Tales Blog Hop)

I signed up for the Fairy Tales Blog Hop awhile ago, which is hosted by Joan of Moosestash Quilting. Well I had an idea or two, but those just didn't pan out, so I switched gears and this is what I came up with. 


I know you are wondering how does this fit the fairy tale blog theme? Well Joan said it can be YOUR fairy tale, so my fairy tale would include using up all my scraps, down to the itty bittiest scrap, so I created this table runner with all scraps (or nearly all scraps). I certainly didn't use up all of my scraps making this runner, but that is my Fairy Tale to be able to use up all of my scraps some day. Well, you know those dang scraps multiply like rabbits, so it is wishful thinking, but I will still be trying to use up those dang scraps.

As a Crafter's Edge Design Team member, I also used several die cuts to create this runner, which are listed farther down below.

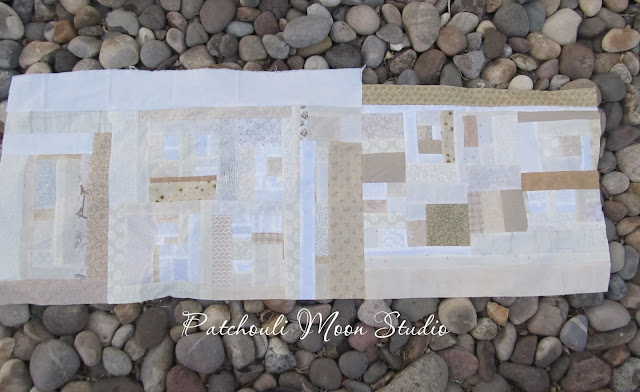
First, just like in Rumpelstiltskin, a maiden spun her hair into gold while I sewed my scraps of white and tans into a background for my table runner.

Scrappy pieced background fabric for table runner in white and off white fabrics
Scraps of all sizes were sewn together free-form or crumb style to create the background to my table runner first.

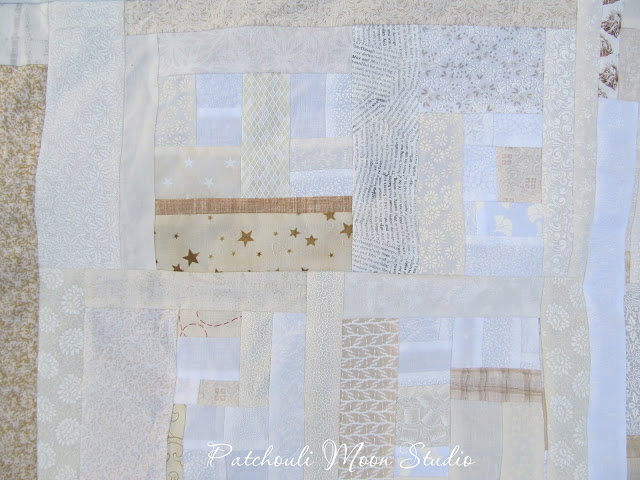
closeup of Scrappy pieced background fabric for table runner in white and off white fabrics
Closer look at one section.

Scrappy pieced background fabric for table runner in white and off white fabrics
Another section up close.

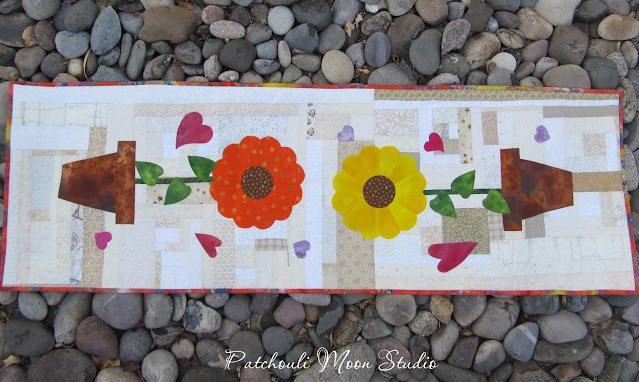
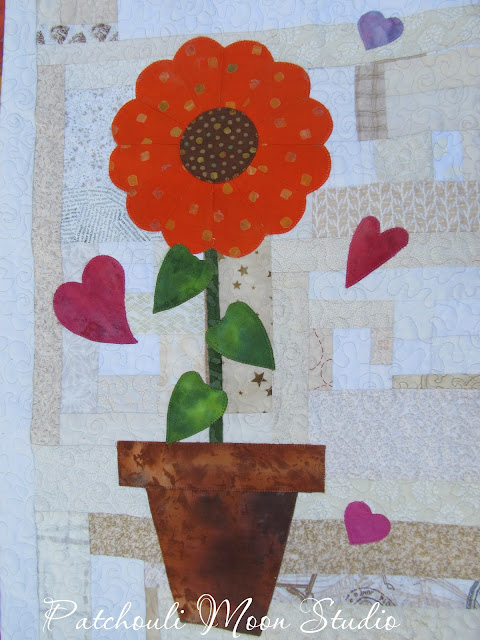
Table Runner Dresden Plate sunflowers in pots on Scrappy background with scattered applique hearts
Here is the finished runner. I don't even have a table to photograph it on because my table is round. :0P

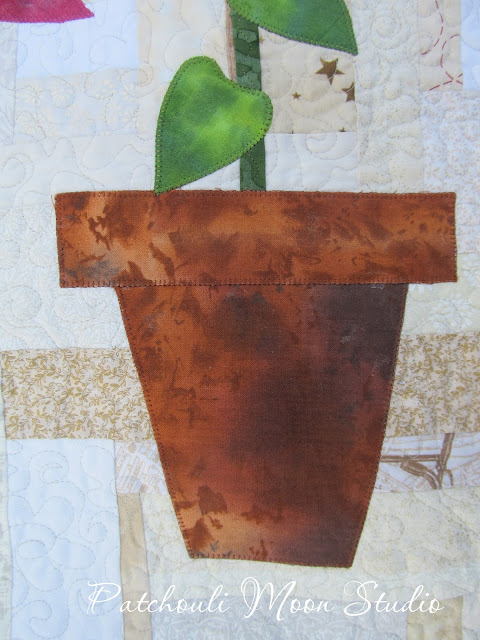
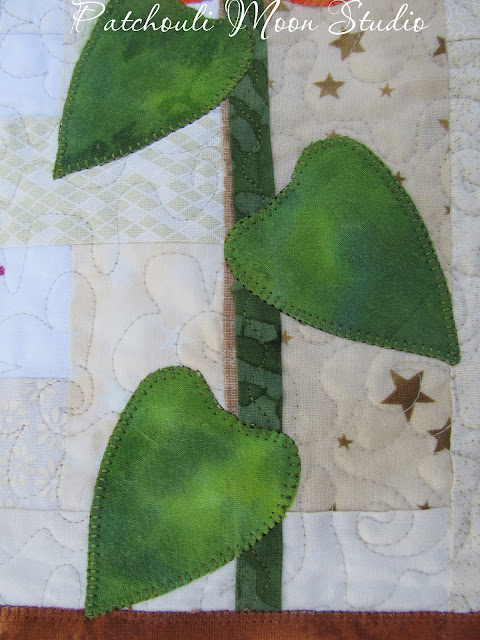
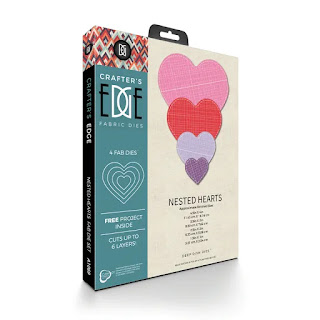
I made 2 Dresden Plates from the Dresden die cut as sunflowers, added a stem from the 1" strip die. I used the Tumbler die for the pot and a 1.5" strip as the rim of the pot. I used the leaf from the Large Flower die set and some Whimsical Hearts from that die set and a small heart from the Nested Hearts too. So that is 6 different die sets that I used all or part of the die cuts from to create this table runner. And all of the batik fabrics that I used came out of my scrap bag! The backing fabric I cut from yardage, but everything else was from my fairy tale scraps, lol!

Table runner closeup of orange Dresden Plate sunflower in pot

Table runner Closeup of yellow Dresden Plate sunflower in pot

Closeup of flower pot for Dresden Sunflower

Closeup of stem and leaves of Dresden Sunflower

Closeup of whimsical applique heart on table runner

closeup of yellow and orange Dresden Plate Sunflowers

The following 6 Crafter's Edge Die Cuts were used in the making of this Dresden Sunflower Table Runner:
1" & 1.5-inch Strip Cutters: 1" strips were used for the stems and folded into the center. 1.5" strips were used for the rim of the pots.

The leaf from this Large Flower die was used for the leaves of the sunflowers.

The Sunflowers were made using the largest of the Rounded Dresden
 plate die set.
I used the Tumbler die cut for the pots.

I used some Whimsical Hearts.

I used the smallest heart from the Nested Hearts.

So there you have it, but wait there's more to see on these other blogs. 5 days of Fairy Tale blog hopping, so hop to it and see what Fairy Tales these other bloggers have to share with you. 


Pin It Now!

Tuesday, June 22, 2021

Fairy Tale Blog Hop this week

I wanted to tell all my followers about the Fairy Tale Blog Hop that started Monday June 21-25. Forgot to tell you yesterday, but don't worry you can hop over to Monday's blogs too. Joan of Moosestash Quilting is the hostess of this blog hop.

So start hopping and see all the great creations these bloggers have made.


See you here on Thursday to show you what I created.

Pin It Now!

Monday, June 21, 2021

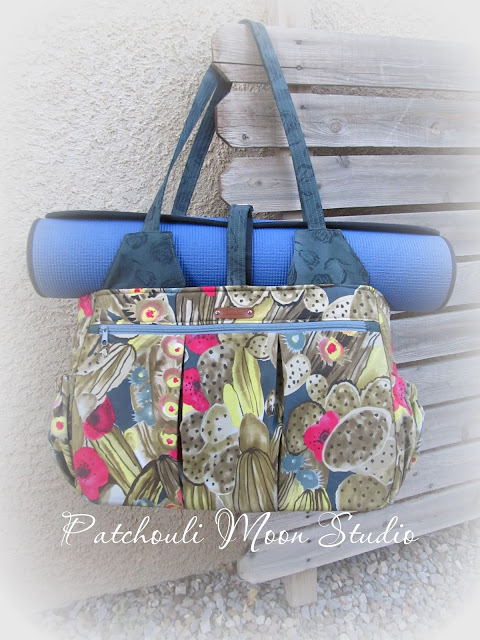
Foxglove Yoga Bag in Cactus Print- a Custom Order

This yoga bag was a custom order that I made recently. I made this style bag not too long ago that my friend purchased from me for her yoga class. A woman in the yoga class kept admiring the bag she told me and so she finally ordered one. 

She chose this cactus print fabric that I had, which is a great choice for a large bag as it really shows off the print well. 

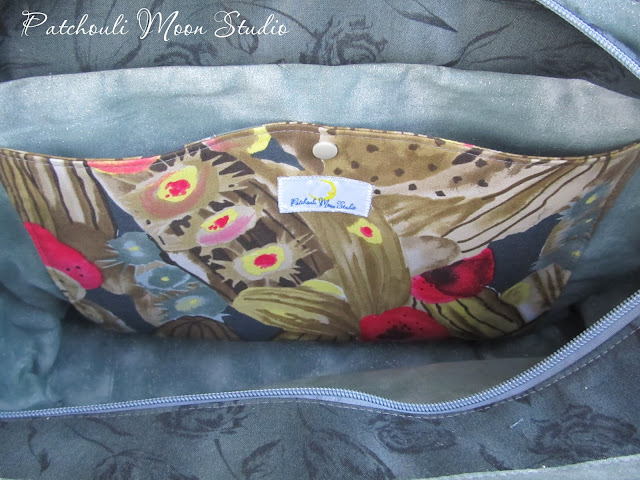
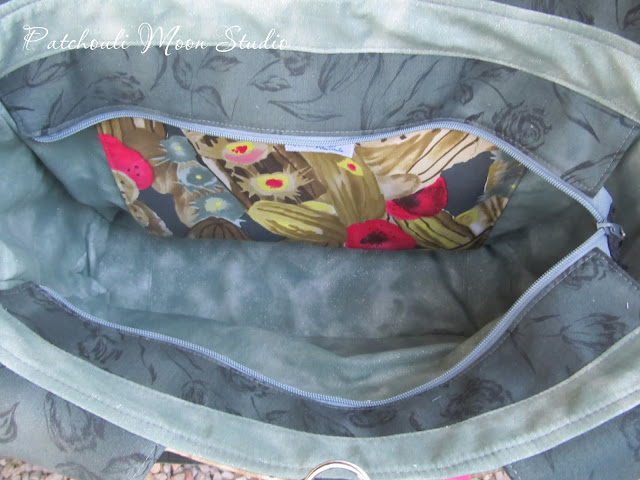
This yoga bag (which can be used for other things too, like a travel bag or diaper bag) has so many great features. The top of the bag has an adjustable strap and hook to hold a yoga/exercise mat or a rolled towel. The front zipper pocket is pleated for holding something like a pair of shoes.  The back of the bag also has pleats, but no pocket. Those pleats help the bag to expand if the bag inside is full of stuff. The sides of the bag each have an elastic pocket which is perfect for a water bottle and a spray bottle. Inside the bag I added a zippered pocket and a large slip pocket that closes with a snap. I added purse feet on the bottom of the bag too. The bag closes with a zipper to keep the contents secure.

This is a beast of a bag! While my sewing machine handled the thick layers without a problem, it was the maneuvering of the bag under the presser foot that was quite the undertaking. 

The bag measures 17.75" W x 12.75" H x 5" D.

Front of yoga bag with yoga mat secured in place with strap
Front zippered pocket can hold a pair of shoes or other large items. The yoga mat secures to the top of the bag with an adjustable strap and hook. Or a towel can be rolled up and held there instead.

Looking down on top of the yoga bag there is a zipper closure.

The front of the yoga bag without the yoga mat attached.

Side view of the yoga bag showing the elastic pockets that hold a water bottle or spray bottle.

Closeup of the front zipper pocket showing the zipper pull with a "handmade" charm dangling.

Inside the front zipper pocket, held open with a pen.
Inside the front zipper pocket, held open with a pen that I include with the bags I make.

Label inside bag that reads, "You look beautiful".
Label I added inside bag that reads, "You look beautiful".

Looking inside the bag at the large slip pocket that closes with a snap.

Matching little wallet that I included with the yoga bag.

Inside view of the little wallet that matching the yoga bag. Business cards were added to the wallet.
Inside view of the little wallet. I added my business cards inside the wallet.

Matching wallet.
Another closer look of the wallet.

Looking inside the yoga bag from the top.

The back side of the yoga bag with the pleats.

Closer look at the side elastic pocket.

Bottom of the yoga bag that is quilted and has purse feet added.
I quilted the bottom through a double layer of heavyweight stabilizer and added purse feet.

The customer was so pleased with this bag and that makes it so worthwhile. Nothing thrills me more than to know I have a happy satisfied customer!

Pin It Now!

Saturday, June 19, 2021

Sew Powerful Purses #59-63

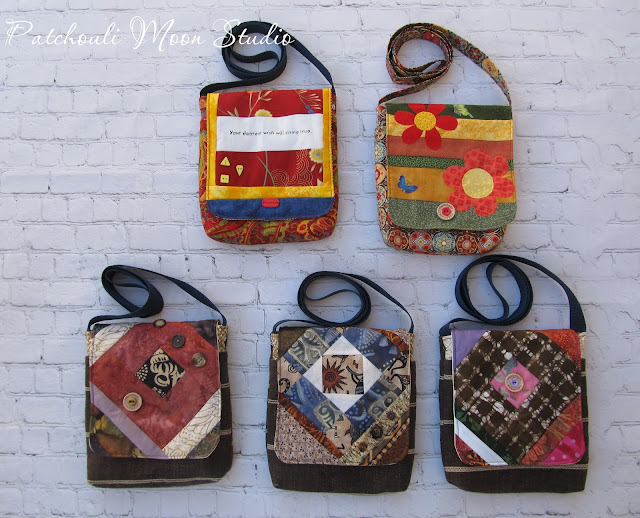
5 more purses made for the Sew Powerful Purse Project.

5 pieced purses and one with applique flowers.
I used up some already made quilt blocks for the flaps of these purses. The purse on the upper left was a quilt block that I had made that I wrote a fortune cookie saying on. I made several quilt blocks with different sayings on them that was intended to be made into a Fortune Cookie Quilt, someday. Well that never happened, so you will be seeing all those blocks slowly become purses through the magic of sewing. In case you cannot read what the fortune says here it is: "Your dearest wish will come true".

Flaps of purses up to see the inside and the "you look beautiful" label
The brown fabric with a stripe were pillows that came with a sofa we had several years ago. Didn't even use the pillows. So I washed the cases and cut our purse pieces with them. I got 6 purses made using the fabric from the pillows. I still have to sew up 3 more of them, so you will see those when they are finished.

Pin It Now!

Thursday, June 17, 2021

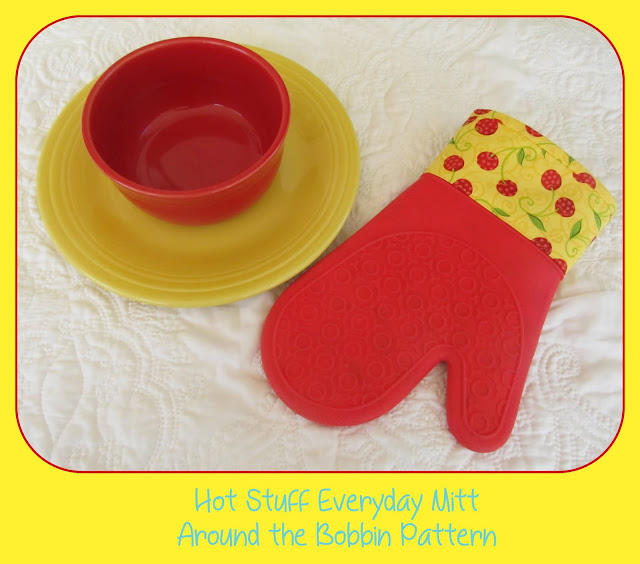
Hot Stuff Everyday Mitt by Around the Bobbin

I tested this Hot Stuff Everyday Mitt from Around the Bobbin. It is not only fun to make, but it looks fabulous! Oh and it is also quite useful as well. The pattern comes with the silicone piece and you can buy silicone refills, if you want to make more. Choose from 3 silicone colors: Red, Green, or Transparent (okay maybe transparent is not a color, but your fabric choice can show through the transparent silicone). 

This mitt is shorter, but with a longer cuff than the Original Hot Stuff Oven Mitt (the original is great for BBQ outdoors on a grill). See the comparison and all the tester version on Around the Bobbin Blog.

Here is mine. I chose red silicone even before I knew which fabric I wanted to use. My kitchenette table has a red top and I have red gingham curtains in the kitchen. (But daughter wanted this mitt, so I guess that just because I had some red touches in my kitchen, it didn't matter, lol).

The inside of the mitt feels so great because it is quilted. Yes you quilt the inside which makes the mitt fit so nice. Be sure and check out the discount code at the end of this post. Limited time for the code.

Red bowl, yellow plate underneath with an oven mitt in red silicone with a fabric cuff of red cherries and yellow background fabric

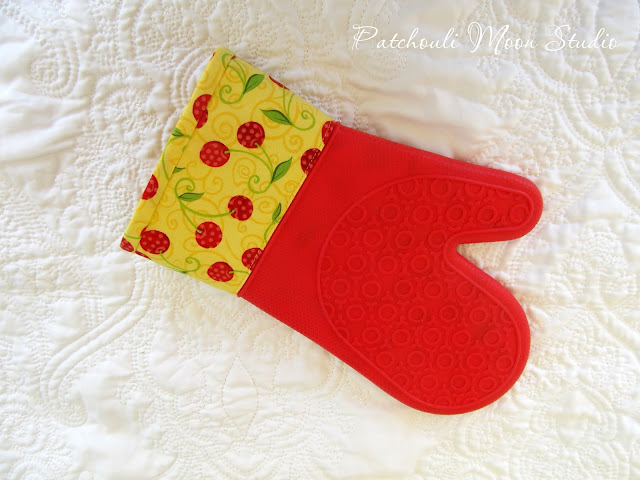
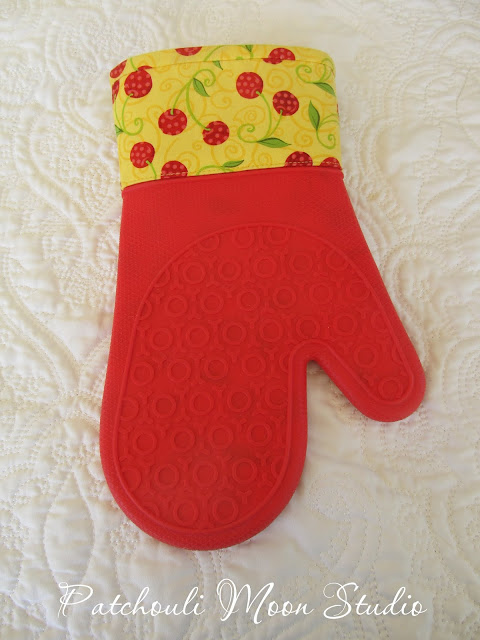
Oven mitt in yellow and red cherry fabric with red silicone.

Oven mitt in yellow and red cherry fabric with red silicone.

Oven mitt in yellow and red cherry fabric with red silicone.

Oven mitt in yellow and red cherry fabric with red silicone.

Oven mitt in yellow and red cherry fabric with red silicone.

Discount code: Use the code Mitt to get 20% off the Hot Stuff Everyday Mitt & Refills too! But hurry discount only good through Saturday, June 19, 2021 noon CDT time.
Pin It Now!
Related Posts Plugin for WordPress, Blogger...