Monday, October 30, 2023

Perfectly Clear Bag

The Perfectly Clear Bag by ChrisW Designs is available now for purchase! There is a full video tutorial too (video link in pdf pattern). 

🧵🪡Introductory Offer – 20% Off - NO CODE NEEDED - One Week only🧵🪡 (Sale Ends Midnight Monday 6th November Australia Eastern Standard Time)
The links are:

Here is my Perfectly Clear Bag that I tested for Christine. It can be made with clear vinyl or a patterned clear vinyl or a combination, or all solid vinyl too. This was my first time using a patterned clear vinyl. I like how many patterns are out there now. Some prints of see-through vinyl are a bit busy and I wanted just a hint of a pattern to make this bag, so I chose this vinyl with a colorful hatch markings on it. Plenty see-through enough.

Bag measures 9 ½” Wide x 7 ½” High x 3” Deep.

Made with clear printed vinyl for the pockets and a solid vinyl for the bottom of the bag.

I used webbing for the handle and added a decorative stitch in a variegated soft pink thread. I like how it looks. There are D-rings I added in case I wanted to add the optional cross body strap later on. But I think I will use this bag for small knitting or sewing projects.

These yarn skeins fit into the front zipper pocket. There is another zip pocket on the back side, so 2 zipper pockets to hold plenty of stuff for a relatively small bag.

Close up of the pattern on the vinyl.

Back of the bag is the same as the front.

This was the first all vinyl bag I have ever made. I have used a clear vinyl window with cotton fabrics for making project bags before, but all vinyl was a first for me and while it wasn't too difficult to sew, I could use with some more practice! The other testers made some absolutely incredible bags with their vinyl choices! They have all sewn with vinyl much more than I have.

This bag can be made with all solid vinyl or cork or leather and not clear vinyl if you want to also. On Christine's blog you can see her solid vinyl bag too. Plus, check out all of the testers bags too. They are really gorgeous!!! 


Pin It Now!

Sunday, October 29, 2023

Star Wars Panel Quilt: Rey & BB-8

This is a fabric panel from the Star Wars movies, featuring Rey & BB-8. I wanted to add a border and quilt it and then donate this to Project Linus. It sat for a long time until I decided what border to make. At first I thought of making wonky stars for the border. I made one wonky star block and didn't like it enough to make more. I think because I used tans, blues and reds in the wonky star and it would have looked too distracting around this panel. I decided to sew free form crumb style blocks using neutral tans, but I added a red center square to each for some interest. I am happy with the outcome of this quilt. 

I like how Rey is a strong female in the movie and I think this will make a great Project Linus donation to a young girl.

The quilt measures 45.5" wide x 52" high.


BB-8.


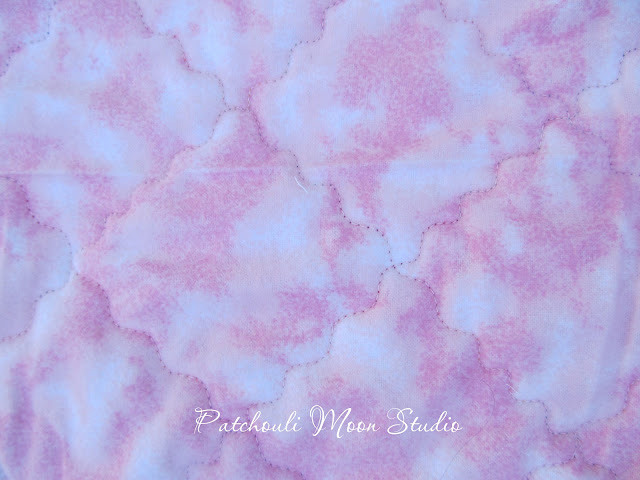
Flannel back showing serpentine quilting
The back of the quilt is mostly flannel (I added strips of the blue binding fabric too as I didn't have enough of the flannel). I quilted it using a serpentine stitch on a diagonal.

Close up of one of the crumb style border blocks
Close up of the crumb style quilt block in the border. It is a great way to use up all sizes of fabric scraps.

May the Force be With You!


Pin It Now!

Friday, October 27, 2023

Scrappy Hexagon Log Cabin Style Quilt for Project Linus

I was playing around with my scraps one day and decided to cut out hexagon centers in orange fabric. Then I sewed log cabin style around the center hexagons using orange, purple and white fabric scraps. I played with the layout and nothing really looked all that exciting to me, so I left it like this and pieced the blocks together and quilted it.

It is a bright and wonky looking quilt for sure. I don't think I will make a scrappy quilt like this again. I had a few more blocks leftover, but not enough to make the quilt larger, so will use those on a purse flap to donate to Sew Powerful one day.

This quilt measures 40" x 50" (suitable size for an elementary aged child).

I didn't bind this quilt, but I sewed it doing the birthing method and then I quilted it using a serpentine stitch on the diagonal.


It's a very wonky looking scrappy quilt. :0) I hope some child will love it to cuddle. Maybe I should have added an appliqué on top, but with the quilt so busy, it wouldn't have shown up very well.


Pin It Now!

Tuesday, October 24, 2023

Bright Colored Patchwork Squares Quilt

Quilt I made for Project Linus a few months back. Used up some colorful squares. I had wanted to make a Twister quilt, but this sat for months as squares, so it became a quilt with squares instead of Twister Pinwheels. Flannel on the back for softness.


I quilted it with variegated thread and the serpentine stitch.


Back of quilt I used flannel, but didn't have enough of this pink flannel, so I used a lavender flannel and white flannel too that I pieced to make larger (see next photo). 

Pieced flannel back of quilt.


Pin It Now!

Saturday, October 21, 2023

Clearance Sale!!!!


SALE!!! All physical items (bags, quilted items, etc.) are on SALE now!!! Up to 60% off!!! Shop now for best selection. Limited to stock on hand. NO CODE required. Payhip Shop 

Think Christmas, Hannukah, Birthdays, Anniversary gifts and more. Grab a great deal now! All sales are final. No returns or refunds.

Everything is handmade by me in my smoke free. pet free & perfume free home. Thank you so much for looking. https://payhip.com/Patchouli


Pin It Now!

Friday, October 20, 2023

Color by Number Quilt (Bargello Style)

I made this quilt from a Sew Can She tutorial, called Color by Number Quilt. It is a bargello style, only done with squares or Trip Around the World style quilt, but in a "V" shape instead of a diamond shape. Easy to make, but you need enough of each color square to make it work. I am pleased how nice this quilt top turned out.

The top measures 54 1/2'' x 63 1/2", which can be difficult for me to quilt, so I gave it to the longarm quilter in my Project Linus (PL) group to quilt it for me. Anything she quilts gets donated to PL. She uses soft Minky fabric for the backing and folds it over for the binding. The Minky was donated to our PL group and she has it at her home. No need for batting as the Minky is thick enough and oh so soft!

I like it hung this way with the "V" pointing down like a "V". But it could be the other way like an "A" without the middle bar.

I chose red, yellow and blue as the primary colors and added one "V" row of aqua.


Here is the finished quilt. She is holding it the opposite way (A) as I had it in the first photo, but it doesn't matter as either direction works. The Minky backing folds over the the front to form a binding. She pieced the backing, using a yellow Minky and an aqua Minky, so it makes the binding 2-colored.

Front view of the flower quilting pattern.

The back of the Minky showing the flower quilting.

This quilt was donated to PL and should be nice and soft and cuddly as the temperatures here get colder.

I might make some more of these, but make smaller tops so that I can quilt them myself. I like to use soft flannel on the back of my quilts. It's a fun way to use up some fabric that has striking results, but that is also easy to make. It sure looks more dramatic than scrappy squares randomly placed.


Pin It Now!

Thursday, October 19, 2023

Ohio Star Quilt & Sawtooth Star Quilt

Years and years ago in a galaxy far, far away, I had belonged to a small group of women quilters who exchanged letters and quilt blocks. Started out as 6 of us and ended up with 9 and today, well I know others have left the group as I had, but not sure how many are left in the group? The idea of the group was we were all members of a larger quilt group and some members had moved away to other states. This was a fun way to connect and write about what was happening in our lives and to share quilt blocks. One person would choose a block for us to all make and tell us what size and colors they wanted and then each time the package would be sent out, we would take blocks from each person and then put in all the blocks we made for the others. Then the next person would have a turn choosing blocks, etc. until we all had chosen a block we wanted. Then it would repeat again with someone choosing a block, etc...

It was fun at first, but as the group grew, the postage costs went up and the wait was longer and longer. I wanted to make my own quilts and not always liked the color choices or pattern that others had chosen to make. After the postage went up to nearly $10 every few months (and this was almost 2 decades ago, so who knows how pricey it is now?), I decided to leave the group. It was crazy how much money was spent on postage alone, and I had to mail the package to the person who lived the farthest away from me, which put the postage up a few dollars higher than the person who was closer to me and her postage cost much less. It would have been even more money to send it priority flat rate. I thought the money I saved from the postage cost would be better spent on buying my own fabric and supplies, so I left the group years ago.

Anyhow, the point to all of this is that these 2 star quilt blocks sat for over 2 decades and was never made into quilt tops, let alone quilts. I wanted to use up my UFO's and got these blocks out to first sew into tops and then I gave it to the woman in my Project Linus group who will quilt them for free as long as I donated them to Project Linus. I had no use for these, and because they are too large for me to quilt without stressing out my shoulders, I gave them to her to quilt. She brought them for show and tell last week.

Project Linus was gifted with a ton of Minky fabric apparently years ago and this is what she uses for the back and fold over binding of the quilt. No batting is needed as it is thick enough and quilting on her longarm machine makes it easy to quilt the Minky. So glad she quilted these and some older children will now get to enjoy the quilts and soft cuddly Minky backing.

So first are the tops I assembled:
Ohio Stars. I played with layouts for a long time so that I could use up all the star blocks that I had. I had 29 blocks (don't know why that number?), so I added that applique stacked star in the bottom right corner to make it an even 30 blocks. I also offset the rows, so I added the colored rectangles. Offsetting helps to add more interest, but also offsets all those seams so they aren't all lined up exactly, which helps have less thickness as well.


Here the quilted quilt. Brown Minky was used the the backing and the folded over binding. She quilted it in a meandering quilt design. She held it up with the rectangle blocks on the sides, as opposed to the top and bottom, but it doesn't matter, as it can go either way.

Closer look at the quilting.

Sawtooth Stars quilt top. I also offset the rows with the rectangles on the sides. I had 30 blocks for this one.

I turned the top on this photo to place the rectangle blocks on the top and bottom. Like the Ohio Star quilt above, to see how it looked this way. It can go either way.


The quilted quilt with the Minky on the back and folded over binding. 

Close up of the quilting.

Both quilts have been donated to Project Linus for 2 children who can cuddle under them as the weather now is getting colder. I am so happy to have these finished and put to good use too!


Pin It Now!
Related Posts Plugin for WordPress, Blogger...