Showing posts with label Clear vinyl zipper bags. Show all posts

Wednesday, August 13, 2025

2 Clear View Project Bags

These 2 bags were a custom order. Karen sent me the fabrics she wanted to use for the bags. I chose the placements of the fabrics. They have clear front windows to see what's inside the bags. I also added a clear window on the front stripe fabric to hold a label of what's inside or her name.  The bags have boxed corners that fold flat when not in use. They hold a lot of stuff too. She was pleased with the bags, which is always so nice to hear.

Both bags. They each have the striped exterior fabric, but the lining fabrics are different. One is colorful wavy stripes on black background and the other has colorful cats on a black background. Karen loves cats. There are carry handles that flopped behind in this photo, but you can see them in the other photos below.

Front of one project bag. 
I added a clear window on the striped fabric she could add a label of what is inside the bag. 
Even though you can see into the clear large window, it isn't always apparent as to what project might be inside or what other items you put into the bag.

back of striped bag
Back side of bag.

I added a clear window on the striped fabric of this bag too. 

Butterfly button closeup
Butterfly button on zipper end tab.

Zipper closure
Zipper closure with handmade charm on pull.

unzipped bag looking inside
Looking down inside one bag.

unzipped bag 2 looking inside
Looking down inside the other bag.

boxed bottom
Boxed bottom expands to hold more stuff.

bag pulled flat
Bag pulled flat for storage.

Pin It Now!

Monday, October 30, 2023

Perfectly Clear Bag

The Perfectly Clear Bag by ChrisW Designs is available now for purchase! There is a full video tutorial too (video link in pdf pattern). 

🧵🪡Introductory Offer – 20% Off - NO CODE NEEDED - One Week only🧵🪡 (Sale Ends Midnight Monday 6th November Australia Eastern Standard Time)
The links are:

Here is my Perfectly Clear Bag that I tested for Christine. It can be made with clear vinyl or a patterned clear vinyl or a combination, or all solid vinyl too. This was my first time using a patterned clear vinyl. I like how many patterns are out there now. Some prints of see-through vinyl are a bit busy and I wanted just a hint of a pattern to make this bag, so I chose this vinyl with a colorful hatch markings on it. Plenty see-through enough.

Bag measures 9 ½” Wide x 7 ½” High x 3” Deep.

Made with clear printed vinyl for the pockets and a solid vinyl for the bottom of the bag.

I used webbing for the handle and added a decorative stitch in a variegated soft pink thread. I like how it looks. There are D-rings I added in case I wanted to add the optional cross body strap later on. But I think I will use this bag for small knitting or sewing projects.

These yarn skeins fit into the front zipper pocket. There is another zip pocket on the back side, so 2 zipper pockets to hold plenty of stuff for a relatively small bag.

Close up of the pattern on the vinyl.

Back of the bag is the same as the front.

This was the first all vinyl bag I have ever made. I have used a clear vinyl window with cotton fabrics for making project bags before, but all vinyl was a first for me and while it wasn't too difficult to sew, I could use with some more practice! The other testers made some absolutely incredible bags with their vinyl choices! They have all sewn with vinyl much more than I have.

This bag can be made with all solid vinyl or cork or leather and not clear vinyl if you want to also. On Christine's blog you can see her solid vinyl bag too. Plus, check out all of the testers bags too. They are really gorgeous!!! 


Pin It Now!

Tuesday, October 17, 2023

Clear Project Bags & Portable Pockets Too!

Here are some project bags that I made a few months ago. One was for myself and one for a friend. I enlarged the size of the project bag by Rosie & David patterns (Rosie's Art Studio) because I wanted a larger bag for myself and wanted to make sure it worked before making another one for my friend. It turned out great! So here they are.

This was my project bag that I enlarged a bit.

I love this bottom of this project bag as it stand up like a tote bag, but when you pull the bottom sides it flattens the bottom, making it easier to store when not in use.

Here is the folded flattened bottom.

This is the enlarged project bag that I made for my friend.

I filled it with yarn I had to show how much it can hold.

The back side of her bag.


I had some leftover fabric, so I made all 3 sizes of Portable Pockets (Around the Bobbin pattern) to match the project bag. Portable pockets are great to have to carry those little items in that could get lost in a large bag or when you just need extra pockets for your bag.

The 3 sizes of Portable Pockets showing the front sides with them unzipped to see the linings.

Zipped closed here.

Backside of the Portable Pockets have divided mesh pockets, but for the smallest size I added a Kam snap because I felt the pocket was too small to sew and divide the pocket in half. The snap makes it easier to get your hand inside to retrieve your small item. I added a small rivet at the top of the larger PP where the pockets are divided in 2.


The large project bag I first made is on the left and then I enlarged the large size to create an extra large size that is on the right for comparison.


Pin It Now!

Tuesday, November 29, 2022

Gnome Bee Project Bag with Clear Front Window

One of my friend's and I both have birthdays in November, so we like to get together and celebrate sometime during the month of November. This year we each worked on our our projects together. Tara cut fabric for new projects, while I was sewing. It was a nice peaceful way to enjoy our birthdays together and do something sewing related too.

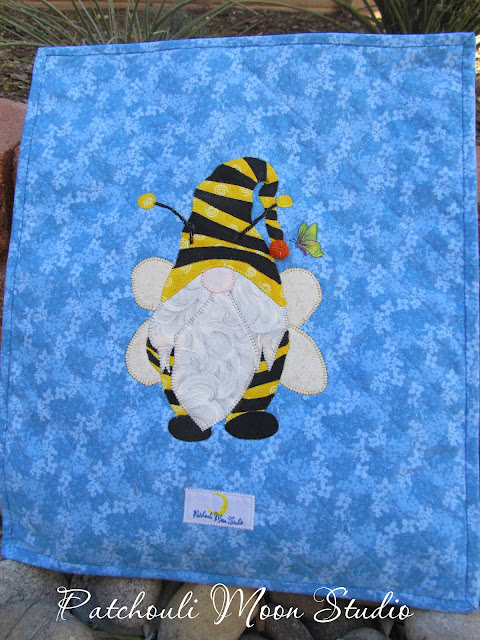
Afterwards, we had lunch together and exchanged gifts. I made Tara a project bag with a clear window to see inside and added an appliqué on the back. Tara and I both love gnomes and since she is a beekeeper now, I found a gnome bee somewhere online and created an appliqué that I stitched on the back of the bag. I also "made" a couple of scarf pins (I say made, but I only glued the little stick-pin part on it) and I also "made" a key fob wristlet, using poly webbing. 

Here is the Project Bag with the clear vinyl window I made for Tara. One of my favorite color combinations is blue & yellow. I think because when I was young I had a bedspread of daisies with yellow centers and blue background. My sister had the same bedspread in a different colorway of pink and green or was it just pink and the green were the leaves? Hmm...it was something like that. My sister has always loved pink and green together. Anyhow, on with the photos, lol!

Project bag with clear vinyl window. The yellow fabric is seen through the clear window.

Back of project bag with the gnome bee appliqué
I fused a butterfly from a piece of fabric I had (I didn't have a bee fabric
 to fuse and the gnome is a bee already). The end tip of his hat is a felt wool ball I hand stitched in place much like you would stitch a pincushion (in an asterisk shape) and added a few French knots in the center.


Closeup of the gnome bee
You can see the wool ball better here with the stitching.

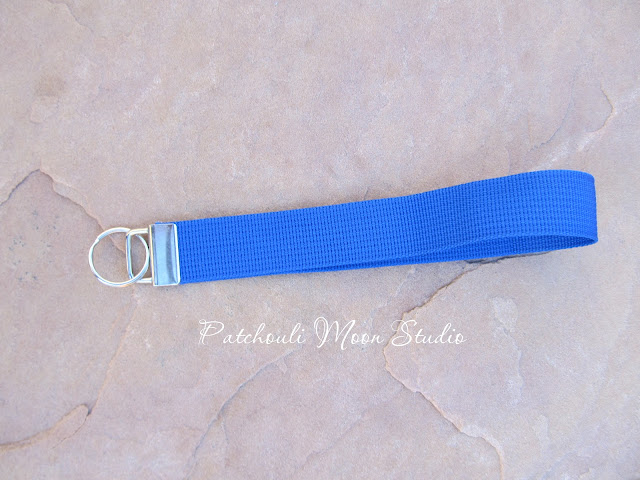
Key Fob Wristlet I also gave Tara
Key fob made with blue webbing.


2 shawl pins I created that I gave to Tara too
I made" these 2 shawl/scarf pins out of glass and glued the metal stick part of the pin on the back. I also added a silicone back closure thingee (so technical I am!) to keep the pin in place. I prefer the silicone closure thing to the metal ones, as they grip better and I don't like pinching the metal parts to put the pin on. I bought heart shaped closures with glitter in them. I thought it best to get clear so the color wouldn't show from the front side (if it could show through). (Scroll to end to see photos).

I was having issues with various other shawl/scarf pins falling out of my knit shawls and scarves, so that is what got me thinking about making some of my own. I made 5 different glass ones and I had to buy them in packs of 10, so I have extras made. Only one is a tad larger than the others. These work best in finer knitting (lace, fingering, sport weight yarns). I will use those other stick type shawl pins (made from wood or metal) for heavier weight yarns that the stick won't slip out so easily. Plus those other stick pins if they are too thick, they won't fit through the knitting without damaging the knitting or creating a hole that might not close back up after the stick is removed. I guess I am opinionated about such things, lol!

After nearly losing a shawl pin in the past (I retraced my steps and found it lying on the ground), I knew I needed to make my own pins as no one was that I could find. And not many were making practical shawl pins out of other materials either. I guess those people aren't knitters or do crochet? Perhaps there isn't a market for shawl pins and that is why I couldn't find any practical ones? But I solved my problem by making these myself and they can also be used in other materials like on a coat, blouse, etc. However, they could make a hole in a blouse that is made with fine material. Okay I blabbed on enough!

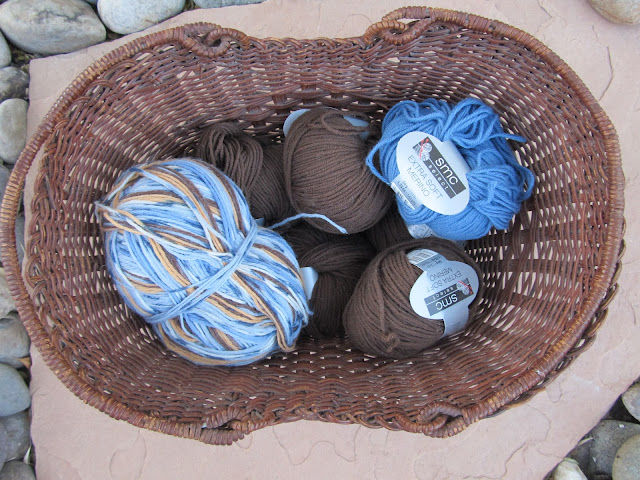
I received some nice gifts from Tara too. Tara gave me some lovely soft Merino wool yarn and a sock yarn in a variegated color, which she put into a basket and gave me the basket too. Plus, she loves paper crafting and upcycling paper stuff (like cards, calendars, etc.), so there were a lot of little cards and such that were placed into a larger cone shaped open envelope-like thing (sorry, I don't know what to call that, but it was so cute) and that created a really nice presentation.

The basket of yarn Tara gave to me.

Basket of yarn
Basket of soft Merino yarn.

Paper crafted cards
This is the envelope thingee that Tara placed all the cards that she made to give to me. It looks so pretty and festive!

Paper crafted cards all spread out to see them all
The upcycled cards and envelope that Tara made and gave to me.

Here are the 5 different shawl/scarf pins that I made.

This is the clear silicone heart-shaped pin back with glitter.

Can you believe December starts tomorrow? Geesh, the world is spinning by so fast!
Pin It Now!

Friday, June 17, 2022

5 The Viewables Zipper Pouches: Tiny to Extra Large

Hello my lovelies. I made The Viewables Pouches (Moments by Liz Design) in all 5 sizes from Tiny-XL. I made the 3 largest for myself. The small I made to giveaway in a zipper pouch swap I joined. I made the tiny in case someone bailed and they needed someone to send a pouch to someone (which I volunteered to do), but I guess for now that hasn't happened.

I love these pouches to use for project bags that I can see what's inside. The sides expand to hold a bit more too. I use them mostly for knitting projects.

This is the Small Size Pouch
This is the Small Size that I sent to my Swap partner.

Back side of the Small Size Viewable pouch
Back view of the Route 66 fabric.

This is the Tiny size Viewable Pouch
Another Route 66 fabric in the Tiny size.

The back side of the Tiny Viewable Pouch
Back side of the Tiny size.

Bothe the Tiny and Small Viewable Pouches together
Both the Tiny & Small sizes together as a comparison.

Medium-XL sizes of Viewable Pouches zipped inside each other
You can zip the smaller sizes inside of the larger sizes. Here I have the Medium-Extra large all zipped into the Extra Large size for storing.

Extra Large size Viewable Pouch
This is the Extra Large size. I like to add a handle to grab from the top for the largest sizes.

Back side of the extra large Viewable Pouch
On the back you can see I both stitched the handle and added a rivet to secure the handle. I LOVE this coneflower with bees fabric!

Large Size Viewable Pouch
This is the Large size.

Medium Size Viewable Pouch
This is the Medium size. For the Tiny-Medium sizes, I make a longer wrist handle to grab the pouch by. I also rivet it in place.

Medium- Extra large size Viewables Pouches together
Medium- Extra Large sizes together to show the size comparison.

All 5 sizes together so you can see the sizes
All 5 sizes of the The Viewables together so you can see the size comparison.

The Tiny filled with pens
The Tiny size filled with pens.

Side view of the Tiny size Viewable filled with pens to see how it can expand
Side view of the Tiny size so you can see how the sides expand to hold items with some dimension to them.

You can find the pattern on Etsy from Moments by Liz. Or email me if you would like any size(s) custom made The Viewables Pouch made for you in fabric and color(s) of your choosing.
Pin It Now!
Related Posts Plugin for WordPress, Blogger...