| The back side of the 3 above. I hand stitched the binding on the back like a quilt. |
Showing posts with label clear window project bag. Show all posts
Sunday, December 14, 2025
More Practical Pouches (Rosie & David Pattern) Sizes Mini-Small-Medium & XXL
Practical Pouches in sizes Mini, Small, Medium and XXL. I made some of these pouches a few weeks ago, but then ran out of the double-sided tape (DST) I needed, so I ordered more DST and finished the rest of the sizes, plus another XXL size, which is my favorite size.
Pin It Now!
Monday, December 1, 2025
A Few Practical Pouches
A friend who is so sweet and kind sent me an Etsy gift card for my birthday in November. A dollar for each year I have been here on Earth, and no I won't tell you how long that is, but quite a while, 😄. I told her she my angel or fairy because she has sent me many things before like fabric and webbing, etc. for making the purses that I donate to Sew Powerful Purse Project (which she is also supporting and donating to and how we met online).
I bought 3 things from the Etsy gift card: a stamp that says, Handmade with Love in New Mexico, that has the shape of the state of New Mexico with a heart on it. I wanted to use that to stamp on the gift cards for the cards that I place into the pocket of the purses that I donate to Sew Powerful. I could also stamp on fabric for a label for the purse, but I do have a stamp with my name on it that I am using for that. The next thing I bought was a pdf pattern from Rosie & David patterns called Practical Pouches, which is what I am sharing today in this blog post. And the third item is some purple denim material to make purses for the girls in Zambia. The color of the denim was a bright pinkish purple on the computer, but I received a dull lavender shade and was a bit disappointed as I loved the color on the computer screen. I will still use use it for the purses, as I am not making the purses for me, although had it been the correct color I saw, I would have made myself a small bag. I did review the item and let them know I was disappointed as the color was completely different from what they showed. Thank you so much Karen for the gift card!
Here are a few Practical Pouches that I made. Size XXL, XL, and 2 large pouches. The pattern includes 6 sizes, 5 with 2 zipper pockets and the mini size has one zipper pocket. All have clear vinyl on the front pocket. I have one of the each of the other sizes cut out and ready to sew up, except that I ran out of double-sided basting tape, which is an important part of making these pouches, so I ordered more from someplace on Etsy and hopefully it will arrive this week or next. Meanwhile, I am sewing purses.
Pin It Now!
| Another look at the XXL with 2 sizes of my circular knitting needles that I am using to knit the sweater. I can also place my other tools that I use in this pocket too. |
The video instruction is free to watch. The pdf you need for the pouch sizes/templates. The pdf is on sale 20% off for 2 more days!
I will share the other sizes I make once I get my double-sided tape.
Tuesday, July 1, 2025
4 (Project) Bags with Clear Fronts
I wanted to make a few bags to hold some scraps and glue sticks, and since I had a lot of clear vinyl, I thought I would make project bags and add clear window pockets to each of them so I could insert a label so I would know what was inside each bag. Of course it might be obvious that the glue sticks are inside that bag, but by adding a pocket, I could at any time put an actual knitting or sewing project into the bag and change the label in the pocket thereby making these bags more versatile. But for now, I wanted a place mainly for holding scraps of interfacing, fusible web, and Peltex scraps. I had put these items in shoe boxes or large produce clamshell boxes before, but those took up more space and since I added a handle to these bags, I hung all but the glue sticks on a door knob.
Pin It Now!
| Clear window pocket so I can slip in a printed label telling me what is inside. |
| The back sides show the fabric used even better. |
| The back sides of these 2. |
I got to use 4 pretty exterior fabrics that I had, along with 4 interior fabrics.
Tuesday, October 17, 2023
Clear Project Bags & Portable Pockets Too!
Here are some project bags that I made a few months ago. One was for myself and one for a friend. I enlarged the size of the project bag by Rosie & David patterns (Rosie's Art Studio) because I wanted a larger bag for myself and wanted to make sure it worked before making another one for my friend. It turned out great! So here they are.
Pin It Now!
| This was my project bag that I enlarged a bit. |
| I love this bottom of this project bag as it stand up like a tote bag, but when you pull the bottom sides it flattens the bottom, making it easier to store when not in use. |
| Here is the folded flattened bottom. |
| This is the enlarged project bag that I made for my friend. |
| I filled it with yarn I had to show how much it can hold. |
| The back side of her bag. |
| The 3 sizes of Portable Pockets showing the front sides with them unzipped to see the linings. |
| Zipped closed here. |
| The large project bag I first made is on the left and then I enlarged the large size to create an extra large size that is on the right for comparison. |
Wednesday, April 19, 2023
Project Bag with a Clear Window for a Friend
A friend of mine had her birthday last month, so I made her a project bag with a clear window. I followed the tutorial from Rosie's Art Studio to make this one. I like that this bag will fold flat when not in use and filled with a project.
Happy Sewing! Here is the tutorial I used to make this bag. Thanks Rosie!
Pin It Now!
I didn't like the way that the wrist carry strap was hooked to the zipper pull as Rosie made hers. All I could think about was if something was heavy in the bag, all the stress would be put on the zipper, so I made a small fabric tab that I sewed into the top back of the bag instead and clipped the wrist strap to that.
The clear window is nice to be able to see what project is inside of the bag.
| The lining fabric is hard to see, but it is a gray-blue print of cross hatching. |
| The bottom of the bag is shown expanded here. If you pull on the 2 sides where the openings are, the bag then flattens out for storage. |
| View from the top front of the bag. |
| View from the top bag of the bag. |
Happy Sewing! Here is the tutorial I used to make this bag. Thanks Rosie!
Tuesday, December 13, 2022
Project Bag with Clear Vinyl Window (Extra Large)
I made an extra large Project Bag with a clear vinyl window for a friend. She makes a lot of Project Linus Quilts to donate and I thought she could use an extra large bag to carry her latest project in and be able to see what's inside by having a clear window on the front. I also used 3 UFO blocks that I made a very long time ago. The 2 blocks on the back of the bag were from a Mystery BOM & Swap from Dream Worthy Quilts, called Quilter's Garden. It was a sewing garden theme. We swapped one block each month w someone assigned to us. So I have those blocks to use as well (just might make myself an extra large bag like this too). The bag measures approximately 20" W x 22" H.
I combined ideas from other project bags I have made in the past to create this one. I had to add a couple of strips at the top as I guess I didn't calculate the height exactly, but I had to sew strips and blocks anyhow to create the back quilted piece.
| On the back of the bag, I used a Rotaries in Bloom block , which is a Dresden Flower with a rotary cutter "stem" and an iron block. These blocks were so fun to make and I have used them in making a sewing machine cover too. As you can see, I quilted the back in a grid. |
| Rotary in Bloom Dresden Flower block. |
| I used Crafter's Edge Alphabet die cuts for create the name and the butterflies too. |
| The iron block. |
| A zipper pull I made. |
Julie said she loved the bag, so that made me happy. I am sure she will load it up with her Project Linus quilts when she comes to our PL group to sew.
Pin It Now!
Labels:
clear window project bag,
Project bag
Tuesday, November 29, 2022
Gnome Bee Project Bag with Clear Front Window
One of my friend's and I both have birthdays in November, so we like to get together and celebrate sometime during the month of November. This year we each worked on our our projects together. Tara cut fabric for new projects, while I was sewing. It was a nice peaceful way to enjoy our birthdays together and do something sewing related too.
Afterwards, we had lunch together and exchanged gifts. I made Tara a project bag with a clear window to see inside and added an appliqué on the back. Tara and I both love gnomes and since she is a beekeeper now, I found a gnome bee somewhere online and created an appliqué that I stitched on the back of the bag. I also "made" a couple of scarf pins (I say made, but I only glued the little stick-pin part on it) and I also "made" a key fob wristlet, using poly webbing.
Here is the Project Bag with the clear vinyl window I made for Tara. One of my favorite color combinations is blue & yellow. I think because when I was young I had a bedspread of daisies with yellow centers and blue background. My sister had the same bedspread in a different colorway of pink and green or was it just pink and the green were the leaves? Hmm...it was something like that. My sister has always loved pink and green together. Anyhow, on with the photos, lol!
| Project bag with clear vinyl window. The yellow fabric is seen through the clear window. |
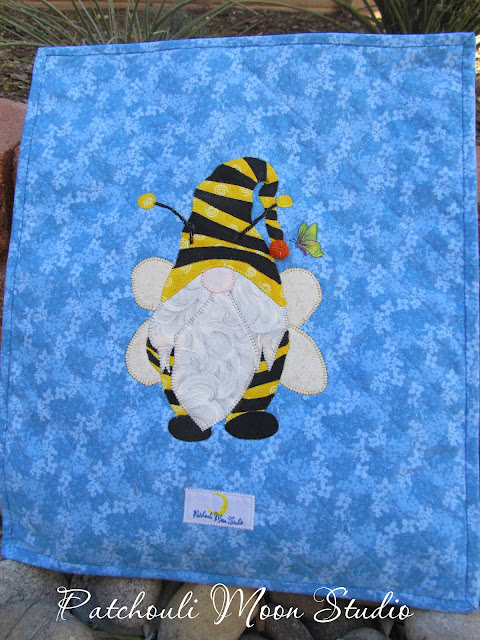
| I fused a butterfly from a piece of fabric I had (I didn't have a bee fabric |
| You can see the wool ball better here with the stitching. |
| Key fob made with blue webbing. |
After nearly losing a shawl pin in the past (I retraced my steps and found it lying on the ground), I knew I needed to make my own pins as no one was that I could find. And not many were making practical shawl pins out of other materials either. I guess those people aren't knitters or do crochet? Perhaps there isn't a market for shawl pins and that is why I couldn't find any practical ones? But I solved my problem by making these myself and they can also be used in other materials like on a coat, blouse, etc. However, they could make a hole in a blouse that is made with fine material. Okay I blabbed on enough!
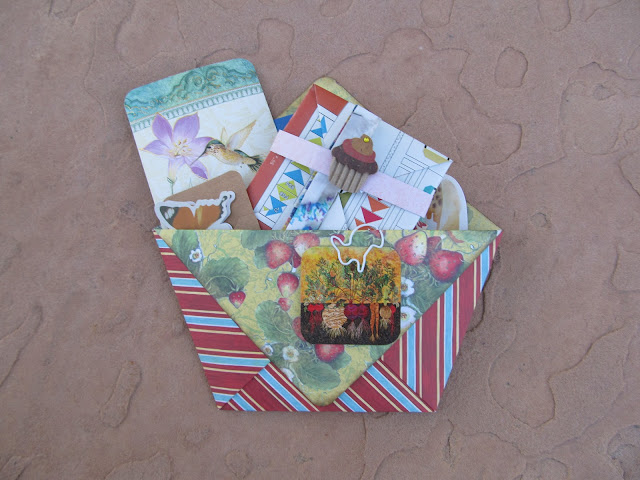
I received some nice gifts from Tara too. Tara gave me some lovely soft Merino wool yarn and a sock yarn in a variegated color, which she put into a basket and gave me the basket too. Plus, she loves paper crafting and upcycling paper stuff (like cards, calendars, etc.), so there were a lot of little cards and such that were placed into a larger cone shaped open envelope-like thing (sorry, I don't know what to call that, but it was so cute) and that created a really nice presentation.
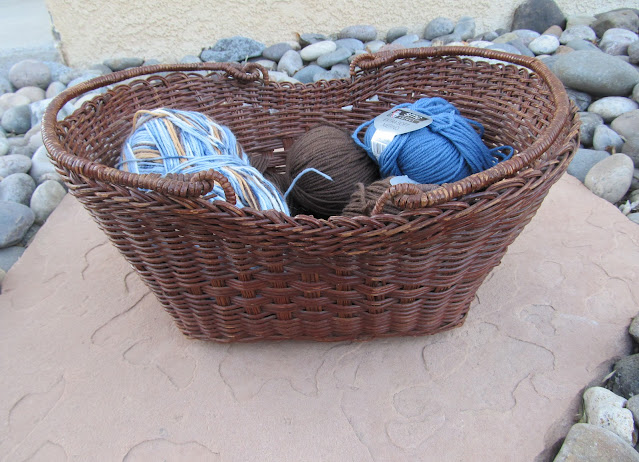
| The basket of yarn Tara gave to me. |
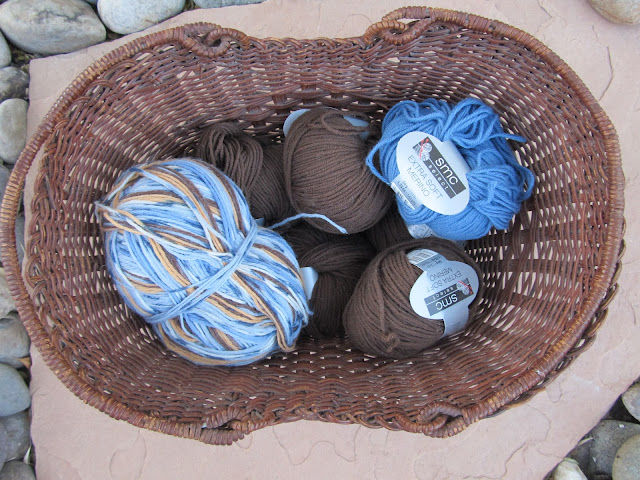
| Basket of soft Merino yarn. |
| This is the envelope thingee that Tara placed all the cards that she made to give to me. It looks so pretty and festive! |
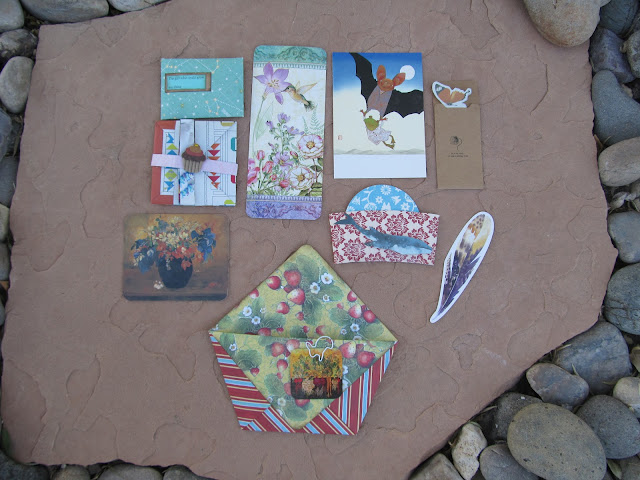
| The upcycled cards and envelope that Tara made and gave to me. |
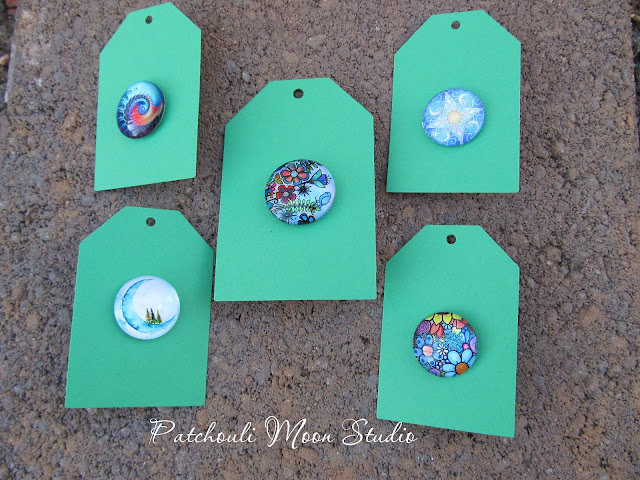
| Here are the 5 different shawl/scarf pins that I made. |
| This is the clear silicone heart-shaped pin back with glitter. |
Subscribe to:
Posts (Atom)