Tuesday, April 30, 2024

Simply Serene Quilt in Black, White & Gray

Hello quilt friends. Mr. P. wanted a quilt made to a specific size (50" wide x 80" long) and he wanted it in grays and black. He didn't want anything too complicated for me to make as he didn't want me to spend a lot of time on it. I looked around the internet for ideas and while on a Facebook quilt group I saw someone posted a quilt in blues in a pattern called Simply Serene. It was beautiful, yet simple. I showed photo to Mr. P and he liked it. Since I needed to make the quilt a certain size and the pattern was not that size and I would have to make changes anyhow, I knew I could make this quilt just by looking at the photo as it is just squares and half square triangles, so it's not hard to make. 

I did a little math, but apparently forgot that these were set on point, so I ended up cutting out much more fabric squares and triangles than I needed, so I will use those squares and half square triangles in another project later. Since this was such a long quilt, I had to lay it all out on the floor in the kitchen when Mr. P. was out of the house. I labeled each diagonal row with a number so that I could sew it in order. I quilted in in a serpentine stitch in a grid, by stitching vertically and then horizontally along each row. The serpentine stitch with it's curved stitching softened the straight angles of the quilt. I used a polyester batting to make it warmer than cotton too.

Mr. P. loved it! It was the right size for him, he likes the look and the soft flannel backing. He even has been able to use it for the past few nights as it has been a bit cooler, but hot weather is coming, so it won't get much use until the fall comes around again.

This quilt was so long that I couldn't reach high enough to hang it up higher and the bottom is on the driveway😜! Yes I hung it on my garage door😄.

closeup

closeup
Serpentine quilting on the front.

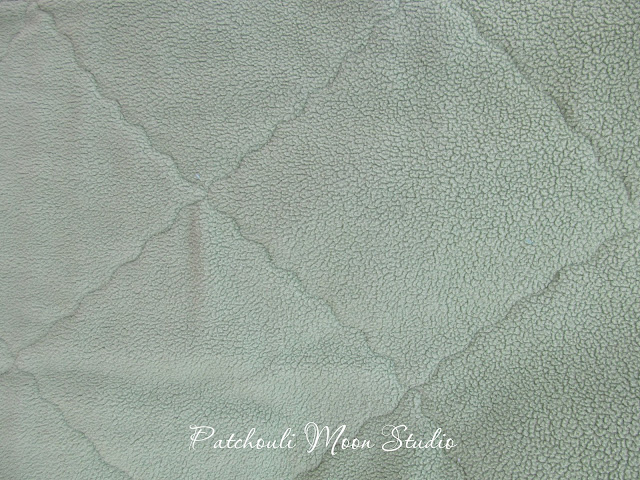
Flannel backing showing the serpentine stitching
Soft flannel backing showing the serpentine stitch.


Happy patchwork piecing & quilting!


Pin It Now!

Friday, April 26, 2024

QuickStitch Tote from ChrisW Designs

I loved testing this this great looking QuickStitch Tote bag for ChrisW Designs! It's nice and roomy, without being huge. You can use webbing or make fabric handles. You can add the slip pocket to the front or both the front and the back of the bag (like I did). Inside is a zipper pocket with a cool-looking zipper overlay that has 2 credit card slots as well! (Other zipper overlay shapes with 2 credit card slots are also available to purchase separately.  The zipper overlay pdf includes 8 designs and lots of zipper sizes to add to any bag that you want to have a zipper overlay! (It's on sale for a limited time now too)!

Bag measures: 16” wide x 12” high x 4 ½” deep.


I used a couple of woven straps my good friend gave to me that are from Guatemala. They were longer than needed and had fringe on the ends, so I cut the excess length off and will use those cut off pieces in something else I make😉. I added some antique brass rivets for extra security as well as a bit of bling.

Front slip pocket is roomy and perfect for a phone and I added another one on the back of the bag too, which can hold keys or other items.

Say "ahh". I love how wide this bag opens! And there is the zipper overlay with the credit card slots. I used the exterior fabric for the overlay. I love this fabric with the postal cancellation stamps for the lining. If you need more pockets a slip pocket across from the zipper pocket could be added. The tote closes with a magnetic snap and that is why it can open so wide. 

If you have a machine that can cut things like a Cricut or Scan 'N Cut, then cutting these overlays would be a great use to be able to cut your cork or vinyl with a machine like that and the SVG files are included in the pdf pattern. Alas, I do not own a machine like that, so I had to hand trace the pattern and hand cut it out. The hardest part to hand cut was the slots for the credit cards as they are so narrow. I think if my material was a bit stiffer, it would have been easier to cut for me. 

You can add purse feet as an option, but I should have space them out just a bit more. They do the job, so that's what matters.

The handles were wider than the instructions called for, so I folded the center part in and stitched them to make a nicer grab handle part.

I took this bag to my Stitch Group to show everyone. I had not used it before and placed my knitting inside it. After I shared it during Show & Tell, I was asked if I had others made, which I did not, but said I could make in any color or I could sell this one, and so she bought this bag! Yay! I wasn't expecting that, so it was nice for her and for me! She liked the size and thought it would be a better bag for her knitting and crochet than what she was using. I can always make another for anyone who wants to buy one and they could choose the color they prefer.

Check out the tester's QuickStitch Totes here. On SALE now for 15% off, but hurry as the sale is for a limited time only and in Australian time! And be sure to sign up for Christine's newsletter so you never miss a sale or a freebie as you never know what she might be giving away or heavily discounting only for her newsletter subscribers. It's worth joining. *Hint: sign up for the newsletter to get this tote pattern for free now!

Happy bag toting!


Pin It Now!

That Patchwork Tote from Around the Bobbin

That Patchwork Tote was a fun one to test for Around the Bobbin, because it was both patchwork and a bag, which are my 2 favorite things to make! Plus, you can use up your larger scrap pieces as well.

That Patchwork Tote is a great pattern for a quilter that is a new bag maker or a seasoned bag maker, but new to patchwork and quilting, because it is an easy to make tote and you can't go wrong with Lisa's great instructions! Rated for a confident beginner.

There are 2 versions of this tote you can choose to create. Version A has the patchwork pieces sewn more symmetrical with the fabrics even on each side and the seams running evenly down the center of the bag or Version B (the one I made) with the patchwork asymmetrical and the seams are offset. Being an asymmetrical kind of gal myself, this one was the one I had to make!😉😆

The pattern is on sale for just a few days only, so hurry. The coupon code is PATCHWORK for 25% off all day Friday through Sunday (4/26 - 4/28/24 midnight CST).

The tote measures 12" H x 11" W x 3 1/2" D.

Looking inside the tote
Tote closes with a magnetic snap. Two divided slip pockets inside. If you are wondering what those spots of blue are in the lining, well I dyed this fabric pink and some of the dye must not have thoroughly dissolved and so it left spots of blue.🙄I don't mind it at all and it's in the lining, so it isn't a big deal to me.

The slip pocket inside the tote showing the pen pocket
I divided this slip pocket so I had a pen pocket and since the rest of the pocket would be too small to divide again, I added a plastic Kam snap to keep the pocket from flopping and to keep larger items inside. I also quilted the bottom base of the lining to hold the firm interfacing in place.

The divided in half slip pocket inside the tote
This slip pocket is divided in half to create 2 pockets.

Both inside pockets
Both pockets inside.

I quilted this bag in a grid using a Serpentine stitch.


side view of tote
Side view.

This was a fun tote to make and I love the patchwork look! For you people with embroidery machines, it would be fun to add some embroidery to some of the patchwork spaces, wouldn't it?

Oh, and be sure to check out the other tester's versions here. There are lots of various fabrics used and both versions of the tote sewn too.

Happy Patchwork Tote Sewing!

Note: I am selling this Patchwork Tote in my PayHip Shop too.  It would make an excellent Mother's Day gift 😉. Grab it now if you need a gift for any occasion. Thanks for looking!


Pin It Now!

Wednesday, April 24, 2024

Scrappy Turquoise, Blue, Green Free Form Log Cabin Style Quilt with Fleece Backing

Here is another free form modified log cabin/courthouse steps style quilt I made. I used polar fleece on the back of this quilt instead of flannel. No batting as the fleece is thick and acts like a batting as well as a backing fabric. Will donate this quilt if it doesn't sell at the gift shop. I thought I would at least try to see if this style quilt would sell? You just never know! The ones I really think would sell, don't, so? I price them cheap enough, so prices isn't the reason it doesn't sell (who knows if they even look at the price?), but there are just too many variables such as size, color, design, etc. You can't please people and I won't do a custom made quilt because I have to enjoy the making of it and I couldn't get enough money to make it worth my while if I didn't enjoy it or it was a pattern that had a zillion pieces in it! So I suspect this one will end up being donated and that is fine with me. 

This quilt measures 4 1/2" x 40 3/4".


The back fleece side showing the quilting
The polar fleece backing showing the gridded serpentine stitch I used to quilt the quilt. In person the green is a bit brighter that it shows here.

closeup
So fun to not have any rules to sew these kind of quilts. I can use any width scraps I want to use.

Happy Scrappy quilt piecing!

*Update: I sold this quilt, yay! I sold it cheap, but it sold! I really wasn't sure. 


Pin It Now!

Monday, April 22, 2024

Thimbleweed Quilters Outdoor Quilt Show 2024

These are just a few of the quilts from the show. I took photos of most of my favorite quilts. Some quilts were hard to get a good photo because of the bright sun pouring across the quilt, so I didn't get photos of those quilts. Enjoy the show!

Quilt by Colleen K.


Made by Marlene W. This was all painted batting (except the binding)!


Made by Colleen K.


I love the Jetson's for the televison.


Made by Barbara S.

Closeup from above quilt.

Made by Mila V.


Made by Sue H.

Made by Sue H.

Closeup of t-shirt quilt (below)

Close up of t-shirt quilt (below)

Back side of t-shirt quilt (see quilt below)

This is a t-shirt quilt (not a panel). Those are all t-shirts!
                                                                  Made by Judy P. 

This quilt is also made using t-shirts from various travels by Linda H.

Pin It Now!
Related Posts Plugin for WordPress, Blogger...