Saturday, August 28, 2021

Sew Powerful Purses #72-75 for 2021

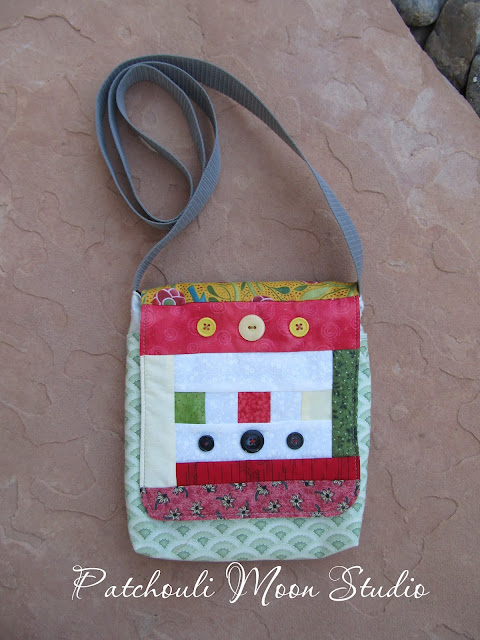
Here are 4 more purses for the Sew Powerful Purse Project.

All of these flaps first started as a quilt block. Then I added strips and buttons to them.
Batik fabrics for this flap.


More batik fabric on the flap.


This one too is batik fabrics on the flap.


No batik fabrics here, just a variety of fabric prints.


All 4 purses.
Pin It Now!

Thursday, August 26, 2021

Smelly Cat Hip/Waist/Fanny/Sling Bag

I made this Smelly Cat  waist bag, hip bag, fanny pack bag, sling bag or whatever the preferred term is for this style of bag, which is a pdf pattern by Sincerely Jen. The bag features a front envelope style pocket with a flap. Inside the front pocket there are 3 cards slots. The flap on the pocket closes with a magnetic snap. Above the front pocket is a zipper that opens to the inside of the bag. Inside is a zippered pocket and the main space has room to hold a few items. The waist strap is adjustable. The bag measures 16" wide x 6" high.

The bag can be worn around the waist, hips or as a sling over your should or across your body too. These kind of bags are great when you only need to take a few items with you. Great for hiking, walking, or when you wants your hands free. 

(This bag has Sold).

I added those plastic clips and adjuster rather than metal hooks because they are easier to use for this kind of bag. I also used nylon webbing for the strap.


Inside the main compartment. Zipper pocket inside too.

Front pocket with a magnetic snap closure.

3 Card slots in the front pocket, plus extra room in front.

You can wear this also as a sling or cross body bag.

And here are some Angelita Daisies in my garden. 

They are small flowers, but these daisies love the heat and are always blooming.

*FYI: All of Sincerely Jen's patterns are name after something that occurred on the old TV show Friends. Smelly Cat , was a song the character Phoebe sang. See video below.


Pin It Now!

Tuesday, August 24, 2021

Scooter Pouch

I recently tested this Scooter Pouch pattern for All Sew Petite. This was the first time testing for Monika and I enjoyed making this bag and her instructions were excellent. Plus, Monika makes a video tutorial on her YouTube channel too. The video wasn't made when I was testing this pattern, but I have watched some of her other videos and they are extremely well done.

For a limited time only, this Scooter pdf pattern is on sale at her Etsy Shop and on her website and no coupon is needed.

As more people are using scooters, electric scooters and bicycles, this Scooter Pouch will come in so handy for carrying your phone, keys, and more. You can even attach the bag to a walker, a wheelchair or a stroller too. You could even use this bag to store other items like tools and it could make a great lunch bag as well.

The pouch opens with a top zipper and features a zipper pocket on the front, which is a perfect place to store your phone. Velcro straps on the back of the pouch allow you to attach to the scooter, bike, walker, etc. The top Velcro strap can be attached to the handle bar, or other place depending on how you use this pouch. It's so easy to strap this pouch on and off your scooter or other mode of transportation.

Wednesday, Monika will share the other testers Scooter Pouches. So pop over to her website tomorrow for a look at their versions in case you get inspired by the fabric they chose. Her blog post is here.

I didn't have a scooter, a bicycle or anything else to show how this pouch attaches , so you can see that on the Sew All Petite website. 

I had this appliqué of a Scooter Girl for years. I loved it and always wanted to make it, but it was way too large an appliqué for this pouch, so I reduced it and made it for the front of the pouch. Even though the pieces were smaller and some really tiny, I love how it came out. So here is my version of the Scooter Pouch, with a Scooter Girl on a motorized scooter.

The pouch measures 6 1/4" high x 9 3/4" wide x 3 " deep (the height and width measurement depend on how you are holding the bag).

I love this Scooter Girl appliqué.

The back of the pouch has Velcro straps.

Inside the pouch I used a hand dyed fabric that I dyed years ago. As you can see the pouch opens wide and is quite roomy.

I used scraps of batik fabric for the appliqué and the background fabric.

View from the side.

The zipper side view.

I always make a beaded zipper pull with a charm for the zippers.

The back fabric is also a batik fabric with a bit of texture to it.


The only thing I could use to show how the pouch attaches was my daughters umbrella pole on her outdoor table. You get the idea of how it would attach to a scooter, bike, etc. The top Velcro strap would attach to a handlebar.

So that's my version of the Scooter Pouch. The only thing I did differently on this was to make the scooter girl appliqué for the front of the pouch.

Pop over to All Sew Petite's website or Etsy shop if you want to make your own version of this pouch. Or you can contact me if you want a custom made pouch.
Pin It Now!

Sunday, August 22, 2021

Sew Powerful Purses #66-69 for 2021 (80 total purses made since 12/2020)

I finally found some time to make another 6 more purses for Sew Powerful. The flaps started out as some quilt blocks I had made years ago. I added fabric strips them and some buttons and some I quilted the flaps.

The goal for 2021 from Sew Powerful is to send 24,000 purses to the girls in Zambia. I hope I can make many more to send by November to help out. I have sent a 3 boxes of purses this year already. I have other purses made that wasn't enough to fit into a large box, so when I have made enough to fit into a box I will mail off more purses. I already have made up over 100 kits, so all I need to do is sew, which is quicker than all the cutting and fusing of interfacing.


Here is a closer look at one purse. The little teal colored word I sewed to the bag on the lower left of the flap says superstar.

Under the flap I added this fabric circle and the label. Since the lining flap was a plain muslin, I wanted to add a pop of color there.


I quilted this flap.

This was some sort of home decorator fabric that was given to me some years ago. I have made a couple of other style bags using this fabric before. This is the last I had left of it. I think the print is pretty and I really like the lime and gray together.

I like the butterfly button and the little round buttons on this flap. It just adds a little extra bling.

This purse I used a variety of fabrics I had to construct the purse.

Here are 2 more.

This flap is quilted and that bird button is so sweet perched on the side.

The name of this quilt block is called the Friendship Star. I set the block on point and then added strips to the top and bottom sides to make it large enough.

I'm so glad to be making more of these purses. Making the flaps is my favorite part too!
Pin It Now!

Thursday, August 19, 2021

Tote Bag Featuring Sue Spargo's Appliqué Birds & Star Quilt Blocks

I just love these appliqué birds designed by Sue Spargo for Crafter's Edge die cuts. The birds are part of a series of 5 different birds that were designed for Crafter's Edge by Sue Spargo. I have two of the birds. 

I knew that I wanted to cut these birds out in felt using the die cuts, but what to do with them after I did that? At first I thought I would make them into pockets and sew them to a tote bag. But then I thought I should just sew these into a front & back of a tote bag. But I needed to make them larger first, so I decided to use the birds for the centers of a Sawtooth Star block. The Birds, the squares and triangles were all cut using the Crossover II Die Cut Machine and die cuts all from Crafter's Edge. That made the cutting so easy and precise.

Here are the blocks I made:

I used the felt I had on hand, which was either wool, a wool blend or polyester. I hand blanket stitched around the birds and added other some French knots too. Some buttons were also added on top of felt circles as well.

For the legs & feet, since they were so skinny, I just did a running stitch to hold them in place. The white background square I stenciled with a chicken wire stencil I had.

On this bird, I did similar stitching and also added buttons. I chose different felt colors for the bird as well as different fabric colors. The aqua fabric is actually a printed sun dyed fabric made by using paint and a texture on top that is dried in the sun. I didn't make this particular fabric; it was given to me by a friend. I have made other sun dyed fabrics before. It's a fun process (as long as it's not windy outside).


To create the stars, I used the Crafter's Edge Half Square Triangles and Quarter Square Triangles. They cut perfectly & sew perfectly too. Just look at that point!

Another perfect point sewn.

The other block points were sewn perfectly as well.

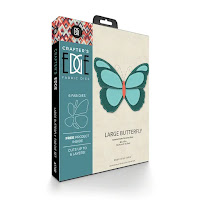
I decided to add an appliqué butterfly to the inside slip pocket as a bit of inside bling, so I used the large butterfly die cut from Crafter's Edge to quickly cut the pieces and I blanket stitched the appliqué by machine. I didn't add the extra appliqué pieces on top of the butterfly because I liked it just like this.


The lining with the slip pocket and appliqué butterfly. I wanted to photograph this before I made the bag, so you could see it better. On the left is a pen pocket division and I stitched another division down the center of the pocket, so there are 3 pockets, including the pen pocket.

One bird on one side of the bag. I quilted it first to batting and then added a foam stabilizer for the tote to stand up and not be slouchy.

The other bird on the other side of the bag.


Hand blanket stitching and added buttons and French knots.

Also hand blanket stitched with French knots and added buttons.

Handmade label.

I sewed the straps in place and also added metal strap ends and 4 rivets for each strap side for some bling and secure handles. 

On the top sides I added a magnetic snap to close the bag and give it a different shape when viewed from the front. When I need to open the bag wide the snaps easily unsnap. The center of the bag also closes with a snap too, keeping everything secure inside the bag.

There is a also a zippered pocket across from the butterfly slip pocket. 

Here is the top side snap unsnapped to show you.

The tote bag measures 15 1/2 " at it's widest x 17" high x 4 3/4" deep at the sides.


I added 6 purse feet to keep the bottom of the bag clean too.

I really love how my tote bag turned out! Thanks to Crafter's Edge for their great die cuts so I could cut such precise pieces and quickly too.

The following 6 die cuts from Crafter's edge were used in making my Tote Bag~

Pin It Now!
Related Posts Plugin for WordPress, Blogger...