Showing posts with label quilted bag. Show all posts

Tuesday, February 25, 2025

2 More Japanese Rice Bags for Holding Sewing Machine Foot Pedals

Two more Japanese Rice Bags finished. I used the last of this sewing theme print to make these rice bags, but I needed a different fabric for the bottom of one of them as I only had 4 squares left of the fabric for the 4 sides. Each have different lining fabrics. 

The squares were cut 7 1/2" square on the smaller bag and 8" square on the larger bag. Just a slight difference in size as you can see.

These are the last ones I will make for holding sewing machine foot pedals. Since I have the clear window pockets, I can place other foot pedals inside by changing the machine card in the pocket if I want to switch machine or if I sell or give any machine away in the future.

2 rice bags
I forgot about adding the clear vinyl pocket to hold the sewing machine names, so I hand sewed these on afterwards.

view from top with drawstrings closed
Drawstring Kumihimo cords I made to close the bags. I also used only 4 cord casings on these bags and made them wider. I had used 8 narrow casings on the other bags I made. I think either work well for bags of this size, but I prefer the narrow casings for larger size bags.

One inside lining shown
Thread spool fabric lining for this bag.

the other inside lining shown with sewing machine foot pedal inside bag
Pink wavy checkered lining fabric for this bag. Sewing machine foot pedal inside.

Pin It Now!

Wednesday, December 4, 2024

Custom Made Tote for LED Light Pad

My friend, Tara, commissioned me to make her another tote to hold her LED light pad inside. I made her one before, but she bought a new light pad and that tote was just a smidge too narrow for her new one to fit as it was a but thicker. Click here to see the first bag I made for her and for mine too.

I used some hand dyed fabric I had and forgot all about, along with some scraps of batik and an Asian print for the teapot and teacup appliqué. Those colorful scraps looked great on the hand dyed fabric. I didn't want to use a white or off white background because of how quickly those light colors can get dirty. At least if the hand dyed fabric gets dirty, it is more hidden.

I added a flap with 2 magnetic snaps to close the bag and a handle to carry it. I quilted the inside for better protection of the light pad. On the back side is a zipper pocket to hold the charging cord. I think it turned out rather well and Tara loves it and that's what really matters is that she is pleased with it.😍

Here is the bag I custom made to hold Tara's LED light pad so she can take it to her calligraphy class and to protect it when not in use at home or wherever else she takes it.

back side with zipper pocket and overlay
The back side of the bag with the zipper pocket and ribbon.

closeup of zipper pocket with overlay
Closeup of the zipper pocket with the vinyl zipper overlay. Some teacup Renaissance ribbon above.

Name appliqué on flap
Closeup of appliqué name on the flap with crystals in between.

closeup of appliqué teapot and teacup
Closeup of appliqué.

peek inside bag to see the top of the LED Light Pad
Peek inside where you can see the top of the LED light pad inside.

Quilted interior of bag
The quilted interior. I quilted it to foam stabilizer for protecting the LED light pad.

Pin It Now!

Saturday, October 5, 2024

Adorable Size Round Japanese Rice Bag (Free Pattern & YouTube Tutorial by Liz)

Last month I made a traditional square Japanese Rice bag that I shared here. Shortly after I made it, Liz (of Moments by Liz), came out with a round Rice Bag in 4 sizes. She named the sizes: Too Cute, Adorable, Just Right & Kitchen Sink. The round bottom templates are free and the Video YouTube tutorial is free too (scroll down to very end for link). When you click on Liz's YouTube at the end of this post, you will find the link to her free pattern for the round bottoms and the rest is cut from measurements using a ruler and rotary cutter. 

Here is my Adorable size round rice bag. It is a pretty cute size, but Too Cute is even smaller. Also, Liz has measurements for making the accent base or using just one fabric, so they are both in her pdf. And, she shows you how to make the tulips ends to cover the knots in the cording if you want to do that. I did not do that with mine though.

The traditional square Rice Bag I made recently, I chose some sewing theme fabric in a different print and color. So I decided to stay with the sewing theme and chose this print for the round bag. I quilted the exterior and the bottom of the bag.

looking down into the bag
The lining fabric is also  sewing theme print with scissors, needle and thread.

Here she is with the drawstrings closed. I again made my drawstrings in Kumihimo (Japanese braiding) for this bag as I did for the square rice bag.

drawstrings closed
This time I made the tabs for the drawstring out of the same cotton pink fabric as the accent and bottom
 of the bag.

quilted bottom of bag
Quilted bottom of the bag.

drawstrings closed view from top of bag
Closed view from above.

vinyl cord stops I made
I made my cord stops out of vinyl. You can buy plastic cord stops or use beads, but both of those need to have large enough openings to fit the cording. Or you could knot the 2 cords together if your cords are long enough to do that. I chose to use wrap my cords together with an elastic hair tie.

Have you ever made a square or a round Rice Bag? Do you have a preference as to round or square? I think I am more partial to the square traditional rice bags, but the round ones are fun too. I suppose it depends on what you will put inside the bag that really matters and the size of bag that you need for your item(s) that you are carrying. I doubt anyone is carrying rice anymore, but you never know. I think I will make some more square rice bags to put my machine pedal and cords in. I will make a name for each bag too so I know which pedal and cord goes to which machine. Now to decide on the right size bag to make. I need one a bit smaller than the last square rice bag I made. 

Happy Rice Bag Making!


Free YouTube tutorial from Moments by Liz~

Pin It Now!

Thursday, September 19, 2024

Japanese Rice Bag ( Komebukuro) with Kumihimo Cording

I wanted to make another Komebukuro, or Japanese Rice Bag, but try making a larger size this time. I had enough of both the outer fabric and the lining fabric to make the sides of the bag, so I chose another fabric for the bag bottom. You can use all one fabric for the outer (or lining), or each side could be a different fabric or a different quilt block or embroidery or appliqué. I might try making another bag using appliqué or pieced blocks for each side. That might be a fun way to make this bag unique and use up scraps and try new quilt blocks too.

You can make this bag in any size that you want. The exterior is made up of 5 square blocks and so is the lining. So choose what size you want to cut or what fabric that you have enough of that you can cut 5 squares (or 4 as I did with a different bottom). You don't want to go too small or too large, so I would say 6" cut squares as the smallest up to 10" squares as the largest size. I suppose you could go larger, but it might result in a more floppy bag if you go too large? Adding interfacing or stabilizer might make it harder to close the drawstring? I am not positive, so experiment with size and materials to see what you prefer.

My bag was cut with 9" squares and is a nice size. I used 1/4" seam allowance. The lining I quilted to batting using a walking foot in straight lines. I did add a woven fusible interfacing to the exterior fabric pieces too, so it wouldn't be too floppy. It stands up nicely and is not too floppy or too rigid, so I like this combination of this structure. 

I made the drawstring cording with another Japanese method, called Kumihimo, which is a braided cord using a round disk and string or yarn. I used 4 different colors and 2 types of ribbon yarn that I had already. I used vinyl pieces for the little loops that the cording passes through for the drawstring.

This Sewing Theme fabric is fun as each side looks a little different.

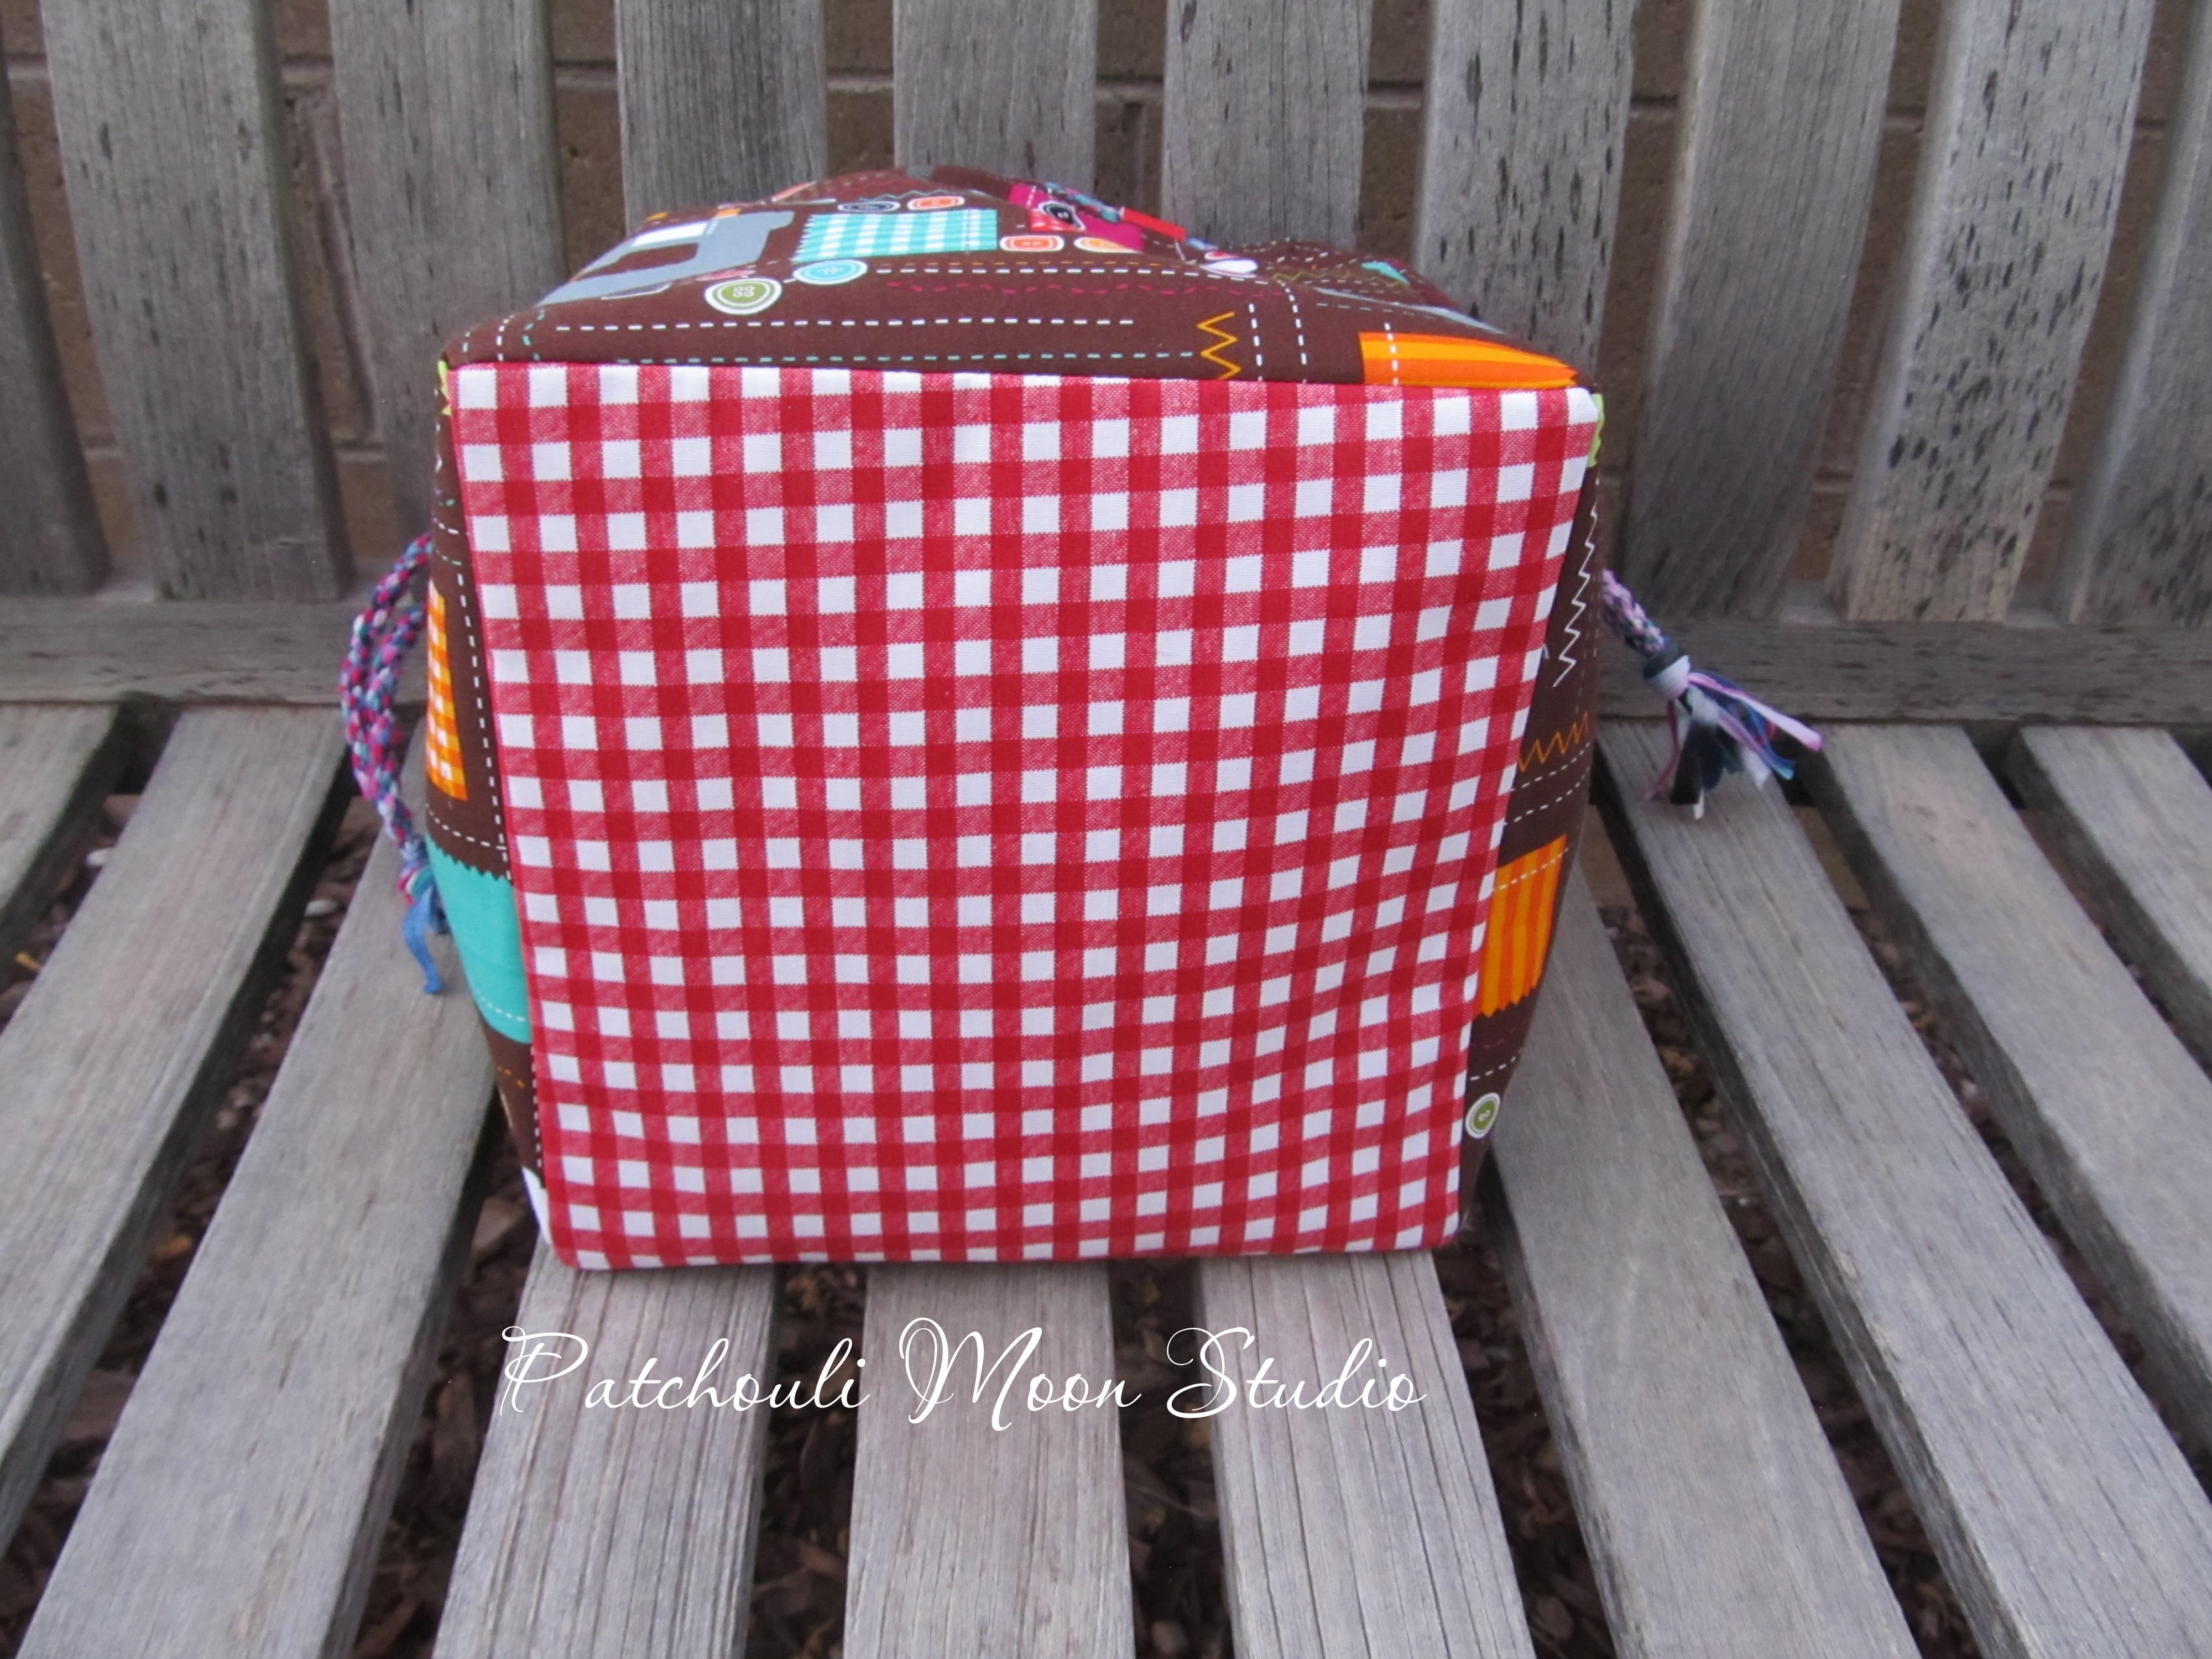
bag bottom
I used this red and white check fabric for the exterior bottom.

Inside bag
Another Sewing Theme print for the lining. This print was depicting cards of buttons and snaps from long ago. I quilted the lining in straight lines.

drawstring closed on bag
Here is the bag closed with the drawstrings

Inside bag
Another lining view.

Inside bag
View inside the bag from the top. Pretty roomy bag.

Top view of bag drawstring closed
Top view of bag drawstring closed.

Another side of bag
Another side of the exterior.


Pin It Now!

Sunday, August 25, 2024

Patchwork Batik Quilted Tote

I made a bag like this a few years ago in different batik fabrics and it was for sale in my Payhip Shop and a woman I know (although we haven't met in person) from Sew Powerful purse making bought it. 

A few weeks ago Sew Powerful had a purse making retreat in Texas and a couple dozen or so women got together there at the retreat. The woman who had purchased the patchwork tote from me was there and had her bag with her. Another woman who sat across from her got to chatting with her about the bag and found out I made it and she knew me from the Facebook group so asked about buying the same bag from me. So I made her this bag in colors she mentioned she liked. Funny thing is the woman who purchased this bag from me lived in Washington state in the same city I had lived in before moving to New Mexico. When I saw her address I knew the road she lived on. Small world! She has received this bag and loves it. That make me happy!!!

She likes purple, pink, turquoise, so I chose these batiks. This is the front of the bag showing some of the prints. I set the fabrics in a diagonal, so they don't all show on each side.

This is the back of the bag. I think I should have straightened the photo as it looks like it is tilting to the right. The zipper is straight, but photo make is look like it is leaning right. I added a vinyl zipper overlay to this zipper, which I didn't do on the first bag I made.

Inside the zipper pocket. I thought this fabric made a pretty lining.

One side view.

The other side view.

Inside is a divided slip pocket with pen pocket. I had forgotten to add the magnetic snap, so I had the sew on kind and sewed it on. Good to have those snaps on hand just in case. I guess my label by the snap wasn't placed exactly centered 😜. Too late now. That's a first!

Pen pocket and 2 other pockets.

I included a little wallet and a medium size Portable Pocket too.

Portable Pocket and Little Wallet. 

Pin It Now!

Friday, April 26, 2024

That Patchwork Tote from Around the Bobbin

That Patchwork Tote was a fun one to test for Around the Bobbin, because it was both patchwork and a bag, which are my 2 favorite things to make! Plus, you can use up your larger scrap pieces as well.

That Patchwork Tote is a great pattern for a quilter that is a new bag maker or a seasoned bag maker, but new to patchwork and quilting, because it is an easy to make tote and you can't go wrong with Lisa's great instructions! Rated for a confident beginner.

There are 2 versions of this tote you can choose to create. Version A has the patchwork pieces sewn more symmetrical with the fabrics even on each side and the seams running evenly down the center of the bag or Version B (the one I made) with the patchwork asymmetrical and the seams are offset. Being an asymmetrical kind of gal myself, this one was the one I had to make!😉😆

The pattern is on sale for just a few days only, so hurry. The coupon code is PATCHWORK for 25% off all day Friday through Sunday (4/26 - 4/28/24 midnight CST).

The tote measures 12" H x 11" W x 3 1/2" D.

Looking inside the tote
Tote closes with a magnetic snap. Two divided slip pockets inside. If you are wondering what those spots of blue are in the lining, well I dyed this fabric pink and some of the dye must not have thoroughly dissolved and so it left spots of blue.🙄I don't mind it at all and it's in the lining, so it isn't a big deal to me.

The slip pocket inside the tote showing the pen pocket
I divided this slip pocket so I had a pen pocket and since the rest of the pocket would be too small to divide again, I added a plastic Kam snap to keep the pocket from flopping and to keep larger items inside. I also quilted the bottom base of the lining to hold the firm interfacing in place.

The divided in half slip pocket inside the tote
This slip pocket is divided in half to create 2 pockets.

Both inside pockets
Both pockets inside.

I quilted this bag in a grid using a Serpentine stitch.


side view of tote
Side view.

This was a fun tote to make and I love the patchwork look! For you people with embroidery machines, it would be fun to add some embroidery to some of the patchwork spaces, wouldn't it?

Oh, and be sure to check out the other tester's versions here. There are lots of various fabrics used and both versions of the tote sewn too.

Happy Patchwork Tote Sewing!

Note: I am selling this Patchwork Tote in my PayHip Shop too.  It would make an excellent Mother's Day gift 😉. Grab it now if you need a gift for any occasion. Thanks for looking!


Pin It Now!

Friday, February 23, 2024

Cross My Body Bag

Christine Welsh of ChrisW Designs has done it again with the Cross My Body Bag! The bag measures approx. 22cm (8 ¾”) W X 22cm (8 ¾”) H X 10cm (4”) D. Features a quilted bag (optional, but makes a sturdy bag), an ingenious recessed zipper closure with no gaps, a hidden front zipper pocket, Christine's signature back phone pocket and an interior zipper pocket. Need a slip pocket? You can add one inside if you want to. I did. I made my bag in scrappy pink & purple batik fabrics with a vinyl accent. You can use all cotton fabric, or use whatever material that you and your machine like. Grab it now while it is on sale. No code needed!

Here is the bag I made~

I used batik scraps of pinks & purples to create this bag. The vinyl accent hides the zipper pocket in front.

the back of the bag sports a phone pocket, which is Christine's signature pocket.

The bottom, front, back and sides of this bag I quilted in a serpentine stitch.


This recessed zipper has an ingenious way of putting it together and there are no gaps at the sides as most recessed zipper closures have.

Back phone pocket.

Inside zipper pocket.

Front hidden zipper pocket is behind the vinyl trim.


Vinyl strap connectors at the sides.


I added a slip pocket with a pen division. A slip pocket is not included in the pattern as it is optional.


The pattern is on sale for a limited time, so if you want to make your own Cross My Body Bag, hop over to ChrisW Designs and get the pdf while it's on sale. Plus there is a video tutorial too! NO code is needed. And please scroll through all the photos to see the other tester bags too.


Pin It Now!
Related Posts Plugin for WordPress, Blogger...