Showing posts with label Sew Can She tutorial. Show all posts

Friday, October 20, 2023

Color by Number Quilt (Bargello Style)

I made this quilt from a Sew Can She tutorial, called Color by Number Quilt. It is a bargello style, only done with squares or Trip Around the World style quilt, but in a "V" shape instead of a diamond shape. Easy to make, but you need enough of each color square to make it work. I am pleased how nice this quilt top turned out.

The top measures 54 1/2'' x 63 1/2", which can be difficult for me to quilt, so I gave it to the longarm quilter in my Project Linus (PL) group to quilt it for me. Anything she quilts gets donated to PL. She uses soft Minky fabric for the backing and folds it over for the binding. The Minky was donated to our PL group and she has it at her home. No need for batting as the Minky is thick enough and oh so soft!

I like it hung this way with the "V" pointing down like a "V". But it could be the other way like an "A" without the middle bar.

I chose red, yellow and blue as the primary colors and added one "V" row of aqua.


Here is the finished quilt. She is holding it the opposite way (A) as I had it in the first photo, but it doesn't matter as either direction works. The Minky backing folds over the the front to form a binding. She pieced the backing, using a yellow Minky and an aqua Minky, so it makes the binding 2-colored.

Front view of the flower quilting pattern.

The back of the Minky showing the flower quilting.

This quilt was donated to PL and should be nice and soft and cuddly as the temperatures here get colder.

I might make some more of these, but make smaller tops so that I can quilt them myself. I like to use soft flannel on the back of my quilts. It's a fun way to use up some fabric that has striking results, but that is also easy to make. It sure looks more dramatic than scrappy squares randomly placed.


Pin It Now!

Sunday, September 8, 2019

Happy Hobo Bag in Patriotic Fabric

I made this Happy Hobo bag from a tutorial from Sew Can She. If you know me, you know I make changes to bags I make and usually add or subtract things from bags to suit my style. I made changes to this bag too. First off I am not fond of pleats on bags, so instead of doing the pleats, I used the lining pattern to make the exterior as well as the lining to avoid the pleats. Plus Caroline not only pleated the front (and back too) but divided the front into 2 sections with a seam down the center. I didn't see the need to do that either. She did a lovely embroidery on her Happy Hobo, but I don't have an embroidery machine and didn't want to hand embroidery either. I just wanted to try making this bag in a fabric. As I was going  through some prints, I found this one and decided I would make this a patriotic bag. I didn't have enough left for the strap, so I sewed 2 fabrics together to create a long enough adjustable strap and I really love the look of the strap! I had to get creative with the inside pockets too, which I actually love the look of those pockets. Funny how when I have to make do with what I have how I can be creative and end up loving the results even more.

So here she is~
The bag closes with a zipper.

The sides have a pocket. A cell phone would fit in just fine. However, if you have large hands, it might be hard to reach down into the pocket, so something like a cell phone where you can grab it from higher would what you would want to place inside the pocket and nothing like your spare change, lol!

On the back of the bag I added a zippered pocket. I love zippered pockets outside or inside to keep some things secure.

I make my zipper pulls and yes I do make everything with love.

Inside the bag the lining I used was the Pledge of Allegiance print. I had enough for the lining but not the pockets or the gusset. I didn't even have large enough pieces to make the pockets out of the exterior fabric, so I pieced the pockets creatively and love how they came out. Hard to get a decent photo inside the bag.

This is the pocket on the other side. I always try and add a pen pocket if the bag is tall enough for one to fit.

SOLD!
Pin It Now!

Monday, October 15, 2018

Convertible Tote with Dog Applique

I made this Convertible Tote (Sew Can She tutorial) with several changes. I have made a few of these bags before and I wanted to make this one with an applique on the front of the bag.  I also made even more changes than I usually do. This is a simple basic bag, but by making changes you can give it a different look.

So first I fused the applique pieces to the front and stitched them down with a blanket stitch. The salmon colored fabric is a fabric that I tie dyed myself a few years ago.

Since I used a dog applique, what goes better with a dog applique than a fabric with "dog" wording. I added the back zippered pocket, but instead of placing the zipper in the center of the top fabric band, I placed it in the main fabric instead.

I never liked how the strap tabs were sewn to the bag in the directions (no offense Caroline!), so I riveted a longer strap tab to each exterior side of the bag. I made a regular adjustable strap with a slider, which I find works better too. 

I also used foam instead of fleece on this bag and love the foam too! I love how this bag turned out!


A dog and bird applique on hand dyed fabric. The top band is dog words. The applique is a Bonnie Sullivan design meant for using wool, but I used cotton, from her series called You Lucky Dog Best Friends.

The strap tabs are riveted to the bag sides.

I added the zipper pocket to the main back fabric instead of the top accent panel.

Cute dog sayings.

Inside the bag is roomy for a smallish bag. I didn't have enough blue fabric for the entire lining, so I repeated the top accent inside and used the same fabric for the pockets. I actually like how that looks. I have made other bags that do this, so I may do the accent fabric inside again.

I made a divided slip pocket, the center is divided to hold a pen, with larger pocket spaces on either side of the pen pocket.
SOLD!

Lovingly made in my Smoke Free, Perfume Free, Pet Free New Mexico home.
All sales final. No refunds or returns. Thank you.
Pin It Now!

Sunday, November 26, 2017

2 Convertible Totes

I made 2 more Convertible Totes like I made the first one (with my changes). The tutorial is from Sew Can She.

I love how these came out. I sold the first one below at a craft show.

This was the one I sold.


The back of the bag has a zippered pocket. Great for your phone or keys.


Inside I divided the slip pocket with a pen pocket in the center.

This is the inside of the bag below. The slip pocket is also divided with a pen pocket in the center.

The fabric is a different print, but the same colors. I chose a lighter top and strap fabric for this one. This one is for sale (it might go to the local gift shop soon though).


The back of the bag.
This bag above went to the gift shop.

Linking this to Elm Street Quilts Bag It 2017.
Pin It Now!

Tuesday, October 3, 2017

Convertible Cross Body Tote

I made this bag, The Convertible Cross Body Tote, a free tutorial by Sew Can She. It turned out really nice. The only thing I ended up changing was that I added an adjustable slider and made the strap longer. I tried doing it Caroline's way with the 2 swivel hooks so that it could be worn across the body or doubled up with the 2 swivel hooks on one ring as a shoulder bag, but the problem I had was that the strap wasn't long enough to go cross the body unless I lengthened it. Then it was too long when I doubled it over. So the only way for it to work was to remove the swivel hooks and add an adjustable slider. That worked out well.

Since I knew I wanted to try this bag and maybe sell it at a gift shop, it had to be able to fit a variety of body shapes, sizes and heights. I find that most designers do not make their straps long enough to adjust for most people. I tend to add length to the straps that I make. I am not tall, nor large (although busty) and most of the straps don't fit across my body long enough, so larger women would really have a problem if the straps weren't long enough. Hopefully someone will love this and buy it. I do want to make some more of these in other colors.

The instructions in the tutorial were very good! The bag is a nice size and shape too. It has a magnetic snap closure.


I used 2 brown prints for the exterior.


Side view to see the depth of the bag.

She likes swinging in the tree!
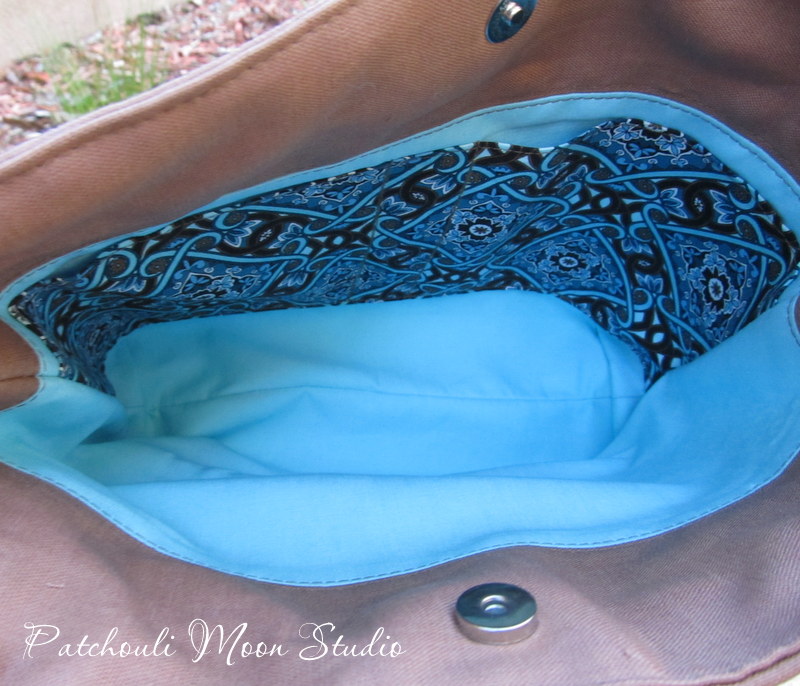
Lining.

Back of bag has a zippered pocket.
Linking to Bag It 2017

This bag has sold!
Pin It Now!
Related Posts Plugin for WordPress, Blogger...