Showing posts with label hobo bag. Show all posts

Tuesday, December 17, 2024

Celestial Curve Bag with Cross Body Strap

I had sold the corduroy bag with the floral print that I made and tested for ChrisW Designs, but then she later asked about lengthening the strap of that bag. I couldn't do that as the strap was both sewn and glued in place. I had no more of that floral print corduroy left, so I offered to make her a cross body bag instead of the fixed shorter strap of the original bag. I did have thin wale navy corduroy, so she wanted it.

I made the strap in the same print as the lining. The corduroy would have been not only too thick, but the nap of the corduroy would end up in 2 directions on a strap, which I didn't like either. I like that the strap fabric looks good and then when the bag is opened, you see the same fabric as the lining, so it ties it together.

Now that I made it with a cross body strap, which I wanted to do for me too, I know it works, although I may still want to tweak it a bit more where the strap connectors are installed. Not sure what I would change for sure, but it is still rather thick in that area. I will think about it before making another one.

navy bag in thin wale corduroy
For some reason it photographed more royal blue than navy blue, but it is navy blue. I guess the sun makes it look more blue?

peeking inside the bag
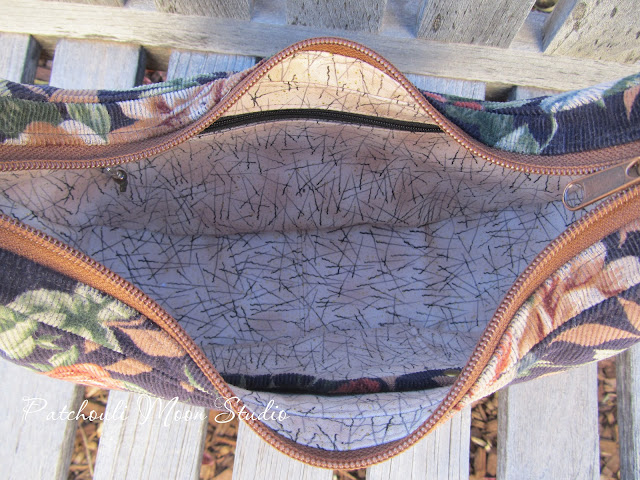
Inside is a slip pocket and a zipper pocket, plus the full gusset too.

inside view of slip pocket
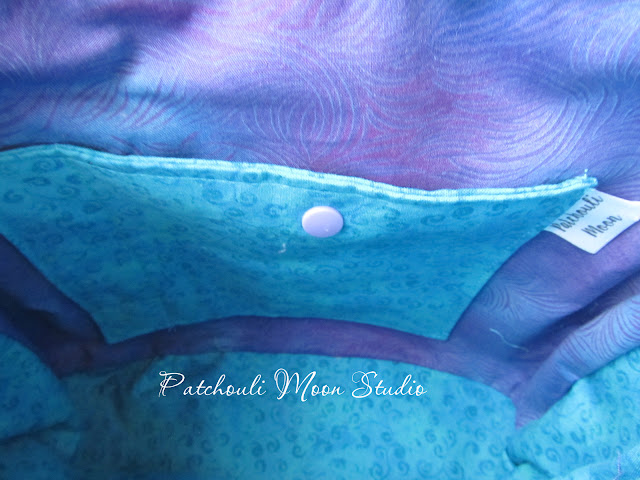
The slip pocket has a bit of the corduroy showing as trim at the top.

inside view of zipper pocket
There is a zipper pocket inside too.

Bag hanging in tree

looking down on zipper closure
Top view of zipper closure.

Navy thin wale corduroy bag

side view
Side view of the bag gusset.

bag bottom
Bottom view.

I love this bag shape!

Pin It Now!

Tuesday, December 10, 2024

Celestial Curve Bag(s) by ChrisW Designs

Celestial Curve Bag pdf (with video instruction too) is now available and it's ON SALE!  Designed by ChrisW Designs, who is a fabulous designer and has the best instructions! I tested these 2 bags for her. I love the shape and size of this bag! The bag features a zipper closure, a stand up handle thanks to the boning used in the handle, a full gusset both outside and inside, and a slip and a zipper pocket inside.

The exterior fabric requires 1/2 yard of fabric. I happened to have 2 fat quarters of the floral print (2nd bag shown) and could easily cut the exterior pattern pieces from those fat quarters. The first bag shown is from a large corduroy scrap that was also the right size. The lining take a bit more fabric due to the zipper and slip pockets that are inside the bag. Such a great looking bag in cotton fabric, vinyl or leather as you can see on the other tester's bags (links at the end).

This bag went together quickly and there is no hardware needed, just a couple of notions like a #3 zipper for the pocket and #5 zipper for the closure, plus interfacing, and stabilizers.

The Celestial Curve Bag measures 11" wide x 5 1/2" high x 3 1/2" deep.

This bag is in corduroy floral print
This corduroy bag is for sale in my PayHip Shop.

closeup of handmade tag

inside zipper pocket

peeking inside the bag

bag bottom gusset

inside slip pocket

top view of the zipper closure

This Celestial Curve Bag was the first one I made with the 2 fat quarters for the exterior. I love the bright happy floral print and colors of this bag! This one is for me!!!

The Celestial Curve Bag measures 11" wide x 5 1/2" high x 3 1/2" deep.

side view
Side view showing gusset.

bottom of bag
Such a pretty bag bottom 😂.

inside slip pocket
Inside slip pocket.

inside zipper pocket
Zipper pocket inside.

I might even make a third bag, since I love the size and shape soooo much!!!! But I will have to find just the right fabric in my fabric collection first.😄

Hurry and grab this pattern while the pdf is on SALE!!!

You can find the pattern in USD on the International website here: https://www.chriswdesigns.com/.../celestial-curve...
Find the Pattern in AUD on the Aussie website here: https://chriswdesigns.com.au/.../celestial-curve.../
See the Introductory Blog Post here: https://www.chriswdesigns.com/.../celestial-curve...
See a full Gallery of photos here: https://www.chriswdesigns.com/the-baguette-bag-gallery\
Video Trailer with Tester Photos: https://youtu.be/DLaVm3grILQ
Pin It Now!

Sunday, April 19, 2020

Ugly Naked Guy Hobo Bag

I made this (small size) Ugly Naked Guy Hobo (Sincerely Jen Pattern) bag last month. You might be wondering about the odd name of this bag, well Jen the designer likes to name her bags after names or phrases from the sitcom Friends.  So if you were a Friends fan, then you might understand. Other bags she sells have names such as, Central Perk Cross Body, Phoebe Mini Backpack, How You Doin' Bowler Bag, and more.

Anyhow, I made the small version of the bag here. I will make the large version another day. I noticed there was only woven interfacing and not fleece or foam for the bag, so I asked in her Facebook group if anyone had used fleece or foam and some did use fleece, but the idea of the bag is to have a bit of a slouch to it, even though the photos I had seen didn't look slouchy. So I decided to add fusible fleece also to the bag. It had 2 layers of fusible woven interfacing already, so adding fleece on top of that really made a nice feeling bag. In fact, if I didn't have foam and wanted a bag to be able to stand up on it's own, I would use 2 layers of interfacing and a layer of fleece. So happy surprise there resulted in another option for my bag making.

I am sure the 2 layers of interfacing alone would have looked very nice, but looking at this style of bag, I just couldn't see it being slouchy for some reason. I really love the look of the bag and it went together fine. While this bag is a pretty good size, I think the large one would work better for me; because while I don't carry a lot of things, what I do carry are large items.

I really love this fabric combination and was disappointed that my stuff didn't fit into the bag as I wanted it to. So a large UNGH (Ugly Naked Guy Hobo) will be made sometime. But since I did love this exterior fabric combination, I am making another bag in the same fabrics, just a different style and different designer, so stay tuned for that to be finished.

The bag features a front zip pocket and a zippered closure.

I added purse feet to the bottom.

Back of the bag. I think I will add a pocket to the large size bag that I make next time.

Zipper closure.

Inside the front zip pocket.

A zippered pocket and a slip pocket inside.

After dividing for a pen pocket on the left, I left the rest of the pocket larger and added a Kam snap too.
For sale in my PayHip Shop.
Pin It Now!

Sunday, September 8, 2019

Happy Hobo Bag in Patriotic Fabric

I made this Happy Hobo bag from a tutorial from Sew Can She. If you know me, you know I make changes to bags I make and usually add or subtract things from bags to suit my style. I made changes to this bag too. First off I am not fond of pleats on bags, so instead of doing the pleats, I used the lining pattern to make the exterior as well as the lining to avoid the pleats. Plus Caroline not only pleated the front (and back too) but divided the front into 2 sections with a seam down the center. I didn't see the need to do that either. She did a lovely embroidery on her Happy Hobo, but I don't have an embroidery machine and didn't want to hand embroidery either. I just wanted to try making this bag in a fabric. As I was going  through some prints, I found this one and decided I would make this a patriotic bag. I didn't have enough left for the strap, so I sewed 2 fabrics together to create a long enough adjustable strap and I really love the look of the strap! I had to get creative with the inside pockets too, which I actually love the look of those pockets. Funny how when I have to make do with what I have how I can be creative and end up loving the results even more.

So here she is~
The bag closes with a zipper.

The sides have a pocket. A cell phone would fit in just fine. However, if you have large hands, it might be hard to reach down into the pocket, so something like a cell phone where you can grab it from higher would what you would want to place inside the pocket and nothing like your spare change, lol!

On the back of the bag I added a zippered pocket. I love zippered pockets outside or inside to keep some things secure.

I make my zipper pulls and yes I do make everything with love.

Inside the bag the lining I used was the Pledge of Allegiance print. I had enough for the lining but not the pockets or the gusset. I didn't even have large enough pieces to make the pockets out of the exterior fabric, so I pieced the pockets creatively and love how they came out. Hard to get a decent photo inside the bag.

This is the pocket on the other side. I always try and add a pen pocket if the bag is tall enough for one to fit.

SOLD!
Pin It Now!
Related Posts Plugin for WordPress, Blogger...