Showing posts with label pieced bag. Show all posts

Thursday, December 12, 2024

Sew Powerful Purses #293-296 (2024)

4 purses with appliqué and pieced background on the flaps.

The purses on the left I fussy cut those motifs out of the fabric and appliquéd them onto the flaps. The 3rd from the left I cut the appliqués out from fabric and the 4th on the right was a fabric I cut as a circle to appliqué on the flap. I think the appliqué helped to brighten up these flaps.

flpas up

backs with pockets
Pockets on the 2 left purses.


Pin It Now!

Thursday, November 14, 2024

Sew Powerful Purse #219 (2024)

Using up some pieced stuff I made a long time ago and found recently to make a flap for purse. Here is one I came across and now it is a purse to donate to a sweet girl in Zambia.

Donating to Sew Powerful Purse Project.


flap up

back of purse with back pocket
Added back pocket.

Pin It Now!

Tuesday, December 26, 2023

Sew Powerful Purses #183-202 (2023)

I finished these 20 purses to donate to Sew Powerful in December 2023. I am still sewing a few more purses, so I hope to complete several more before the new year begins. I had cut out so many purse kits to have ready to sew during the September Sew-a-thon this year, so I really wanted to finish as many purses as I can before I need to cut more purse kits. 

Here are the 20 purse I completed~

This purse I made using a raw edge technique I came up with. It is heavily quilted and I used tiny scraps, all raw edge batiks on this flap. I couched yarn, added some buttons, and an iridescent material scrap too. I really love making the flaps like this! 

Showing the back of purse with upcycled denim jean pocket
I upcycled denim jeans for the purse body and this is the back of the purse with the front jean pocket. I flipped the flap up so you could see the entire flap, since a bit of it gets hidden on the back when the flap is folded over to the front side.

Closeup of decorative machine stitches sewn to the webbing strap
I also had done some decorative machine stitching down the center of the webbing straps on some purses. I wanted to try doing the stitches to see if it would work and it did! So I stitched up several webbing straps in various colors of webbing and used various variegated thread colors and different stitched designs too as you will se in a few of the purses below.

another upcycled denim purse, including the flap that I made using several scraps of denim in various shades of blue denim and black denim too. 

Closeup of decorative machine stitches sewn to the webbing strap
Another closeup of a decorative stitched webbing strap.

Showing the back of purse with upcycled denim jean pocket
Back of purse also has the front denim pocket for the back.

2 upcycled denim purses here. The one on the left I quilted scraps of denim that was all raw edge to keep it flat as too many denim seams can be a bear to stitch through! Then I added a butterfly that I appliquéd over the quilted denim. It just needed something else and I already had the butterfly appliqué cut out. The purse on the right is patchwork denim scraps sewn with seams and I added some ribbon and even a Levi label!

Closeup of decorative machine stitches sewn to the webbing strap
Closeup of another decorative stitched webbing from the denim purse on the right.

Showing the back of purse with upcycled denim jean pocket
These 2 purse backs have the patch denim pockets added to the back side and I stitched an appliqué heart onto each pocket. 

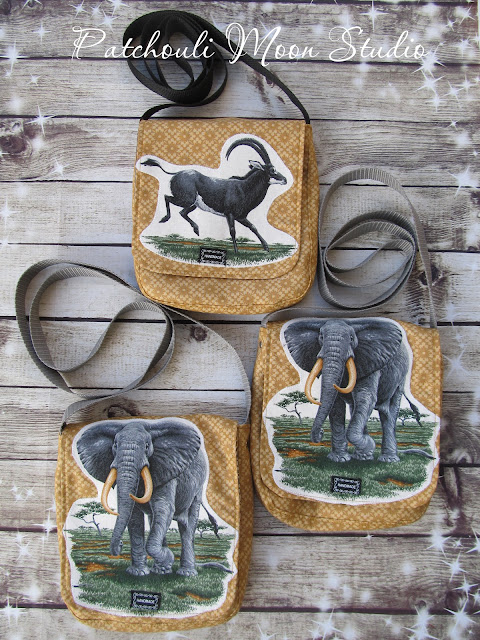
3 more appliqué flaps of wild animals.

This is a patchwork flap that started with the pentagon shape in the center. Those 3 buttons I stitched on by hand using making a little flower in the buttons with the embroidery floss.

Another patchwork scrappy flap with added heart buttons.

Closeup of decorative machine stitches sewn to the webbing strap
Closeup of another decorative stitch on webbing strap.

These 4 purses are scrappy patchwork and I sewed the flowers in the buttons on all of these as well.

These 3 are patchwork flaps. I added flower shaped buttons that I sewed on 2 of the purse flaps.

Closeup of decorative machine stitches sewn to the webbing strap
Closeup of decorative machine stitches on webbing strap from the one purse below.

Here are 4 purses with an African women print. I used red fabric for the gussets on all 4 purses, since I didn't have enough fabric to use for all the purses of this print. 3 of the purses I had enough to create the front and backs of the purses, but not for the fourth purse, so that body is all red. 


Pin It Now!

Saturday, April 23, 2022

Sew Powerful Purses #63-71 for 2022

Hello Sweet Purse Makers. I am here to show you 9 more purses that I made for the Sew Powerful Purse Project. For these purses, I used brown fabrics that I had in smaller cuts from a fat quarter to larger scraps. I used brown webbing for all of the straps. 

First, I like to cut the exterior fabrics: the front and back and the top narrow front and back pieces, the front pocket and the gusset. Then if I have enough of that fabric left, I will cut a back slip pocket too. Oftentimes when cutting the gusset, I will not have a long enough piece, so I cut the gusset in 2 pieces (plus I add a seam allowance) and then sew the 2 gusset pieces together. This allows me to use shorter fabric pieces and I automatically know where the center of the gusset is because there is the seam line. I topstitch on each side of the gusset seam too.

Next, I cut the lining main pieces (which I prefer to cut as one piece, rather than cut 2 pieces as the intermediate purse instructions have you do). It saves time not having to cut and then piece the top part on the lining, which is another step to do and it's only seen by the girl who chooses the purse. If I do not have enough fabric to cut the lining pieces, I will cut 2 different fabrics or piece the lining fabric to make it large enough. I will cut the pocket lining and the flap lining pieces next. If they are not the same fabric as the main lining fabrics, that is fine as it adds more interest for the girl to see all the different fabrics that were used in creating the purse and only she will see the lining. Again, if I don't have a large enough piece, I will piece it,

Last, but not not least, I will cut a foundation fabric like muslin or flannel and cut it slightly larger and then create the flap by piecing fabrics to the foundation. The foundation is used instead of interfacing as it is a bit sturdier, especially after I piece the flap. I often just piece the flap in a crumb or string no rules way, rather than piece a specific quilt block. That way it sews quicker and I can use up any scrap I like. Once the piecing is done and pressed, I quilt the piece and finally I like to add a pop of color to the flap by blanket stitching an appliqué like a flower, heart, or something else to the flap. Usually I do not have enough exterior fabric left to cut a flap piece and this way I use up scraps from the current purse I am sewing, but also some scraps from other purses I am making too. I will add a bit of the lining fabric to the purse flap too, whether it is in the same color family or not. By piecing the flaps I am able to use up a lot of scraps that are leftover from the cutting of the rest of the purse. I may take a bit more time to create the flap in this manner, but I get to be creative too, which I love. Once the appliqué has been sewn in place, I give the flap a press and then cut the flap out to the size in the pattern. The last thing I do before sewing the lining to the flap is to add any embellishments such as buttons, lace, trim, rickrack, hand embroidery, etc.
 

Back pocket
I added a back slip pocket to all of these purses, but am only showing you 2. The pocket matches the exterior fabric. By adding a back pocket, there are 2 pockets: one under the flap at the front of the purse and one here on the back. The intermediate purse has no inside pocket, so it makes it quicker to sew.


Back Pocket on purse
Another back pocket.


I used a 5 sided piece of fabric to start the piecing on this flap and liked how it looked, so opted to not add any appliqué, but just keep the crazy quilt look instead. Added buttons was all it needed.

For this flower, I first pieced yellow scraps together to create a larger piece and then used a flower die cut to cut out this flower. Piecing the flower first gave it a different look.

Close up of the scrappy yellow appliqué flower
Closer look at the pieced then appliqué flower. I pieced several yellow blocks like this, so I can cut more scrappy flowers for more flaps.

Most of the appliqué I used above were things I had cut out years ago to use on other things I was making, but I didn't use them for one reason or another, so I put them in a box and thought I might use them for something else. Well, it sure saved time having so many appliqué shapes already fused and cut ahead of time.

We need to include a notecard in the front pocket of each purse we make too, so I created some notecards using some of the fused appliqué I had already too. They make nice notecards with fabric appliqué on the front. I have enough scraps of fabric and with die cuts I can cut up a lot of shapes to be used for the cards as well. I will share the notecards I made on a blog post another day.

Pin It Now!

Saturday, June 19, 2021

Sew Powerful Purses #59-63

5 more purses made for the Sew Powerful Purse Project.

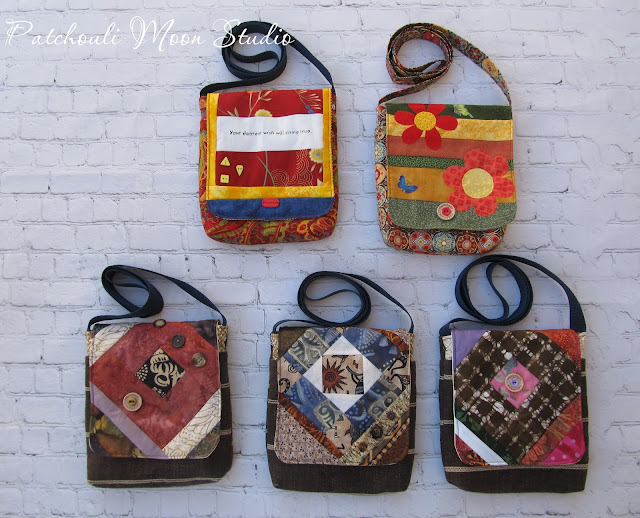
5 pieced purses and one with applique flowers.
I used up some already made quilt blocks for the flaps of these purses. The purse on the upper left was a quilt block that I had made that I wrote a fortune cookie saying on. I made several quilt blocks with different sayings on them that was intended to be made into a Fortune Cookie Quilt, someday. Well that never happened, so you will be seeing all those blocks slowly become purses through the magic of sewing. In case you cannot read what the fortune says here it is: "Your dearest wish will come true".

Flaps of purses up to see the inside and the "you look beautiful" label
The brown fabric with a stripe were pillows that came with a sofa we had several years ago. Didn't even use the pillows. So I washed the cases and cut our purse pieces with them. I got 6 purses made using the fabric from the pillows. I still have to sew up 3 more of them, so you will see those when they are finished.

Pin It Now!

Sunday, May 23, 2021

Emma Cross Body Bag with Pieced & Applique Flap

I wrote another tutorial that you can find over on ChrisW Designs blog. I show you how to make a pieced flap (or bag) and a pieced flap with applique and embellishments. I made the Emma bag, which is a fun, quick sew that is perfect for little girls, teens or for someone that doesn't need to carry a ton of stuff with them.

I actually made 2 Emma Bags, but the first one here is what I use in the tutorial. The second Emma I pieced the entire bag and quilted it and added an applique on the flap. The tutorial is just a guide to get you going so you can do your own thing.

I pieced the background, added an applique heart, quilting and crystals on the flap for bling. I also made Kumihimo strap (Japanese Braiding).

On this Emma, I pieced the entire bag and added a heart applique on the flap. (I Donated this bag to raise funds for Alzheimer's Disease 2022)

I made a Kumihimo strap for this bag too.
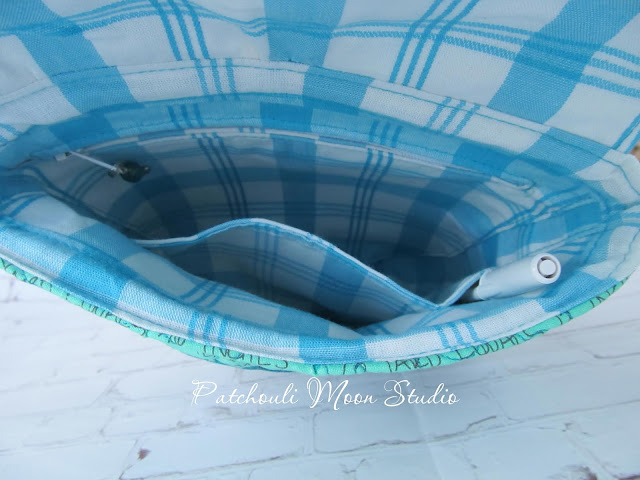
Inside Emma is a slip pocket and a zipper pocket.

Check out my tutorial over at ChrisW Designs blog. 

Pin It Now!
Related Posts Plugin for WordPress, Blogger...