Showing posts with label decorative machine stitches. Show all posts

Tuesday, April 15, 2025

Sew Powerful Purses 66-68 for 2025

3 denim purses donated to Sew Powerful. These were upcycled denim jeans that I turned into purses. Decorative stitches, yarn couching and buttons were added to the flaps. I even sewed a decorative stitch on the one webbing strap.


flaps up
Front jeans pockets for the front of 2 purses adds an additional pocket to the front.

backs with decorative stitches
Scrappy denim with decorative stitching on the backs of the purses.

Pin It Now!

Monday, April 14, 2025

Sew Powerful Purses #64-65 for 2025

Another 2 purses donated to Sew Powerful. The purse flap on the left I stitched decorative machine stitches, rickrack, couched yarn, added French knots by hand, buttons, ribbon with words, and crystals. The purse on the right I painted the background using a stencil and added an appliqué flower with double stacked buttons for the center of the flower. I love creating and experimenting on the flaps.


flaps up
Denim purse body on left and cotton print on right.

backs with pockets
Purse on left I even stitched a decorative stitch down the webbing. Needed to add a fabric strip to make pocket wider for the right purse back pocket.


Pin It Now!

Sunday, March 30, 2025

Sew Powerful Purses #48-54 (2025) Made from Starbucks Aprons

These 7 purses that I am donating to Sew Powerful were made upcycling 4 Starbucks aprons. My daughter works at Starbucks and when she got new aprons she was getting rid of these, and of course I thought Purses! She had 3 red and 1 green apron and I was able to get 8 total purses out of the 4 aprons. I had already posted one green purse body with an appliqué flower on the flap using the green apron here. Thanks sweet daughter! 8 girls will benefit from me making 8 purses for them to stay in school all year. Yay!

I got 4 purses with the Starbucks logo for flaps and had to make 4 more more total flaps (the one I mentioned above in green) and the 3 raw edge quilted flaps further down below. The aprons all have 2 front pockets and I used one of the apron pockets (plus a bit more fabric around the pocket) for each of the total 8 backs with the aprons pocket still attached, so no need to make a pocket, yay! I also pieced together enough of the apron neck straps to create 2 purse straps and I used webbing for the other purse straps.

 The Starbucks logo is a two-tailed siren, which is inspired by the Greek myth of the Sirens, who lured sailors to their deaths with enchanting songs, and represent the company's connection to the sea and Seattle, where it originated. Nice, huh? 😬

4 purse fronts with Starbucks logo and decorative stitches and embellishments
The logo was up high on the apron, so I couldn't bring it down more. I wanted to add embellishments on the flap so it looked more appealing and so I used rickrack, lace, buttons, crystals, machine blanket stitches and some French knots.

4 backs showing the back pockets from the Starbucks aprons
The back of the purses show the apron front pockets.

closeup of one back pocket from apron
Closer look at the apron pocket on the back.

3 purse fronts with raw edge scrappy flaps and Starbucks apron bodies
I had to create flaps to go with the remainder of the apron fabric that I used for these purse bodies, so I added raw edge scraps and quilted them. I added embellishments of buttons & couched yarn.

closeup of decorative flap
Closer look.

Another decorative flap closeup
Another purse closeup.

a third closeup of decorative flap
3rd purse closeup.

3 purses with back pockets from aprons
These all had the apron pockets I used on the backs too.
Pin It Now!

Wednesday, February 5, 2025

Tonia Mini Moto Cross Body Bag

This is such a sweet bag. It's the Tonia Mini Moto Bag by Swoon Patterns. I wanted to make a small bag for myself and decided on making this one, but as a cross body bag instead of a clip on hip bag. I also wanted to do a decorative machine stitched flap too with added embellishments. I added a back zipper pocket with a zipper overlay instead of the back slip pocket. I added the slip pocket inside the bag and shortened it and I also added the inside zipper pocket too. So my bag has 3 pockets instead of 2. I also made a few more changes I will point out in the photos.

The bag measures 6" wide x 6" high x 2" deep. It's a nice size if you just carry a few items, which I am doing these days more and more. I always have the option of enlarging this bag if I do want a larger size, but I think I will be using this size and see if I need any more space or not.


I had fun making this bag!

I had a fabric that had some of the same colors as the fabric in the body, so I used it to stitch the decorative stitches on so they would show up. I added rickrack, buttons, crystals, French knots by hand, along with the machine decorative stitches. It makes this a one-of-a-kind bag for sure!

side view showing the riveted straps
I tried something new that I saw on a bag a few years ago and that is to add vinyl across the top and bottom of the strap connectors to cover the raw edge at the bottom of the connector and anchor the connector in place at top and bottom with stitching and rivets. Got a rivet a bit off center there 😁😜! Well this bag is mine, so I can live with that, 😆. The strap, D-rings and adjustable slider are 1/2" wide, which is narrower that I usually make my straps, but I wanted a narrow strap on this bag.

bag bottom
For a small bag the depth of the gusset is nice and ample. I love bags with gussets!!!

flap up to show lining and snap closure
I used a magnetic snap closure as my other closures were too large for this small bag. I also riveted a Handmade tag onto a scrap of the rainbow vinyl.

inside bag showing pockets
Inside is a larger slip pocket with a pen pocket and a plastic snap to close the larger pocket. Zipper pocket is across as you can see the zipper pull on the right.

another inside view
Hard to get a good photo inside when the bag is small. Inside the bag showing the slip pocket. I divided for a pen pocket and then added a plastic snap closure for the larger pocket section. Zipper pocket is across from this pocket. The lining even has a gusset too.

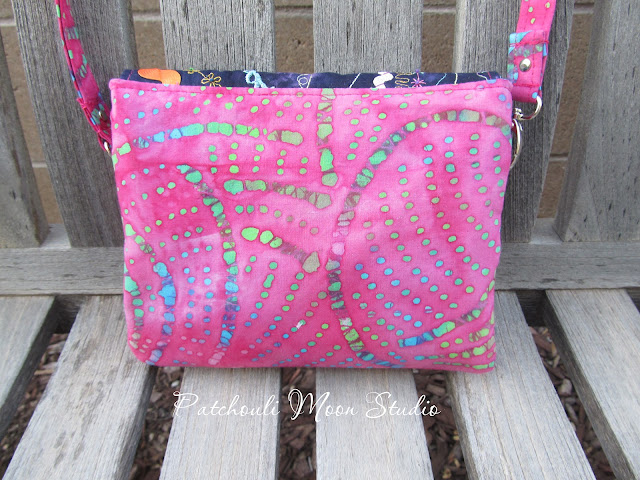
back of bag with zipper overlay
Back zipper pocket with a rainbow vinyl overlay.

back zipper pocket unzipped
Unzipped pocket.

Pin It Now!

Monday, November 11, 2024

Sew Powerful Purse #218 (2024)

A denim purse made by upcycling jeans. I added an appliqué bird using batik fabrics and some hand embroidery stitches and machine stitches too.


back with pocket and machine stitches
Back pocket using strips of denim and decorative stitches.

closeup of bird appliqué
Bird appliqué closeup.

flap up showing front jean pocket
Jean pocket on front provides an extra pocket.


Pin It Now!

Sunday, November 10, 2024

Sew Powerful Purse #217 (2024)

Upcycled denim jeans purse. Not only did I upcycle the denim jeans for the purse body, but I used raw edge denim jean scraps to create the flap, along with some decorative machine stitching. A few added buttons for embellishment too.


Raw edge patchy denim jeans scraps with lots of decorative machine stitching to create the purse flap.

back pocket
Back pocket.
Pin It Now!

Saturday, September 28, 2024

Girlfriend Cross Body Bag with Decorative Stitches Flap

I wanted to make a bag with a flap and stitch decorative machine stitches and added rickrack and embellishments. 

This is the Girlfriend Bag by Imazz Patterns. I tested this bag years and years ago for Imazz. It can be made as a clutch, wristlet or cross body bag. Imazz really liked the Girlfriend Bag that I tested and she even has photos of that test bag I made on her Etsy Store. Click the link above and see a few Girlfriend Bags, including mine.

The bag measures 8" wide x 6" high.

This time I wanted to make a more shapely flap on this one, so I made the flap longer and shaped the bottom of the flap like the in the photo below. I love how the flap turned out!

This bag is so cute. It has a zippered compartment pocket under the flap, a slip pocket with a zippered pocket inside it and a secret little slip pocket between the other 2 pockets. I really loved how it all came out.  

I love the separate places to put things inside, I love the flap (with or without the way I shaped it and decorated it), I love the lighter feel of this bag as it doesn't put stress on the body (especially a shoulder) and the strap can be removed and carried as a clutch or make a wrist strap and carry that way too on occasion. 

I listed this bag for sale in my PayHip Shop with special pricing for a limited time only.

front view of bag when empty
Here is the front of the bag.


side view when bag is empty
Side view.

back side when empty
Back side of bag.

flap up when empty
Flap up showing the front of the bag.

view inside when bag is empty
Looking down inside of the bag. Here you see the front zippered pocket, the back slip pocket with a zippered pocket inside of it and the hidden center slip pocket is quite hidden in this photo.

zipper pocket inside when empty
Looking down inside the bag with the zipper compartment pocket unzipped. The secret slip pocket is in between the zipper pocket in the front and the back slip pocket.

View of inside secret slip pocket
To get a better look at that hidden secret slip pocket, I used my lip balm to keep the pocket opened up
 for the photo. Say "ahh". By the way that is great lip balm!!! Comes in lots of flavors too. I like the grapefruit flavor the best and this lime flavor a second best and it's made right here in New Mexico too, in Santa Fe! Yay!

Check this out in my PayHip Shop. Limited time special price. Thanks for looking.

Pin It Now!

Wednesday, July 24, 2024

The Allure Bag with Decorative Stitches on the Flap

I was contacted to make a custom bag for a woman who has purchased other bags from me before. She wanted the Allure Bag (she bought this Allure bag from me a while ago), but she wanted it to have decorative stitches on the flap like this Fiona's Freeway bag I made that she also bought from me awhile back. The Allure bags that I have made are all made at 85% from the original Allure bag size, because after testing The Allure, I found it to be rather large, but at 85% it is a nice size.

The Allure is a ChrisW Design bag. I have tested bags for Christine for over 10 years now and she has the best instructions and really great way of sewing certain things too. So I did sew a few things like other bags I have tested for Christine. I added a zipper overlay on the inside zipper pocket and I quilted the bottom of the bag too, like Christine now does in some of her bags, but the instructions for the Allure doesn't have a quilted bottom or zipper overlay, but it does have her signature hidden phone pocket on the back of the bag.

 The original Allure measures 13 1/2" at the widest point x 10 1/2" at the base x 10" high x 6" deep, whereas the reduced 85% size I made here is approximately 11 1/4" at the widest point x 8 3/4" at the base x 8 1/2" high x 5" deep.

Decorative machine stitches, rickrack, buttons, crystals and hand French knots.

back side
The back side of the bag. I used purple batik and faux cork (cotton fabric).

First time adding a flip lock closure too. I usually do a magnetic snap, but I got some flip locks on sale and wanted to try it.

Flap up


Inside slip pocket
I added a divided slip pocket with 2 pen pockets on the sides. The lining is a batik fabric too.

Zipper pocket inside with vinyl overlay
Zipper pocket with a vinyl overlay.

hidden phone pocket
Hidden phone pocket on the back.

Quilted bottom of bag
Quilted bottom.

Side view
View from the side.

Inside view
Vinyl zipper overlay in pink.

Adjustable strap to wear across body or on shoulder.

She should be receiving this bag by Saturday. I did show her these photos, but there is nothing like seeing it in person.

Pin It Now!
Related Posts Plugin for WordPress, Blogger...