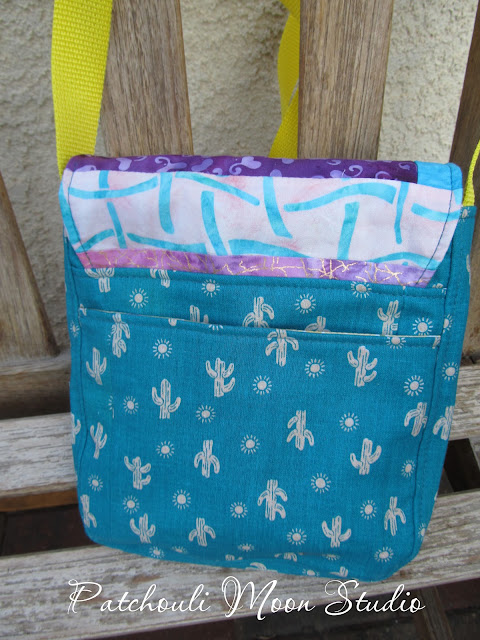
Tuesday, July 30, 2024

Sew Powerful Purses #144-147 (2024)

I bought a New Mexico State panel fabric a few years ago. The panel had a couple of sizes of these panels with the maps and the state outline with the roadrunner (our state bird) on them. I decided to make purse flaps with the panels. I made 2 of each of the panels, adding more fabric to bring the panels to the required flap size. I used a lavender canvas-like fabric for the purse bodies. I will put a couple in the gift shop to see if they sell first and donate the money to Sew Powerful if they sell or donate the purses to a few Zambian girls if they don't sell. Time will tell what will happen. Either way it's a win-win for Sew Powerful.


flaps up
The flap lining fabric was a jewel print that was donated to me, so I used it for the lining as the jewels were large and would have been cut off no matter what I used them for.

back with pocket
I added a slip pocket on the back side of the purses too.


Pin It Now!

Saturday, July 27, 2024

Sew Powerful Purse #143 (2024)

I made this purse with a stencil of an African woman. It is not the first one I made like this with a stencil, but I cannot find the first one 😜so it must be buried deep in one of the bags of kits I made. I did stencil several flaps with this stencil and some others stencils too.

The background I used the cut off end of a head of lettuce and stamped all over the fabric first with that. The lettuce end looked like a flower to me. Then I used the stencil over that. I am not as wild about how this one turned out because the background stamping and the stencil seemed to overwhelm each other. So lesson learned there. The other backgrounds I did were much better. I do love this stencil though.

Lettuce end used as a stamp for the background. I added crystals as a necklace. A few French knots and straight embroidery lines on her head wrap too. 

Back side
Back side of purse.

flap up
I like the paisley print. It is a lightweight canvas material.


Pin It Now!

Wednesday, July 24, 2024

The Allure Bag with Decorative Stitches on the Flap

I was contacted to make a custom bag for a woman who has purchased other bags from me before. She wanted the Allure Bag (she bought this Allure bag from me a while ago), but she wanted it to have decorative stitches on the flap like this Fiona's Freeway bag I made that she also bought from me awhile back. The Allure bags that I have made are all made at 85% from the original Allure bag size, because after testing The Allure, I found it to be rather large, but at 85% it is a nice size.

The Allure is a ChrisW Design bag. I have tested bags for Christine for over 10 years now and she has the best instructions and really great way of sewing certain things too. So I did sew a few things like other bags I have tested for Christine. I added a zipper overlay on the inside zipper pocket and I quilted the bottom of the bag too, like Christine now does in some of her bags, but the instructions for the Allure doesn't have a quilted bottom or zipper overlay, but it does have her signature hidden phone pocket on the back of the bag.

 The original Allure measures 13 1/2" at the widest point x 10 1/2" at the base x 10" high x 6" deep, whereas the reduced 85% size I made here is approximately 11 1/4" at the widest point x 8 3/4" at the base x 8 1/2" high x 5" deep.

Decorative machine stitches, rickrack, buttons, crystals and hand French knots.

back side
The back side of the bag. I used purple batik and faux cork (cotton fabric).

First time adding a flip lock closure too. I usually do a magnetic snap, but I got some flip locks on sale and wanted to try it.

Flap up


Inside slip pocket
I added a divided slip pocket with 2 pen pockets on the sides. The lining is a batik fabric too.

Zipper pocket inside with vinyl overlay
Zipper pocket with a vinyl overlay.

hidden phone pocket
Hidden phone pocket on the back.

Quilted bottom of bag
Quilted bottom.

Side view
View from the side.

Inside view
Vinyl zipper overlay in pink.

Adjustable strap to wear across body or on shoulder.

She should be receiving this bag by Saturday. I did show her these photos, but there is nothing like seeing it in person.

Pin It Now!

Monday, July 22, 2024

Alaska Salmon Quilt (Something Smells Fishy Blog Hop)


Eww! Something sure smells fishy around here! Oh yeah, it's time for the Something Smells Fishy Blog Hop, hosted by Carol of Just Let me Quilt.

In 2016 when I was in Washington state to celebrate my mom's 90th birthday, my sister, my daughter, my nephew and I took the ferry across to Seattle. We went to Pike Place Market and then we walked to a quilt shop called, Undercover Quilts. Unfortunately that shop has since closed, but they have an Etsy Store by the same name, but they are on a break until sometime in August. Anyhow, while I was at the quilt shop I bought a couple of patterns and Salmon Boy  was one of the patterns I bought. I never made the quilt until now. Sometimes a blog hop can light fire under you to get you going to make or finish a project, so thanks Carol, I needed this blog hop to get this one made!😁😉

I bought the pattern only (not the laser cut), so it was a bit tedious to cut out the salmon, but not as bad as I thought, which was probably one reason I kept putting it off 😄!

All done now. I quilted the background, but only fused the salmon and the salmon eggs onto the quilt. I wasn't going to stitch around all those tiny areas!😜😬It's a wall hanging, so it won't get washed or used like a cuddle quilt would.

Quilt measures 16" high x 29" wide.

I chose to use a salmon color hand dyed fabric for the salmon. The pattern showed using a dark salmon. I quilted wavy lines to simulate water movement.

I cut this out by hand. I didn't do too shabby of a job.


And here is the tail end of the salmon, which means this is also the end of my blog post, 😄.


Check out the other FISHY 🐠🐟🎣 Blog Hop Participants:


Pin It Now!

Saturday, July 20, 2024

Something Smells Fishy Blog Hop Starts Monday July 22-25, 2024

Carol, of Just Let Me Quilt is hosting this blog hop. I know I am looking forward to seeing what fishy projects everyone has come up with. Come back on Monday to see what the first participants are sharing.


Pin It Now!

Wednesday, July 17, 2024

Sew Powerful Purse #142 (2024) for ME!!!

I made 3 similar flaps like this one. The first one was during the Flaps of Friendship, where we exchanged flaps with someone else and that person then completed the rest of the purse and I also completed a purse from a flap I received (well 2 flaps as I joined twice). This was like the second flap I sent to someone. I liked it so much when I made the first one, I made 2 more. The other one I did a bit differently with a purple flower and a swirl in the center of the flower.

I used my husband's upcycle gray pants to make the exterior of the purse. 

The background fabric was a donation and I was able to get 3 flaps using it, but I had to add a strip at the top to make it tall enough on all 3.

side view shows rivet and decorative strap stitches
I used a decorative stitch on the webbing.

flap up to show front pocket from upcycled pants
Front of the purse is where I used the front pocket of the pants, which has 2 pockets, plus the pocket I created as per the pattern.

closer look at front pocket

Inside view showing divided slip pocket
I added a slip pocket with a pen pocket inside this purse. 

Inside divided slip pocket with pen pocket and pen
Inside slip pocket divided by a pen pocket.

back side with slip pocket
The back has a large slip pocket.


peeking into back pocket
Peeking inside the back slip pocket.

I really loved how this purse turned out and I thought I did a great job making it, but then this happened:

I wore this when we went out one day and was told it didn't look good on me. I know it was because the strap cut through my large chest. I couldn't get that out of my head though. My feelings were hurt😢, but I am built the way I am built and I cannot change that, even if I lost a lot of weight I would still be large in the chest. So I ended up cutting the strap at the sides and leaving enough of it to wrap around strap hardware rings. Then I made a wider strap and thread them through the rings. I thought I had measured correctly and made the strap 1 1/4" wide, but it came out 1 1/2" wide. 1/4" isn't that big of a difference, but the original strap was 1" wide, so 1/2" is more noticeable and the new strap looks so out of balance now with the smaller bag size😭. I don't know if I should make another strap now or just use it as it is. I shouldn't have listened and just wore it like I made it in the photos above. I don't even want to share how it now looks. I cannot even donate it because I added the hardware, so I would have to remove all that and add the webbing strap back again and patch together the parts that were cut off in order to have the proper length of strap. Ugh!

So all that got me thinking about what does look good on me? Maybe I need to stop wearing cross body bags altogether? But I love the hands free aspect of a cross body bag. I cannot wear shoulder bags as they are constantly slipping off my shoulder and if the bag is too heavy, it hurts my shoulder. I thought about a sling, which can be worn on the back like a backpack or in the front across the chest, but if I wear it like that, it will just be the same issue again. I have backpacks and I like them, but if I am just popping to the store having to take the backpack off and on can be a pain, but they are great for going to shows and such. I am sure wearing a backpack also emphasizes my chest too!

Then there are fanny packs-waist or hip bags. I suppose that would make my waist or hips look larger or if worn like a sling in front across my chest I am back to the same problem again! I even thought about making a small bag that ties like an apron around the waist, like they wore hundreds of years ago. But why shouldn't I just make and use a bag that I like? Why should someone else's opinion on how I look even matter? I need a bag to carry my stuff and it needs to please me in the style, color, size and the function of the bag, and not someone else. If I am told that again, I will empty out the contents of my bag and just let him carry it all then!😠Thanks for letting me get this off my big chest!


Pin It Now!

Tuesday, July 16, 2024

Sew Powerful Purse #140-141 (2024)

2 more purses made using the Kokopelli squares I cut from a fabric with these Kokopelli's in a few colors. I sewed around the Kokopelli squares with batik scraps and used a cactus print for one exterior body and batik for the other exterior body.

I will donate these 2 purses to Sew Powerful Purse Project. I did take 2 other Kokopelli purses, similar to these, in to the gift shop to see if any would sell and I sold one in June, but so sales at all are happening yet in July. Even if the second purse there does sell, it will be almost time for Balloon Fiesta intake and I am making some hot air balloon purses now to take in (in September) and see what happens. If I sell any of the purses, the money I make will be donated to Sew Powerful and if they don't sell, the purses will be donated, so it's a win-win either way.

I added to Kokopelli's facing each other in this purse flap.

flap up
Cactus and sun exterior body with batik flap lining.

Lining view
Lining fabric.

back of purse with pocket
Back side with a slip pocket.

one Kokopelli with batik scraps sewn around him.

Flap up
Batik for the exterior of the purse and the flap lining.

lining view
Lining inside.

back side with pocket
Back of purse with a slip pocket.
Pin It Now!

Monday, July 15, 2024

Emma Half Moon Bag in Echinacea Print

I made this Emma Half Moon Bag for myself! When I tested this bag pattern for Around the Bobbin patterns a while back, I made one for my Aunt in opera and music print fabrics. She is a retired singer.

I knew I wanted to eventually make this style for myself and I chose my favorite flower print fabric to make mine. The Echinacea Glow is by designer Anna Marie Horner.

The bag measures 12" wide x 8" high x 3" deep

Front of bag
I love the shape and style of this bag! And of course my favorite flower print! Echinacea (or coneflower) is my favorite flower, with sunflowers being a close second favorite.

closer look at front
Front of bag with a zipper closure. I have my stuff inside so it looks full.

Side view showing gusset, strap tabs and rivets
I added the strap tab to the outside upper gusset. I stitched and riveted in place and added a strap end as well.

Back side of bag with slip pocket that closes with a magnetic snap. (I really thought I had aligned the fabric to match just perfectly before I cut the pocket, but apparently not!😛😬 Oh well this bag is for me and the back side will be against my hip so no one will see it.

My keys inside back pocket
Back pocket with my keys inside.

My stuff inside bag
My stuff inside.

Zipper overlay inside
I added a zipper vinyl overlay to the inside zipper pocket.

divided sliup pocket inside
Divided slip pocket on one side of inside.

Quilted bottom of bag


Pin It Now!
Related Posts Plugin for WordPress, Blogger...