Hello fabric postcard lovers. I made eleven fabric postcards this year for the annual Make a Wish fundraiser that happens during the Sisters, Oregon Outdoor Quilt Show. My favorite quilt show!
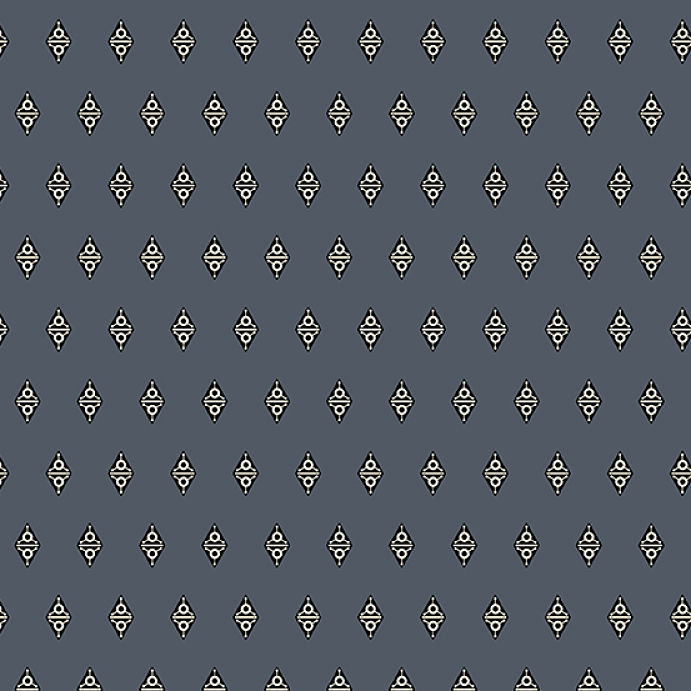
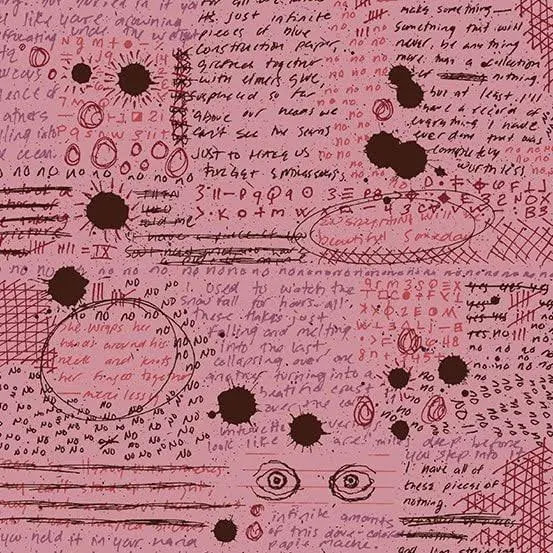
This year the 2 fabrics chosen are from Andover Fabric and designed by Giucy Giuce from his Fabric from the Attic and Fabric from the Basement lines. The pink fabric is Rant- Dried Orchid and the dark print is Alien Diamond- Shirt.
Postcard Challenge: Create a fabric postcard using BOTH of the two challenge fabrics shown below. Cards will be juried with cash prizes for the top three selections, and then matted and framed for silent auction.
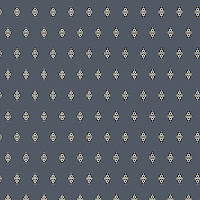 |
| Alien Diamond- Shirt |
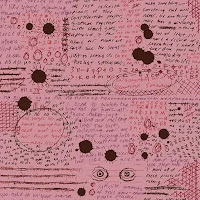 |
| Rant- Dried Orchid |
I created eleven cards total (I requested 6 sets of the fabric though, as I knew I could create more than 6 cards from each set). I always have fun making these cards. I have had several of my postcards framed to be sold for more money than just the postcard itself (which are also sold, but for less money). It's an honor to have my cards chosen to get framed, although I usually am not told what cards, if any get framed. I have a friend who attends the show and lives nearby and she tells me and takes photos, but I wish they would inform us postcard makers and send us a photo of all the cards we make that they frame, as it would be great to know that and see it too, especially if we cannot attend the show. Only one year did I get an email that they framed one of my cards and emailed me a photo of it. I guess they have different people volunteering (or staff?) each year, so it is up to that person?
Here are my postcards. I machine blanket stitched around most of the appliqué shapes, added some hand embroidery like French knots and backstitching on some cards. I added some hot fix crystals on a few cards for bling. I hand blanket stitched around each card along the outside edge to hold the layers together.
.JPG "Patchouli Moon Studio~ Eleven Fabric Postcards for Sisters (Oregon) Outdoor Quilt Show Wish Contest 2023") |
| I used Crafter's Edge die cuts to cut out the Canning Jar and the Hearts. |
.JPG "Patchouli Moon Studio~ Eleven Fabric Postcards for Sisters (Oregon) Outdoor Quilt Show Wish Contest 2023") |
| I cut these shapes out from die cuts also. Circles, a diamond that I cut on half for the ears and the tip of the diamond for the nose. I hand stitched on the whiskers, which are slightly crooked for a bit of whimsey, as well as those cockeyed eyes, lol! |
.JPG "Patchouli Moon Studio~ Eleven Fabric Postcards for Sisters (Oregon) Outdoor Quilt Show Wish Contest 2023") |
| I tried something different and new to me for the outside edges of the postcard on this one. I saw a video showing how Susan Carlson did the edges of one of her art quilts using scraps. She glued the scraps on all around the quilt. The scraps blended well with her quilt. I thought I would give it a go on a postcard and see what I thought. I only did this one that way. I think that edging would maybe look better on a larger quilt, rather than a small postcard (4" x 6" are the size of these postcards). Do you have an opinion about the scrappy edge? Like it? Don't like it? Check out the video I watched at the end of this post. |
.JPG "Patchouli Moon Studio~ Eleven Fabric Postcards for Sisters (Oregon) Outdoor Quilt Show Wish Contest 2023") |
| A pink sunflower. One of my favorite flowers are sunflowers. |
.JPG "Patchouli Moon Studio~ Eleven Fabric Postcards for Sisters (Oregon) Outdoor Quilt Show Wish Contest 2023") |
| More die cuts used here. A pentagon for the flower and a tumbler die cut for the pot. |
.JPG "Patchouli Moon Studio~ Eleven Fabric Postcards for Sisters (Oregon) Outdoor Quilt Show Wish Contest 2023") |
| Besides sunflowers, I LOVE Echinacea (coneflowers)! This is my favorite flower. Cannot grow them, darn! I tried from seed and plants and they just don't grow at all, even though they sell both plants and seeds here. Must be doing something wrong or it's too cold or too hot? So I will create them in my quilting instead. |
.JPG "Patchouli Moon Studio~ Eleven Fabric Postcards for Sisters (Oregon) Outdoor Quilt Show Wish Contest 2023") |
| Under my Tip of the Morning Tuesday page, I have a tutorial for how I create this kind of flower. I start with a circle (using a die cut for me) and then show you how to make cuts. This flower always looks great, even if the circle or cuts are wonky. As in nature, nothing is perfect. |
.JPG "Patchouli Moon Studio~ Eleven Fabric Postcards for Sisters (Oregon) Outdoor Quilt Show Wish Contest 2023") |
| Made this with more die cuts: a teacup, hearts and flowers. A touch of hand embroidery and some crystal bling. |
.JPG "Patchouli Moon Studio~ Eleven Fabric Postcards for Sisters (Oregon) Outdoor Quilt Show Wish Contest 2023") |
| No die cuts used here! I drew this one out myself. I wanted another coneflower and a bee on it. A jumbo bee, lol! I was looking for something to use for the wings and I was recently given something that was tied with a variegated organza ribbon, so I fused some fusible we to the ribbon and I created the bee's wings. Added 3 crystals for a bit more bling to the wing. Wing bling? LOL! |
.JPG "Patchouli Moon Studio~ Eleven Fabric Postcards for Sisters (Oregon) Outdoor Quilt Show Wish Contest 2023") |
| For this card, I wanted to do a reverse appliqué, so I first sewed an under layer crazy quilt style and then cut out the flower in the center of the dark fabric (used a flower die cut) and machine blanket stitched it in place. As you can see the blanket stitching is biting into the background, since it is reverse appliqué. A bit of crystal bling was added too. |
.JPG "Patchouli Moon Studio~ Eleven Fabric Postcards for Sisters (Oregon) Outdoor Quilt Show Wish Contest 2023") |
| More die cuts, this time I used ovals to create the butterfly. I do have a butterfly die cut, but it was too large for the postcard, so I only used the center body from that die cut to create this. |
.JPG "Patchouli Moon Studio~ Eleven Fabric Postcards for Sisters (Oregon) Outdoor Quilt Show Wish Contest 2023") |
| I used 3 different rubber stamps to stamp the Postcard Stamp onto the backside of each card. Just showing this one here so you get the idea. |
.JPG "Patchouli Moon Studio~ Eleven Fabric Postcards for Sisters (Oregon) Outdoor Quilt Show Wish Contest 2023") |
All eleven cards together.
|
The deadline for entering the contest to be juried is May 4, 2023 (cards need to be received by this date). However, they accept ALL postcards (using any or all of your own fabric, not just the contest fabrics) through June 10, 2023.
Pin It Now!

.JPG "Patchouli Moon Studio~ Genevieve Bag in Batik Fabrics")

.JPG "Patchouli Moon Studio~ Genevieve Bag in Batik Fabrics")
.JPG "Patchouli Moon Studio~ Genevieve Bag in Batik Fabrics")
.JPG "Patchouli Moon Studio~ Genevieve Bag in Batik Fabrics")
.JPG "Patchouli Moon Studio~ Genevieve Bag in Batik Fabrics")
.JPG "Patchouli Moon Studio~ Genevieve Bag in Batik Fabrics")
.JPG "Patchouli Moon Studio~ Genevieve Bag in Batik Fabrics")
.JPG "Patchouli Moon Studio~ Genevieve Bag in Batik Fabrics")
.JPG "Patchouli Moon Studio~ Genevieve Bag in Batik Fabrics")
.JPG "Patchouli Moon Studio~ Genevieve Bag in Batik Fabrics")
.JPG "Patchouli Moon Studio~ Genevieve Bag in Batik Fabrics")
.JPG "Patchouli Moon Studio~ Genevieve Bag in Batik Fabrics")
.JPG "Patchouli Moon Studio~ Genevieve Bag in Batik Fabrics")
.JPG "Patchouli Moon Studio~ Genevieve Bag in Batik Fabrics")


.JPG "Patchouli Moon Studio~ Eleven Fabric Postcards for Sisters (Oregon) Outdoor Quilt Show Wish Contest 2023")
.JPG "Patchouli Moon Studio~ Eleven Fabric Postcards for Sisters (Oregon) Outdoor Quilt Show Wish Contest 2023")
.JPG "Patchouli Moon Studio~ Eleven Fabric Postcards for Sisters (Oregon) Outdoor Quilt Show Wish Contest 2023")
.JPG "Patchouli Moon Studio~ Eleven Fabric Postcards for Sisters (Oregon) Outdoor Quilt Show Wish Contest 2023")
.JPG "Patchouli Moon Studio~ Eleven Fabric Postcards for Sisters (Oregon) Outdoor Quilt Show Wish Contest 2023")
.JPG "Patchouli Moon Studio~ Eleven Fabric Postcards for Sisters (Oregon) Outdoor Quilt Show Wish Contest 2023")
.JPG "Patchouli Moon Studio~ Eleven Fabric Postcards for Sisters (Oregon) Outdoor Quilt Show Wish Contest 2023")
.JPG "Patchouli Moon Studio~ Eleven Fabric Postcards for Sisters (Oregon) Outdoor Quilt Show Wish Contest 2023")
.JPG "Patchouli Moon Studio~ Eleven Fabric Postcards for Sisters (Oregon) Outdoor Quilt Show Wish Contest 2023")
.JPG "Patchouli Moon Studio~ Eleven Fabric Postcards for Sisters (Oregon) Outdoor Quilt Show Wish Contest 2023")
.JPG "Patchouli Moon Studio~ Eleven Fabric Postcards for Sisters (Oregon) Outdoor Quilt Show Wish Contest 2023")
.JPG "Patchouli Moon Studio~ Eleven Fabric Postcards for Sisters (Oregon) Outdoor Quilt Show Wish Contest 2023")
.JPG "Patchouli Moon Studio~ Eleven Fabric Postcards for Sisters (Oregon) Outdoor Quilt Show Wish Contest 2023")




.JPG "Patchouli Moon Studio~ Project Bag with Clear Window for a Friend")
.JPG "Patchouli Moon Studio~ Project Bag with Clear Window for a Friend")
.JPG "Patchouli Moon Studio~ Project Bag with Clear Window for a Friend")
.JPG "Patchouli Moon Studio~ Project Bag with Clear Window for a Friend")
.JPG "Patchouli Moon Studio~ Project Bag with Clear Window for a Friend")
.JPG "Patchouli Moon Studio~ Project Bag with Clear Window for a Friend")

