Monday, August 31, 2015

Open Wide! Zipper Bag

I recently tested a new bag pattern by Annie Unrein (inventor of Soft and Stable), called Open Wide! This cute and functional bag comes in 3 sizes: small-medium-large. Having to decide which size I would make first, I opted for the middle size. I figured that way I would know the small would be smaller and the large would be larger than this middle size in case I want to make another one in a different size. For a medium size bag this one is really roomy and true to it's name; it does open wide to see what's inside and to get at your things easier too.

Annie uses a lot of mesh material for her pockets in several of her patterns. I do have some mesh and have used the mesh before. The advantage of using mesh it that you can see what's in those pockets, but sometimes if you are placing tiny things in the pockets or things that could poke out, mesh isn't always the best choice to use. So I thought I would use fabric for the pockets this time, rather than the mesh that is called for. I wanted to see if it would work as well and I am pleased with the results. I used 2 layers of fabric for the pockets. I could have divided the pockets by stitching one or both pockets in half to make another pocket, but I didn't on this bag. When I make another bag, especially the larger size, I will be dividing the pockets in half.

I love how the binding provides a place to grab onto while unzipping the zipper and the other end of the bag has a loop to grab when zipping the bag closed. Plus that end loop is where you can tuck the zipper end into as well. I think it would be easy to add a slip pocket on the outside front or back too, and I may try that on the next bag I make. I will be making more of these in the other sizes for sure!
The front of the bag with an accent strip. The top binding forms a loop on the left so that you can grab onto it when unzipping the bag.
The back of the bag. I could try adding a slip pocket here if I wanted to when I make another Open Wide bag.
The long zipper end tucks into the grab loop.
See why it's called "Open Wide!"There are 2 large pockets that could easily be divided in half with some stitching. I will do that on the next bag I make. I opted to use fabric for the pockets (2 layers) rather than mesh for the pockets. Either fabric or mesh works well.
Pin It Now!

Thursday, August 27, 2015

Doll Quilts or Table Toppers

I wanted to use up some fabric scraps and since I recently made some doll clothes for 18" size dolls, I decided that I would make some doll quilts too, which of course could be table toppers or even wall quilts. I only made one in girly colors, which is a pink string quilt, so probably most little girls wouldn't even like the other colors I chose to use? When I was a young girl I loved blue and still do, so perhaps some girls might like these other quilt colors too, that is if they do become doll quilts rather than table toppers or wall quilts.
Scrappy 9-Patch quilt.
On the back of the quilt I sewed my new label. I was lucky enough to win some labels from a giveaway at Sew Fresh Quilts. The labels are from Ikaprint.
Trip-Around-the-World quilt. (Sold).
My pretty new label on the back.
Lorna from Sew Fresh Quilts had her labels made with her Blog/Business name on the front of her label and her name on the back of the label and I really liked that so I did the same thing with my labels. I chose a different font than Lorna did though.
Scrappy string quilt in scrappy blues. I set this in a zigzag. (Sold.)
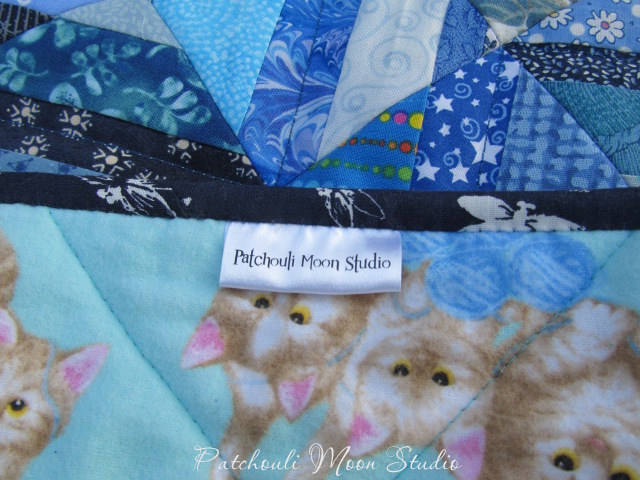
Here is the back of the scrappy blue string quilt where you can see the zigzag quilting. The kitten fabric is a flannel.
The label on the back.
Scrappy pink string quilt. I set this one in a diamond setting.
Yes another photo of my new label. I just think the label looks so nice I wanted to show it off.
Back of the pink scrappy string quilt is a pink flannel print. You can see the diamond quilting lines.

Pin It Now!

Sunday, August 23, 2015

Cozy Afternoon Blocks 3 & 4

I finished making Blocks 3 and 4 of the Cozy Afternoon Block of the Month, designed by Jacquelynne Steves. This is a free Block of the month. I combined machine embroidery stitches and hand embroidery stitches on the appliques. I really enjoyed making these blocks.
Block #3.
Block #3.
Block #3.
Block #4.
Block #4.
Pin It Now!

Monday, August 17, 2015

Doll Clothes

I have a lot of scraps of fabric and I thought it might be fun to sew some doll clothes. So I found some free patterns online for the 18" dolls like the American Girl dolls. A few years after the first American Girl dolls were first sold, I bought Samantha for my daughter. Samantha was the doll she wanted. Back then there were only 3 American Girl dolls: Samantha, Kirsten, & Molly. I asked my daughter where Samantha was several months ago because I wanted to use her to model the clothes I make. Well my daughter gave her away to a little girl she knew who admired Samantha whenever she saw her. Darn, there went my prop. But I am sure that little girl is loving Samantha. So no doll to model these clothes. I took a few to the gift shop in hopes of selling the clothes. If they sell well, I may just have to buy a knock-off version of the doll which is a lot cheaper than the American Girl dolls made by the Pleasant Company.

I am also making some doll quilts right now and using up some quilt blocks that were already made and making a few new quilts too. So I will get those posted here as soon as they are finished. Meanwhile, here is what I made (so far):

A chef's hat. No doll to model this so I placed the hat on top of a small sunflower that hadn't opened up yet, lol!!!
I made 3 doll aprons that are reversible. So this is one side of this apron and...
...this is the other side of the apron.
This is another apron on one side and...
...this is the other side of the apron. Yes this is the same fabric as the first apron, but the ribbon ties on this apron is pale pink, while the first apron's ties are white and wider.
The third apron. This is one side and...
...this is the reverse side.
Plaid doll skirt with eyelet ruffle.
Doll tote bag.
Doll tote bag in yellow print.
A longer skirt with a ruffled edge.
A patchwork skirt. 
A drawstring sundress, I also added a ruffled edge. I have so many ruffled trims that I needed to find a way to use them.
I knit this tee-shirt and it took so much longer than sewing the clothes. I have lots of yarn that I need to use up too.
The back side of the knit tee-shirt has 3 buttons. I knit this in reverse stockinette stitch.
I sold most of these on 4/22/18. The knit sweater sold in 2017.
  Pin It Now!

Tuesday, August 11, 2015

Faux Wool Flowers in a Vase Applique Quilt

I designed this applique quilt myself and used flannel prints that look like wool. I did all the embroidery by hand, which I love to do. Then I quilted it. The cotton flannel is cheaper than 100% wool and if wool makes you itch, it's also softer and no itch. I love the look of wool and I do have wool and wool blends that I use on some things, but this flannel is certainly a nice alternative, especially for a quilt. The plaid border and binding is a cotton fabric, but not flannel.
Flowers and vase are all flannel fabrics. The background and border and binding are cotton fabrics, but not flannel.
I hand embroidered all the flowers, leaves and vase.
I echo quilted around the vase of flowers.
Pin It Now!

Sunday, August 9, 2015

Welcome to My Garden Quilt

I belonged to an applique group years ago and we were all working on applique garden quilts. There were several large quilt blocks that we were making and were going to put them all together into one quilt (if we wanted to). This was one of the quilt blocks I had made. When the applique group was put on hold and we stopped meeting, I never finished this quilt. I was going through some UFO's a few months ago and saw this and thought I really should get this quilted and finish it. I did want to add an applique bird on top of the birdhouse first before I quilted it, so I did.

Then a few months ago I was wandering around Hobby Lobby when they had a 50% off their metal wall art and I found a cute metal birdcage that had a place to hold a photograph. A friend of mine had hung a quilt of hers on a metal wall art that said: "Live, Love, Laugh" or something like that, and I really liked how that looked. So I started to think about the birdhouse quilt that I was almost done with and thought this would be just perfect to hang that quilt on. I saw there was a place to attach some fabric to the metal cage and then to the quilt. It was about the right size too. I also needed to make a fabric postcard to put in the frame. Not sure I really like how the applique bird came out for the postcard, but I can always change that later if I want. My husband likes it so it's staying for now. Anyhow here is the quilt~
This is a long and narrow quilt. It's in my entry so you see it right across from my front door.


The metal looks all old like an antique, even though it's new. There is some glare on the glass in this photo on the coneflower. The background fabric that I used  here was a scrap of fabric that was from my dear friend Gloria, who passed away in February and was part of our applique group. I wanted to use a fabric that was from her as a reminder of her and our applique group.
No glare on the glass frame in this photo. You can see the fabric I put around the back of  the birdcage frame and attached it to the quilt to hang it.
Top of the birdhouse.
You might start to think creatively next time you see some metal wall art at thrift stores or yard sales or craft stores and see if it will work for a quilt you have or perhaps design a quilt that will work with the metal art. By hanging your quilt on something like this, you get 2 pieces of art in one. Plus when the metal art is on sale it's a lot cheaper than those metal quilt holders from quilt shops and you can find a variety of sizes too. I bought a couple of black metal art to hang some more quilts on....whenever I get around to making the quilts that is.


Pin It Now!
Related Posts Plugin for WordPress, Blogger...