Showing posts with label fabric scrap busting project. Show all posts

Friday, January 21, 2022

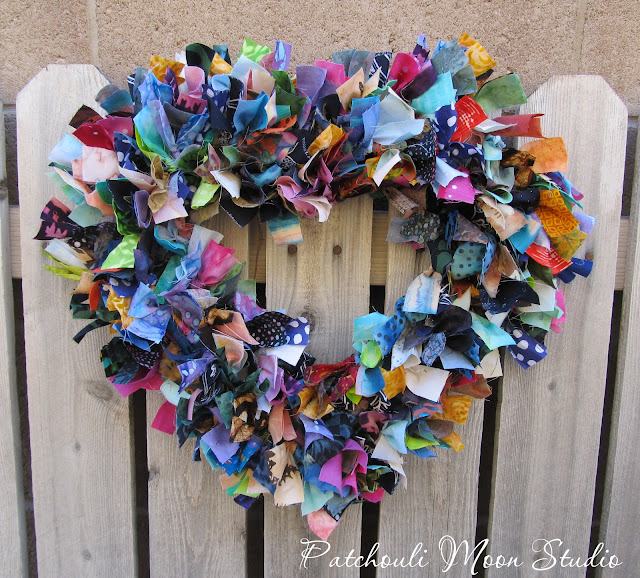
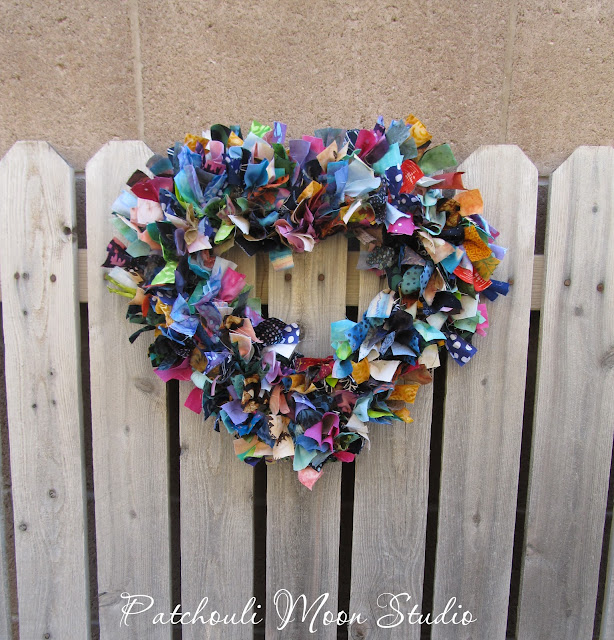
Heart Shaped Wreath with Scrappy Batik Fabrics

Recently I saw a beautiful round wreath on Instagram that was made with fabric scraps. I loved the look and thought it was a wonderful idea for using up small bits of fabric scraps. The woman who made her wreath said she cut 1-inch x 6-inch strips of fabric and tied the strips onto the wire wreath frame and packed them tightly. So I decided to use my batik fabric scraps and cut them into the same size strips. I cut everything in my scrap bag that was at least 6" long. I counted the strips as I went (just curious as I had no idea how many strips it would take). I had 755 strips in total, but I didn't cut up the larger scraps in my scrap bag just yet. I placed the strips into a small fabric basket I made and I didn't even use up 1/4 of the strips I cut to make this heart wreath.

I went to the Dollar Tree (DT) store because I remember seeing wire wreaths there. The local DT had a set of 2 round mini size wreath wires only. I bought them since that's all they had. Then while I was out that day, I stopped at another DT to see if they had a large round wire wreath, but they had a heart shaped one and the set of 2 mini rounds ones. I bought the heart shaped one. Maybe one day I will find the large round one, but I did like this heart shaped wreath too. 

I didn't want to use only red, pink or purple fabrics because that would look too Valentine's Day only and while I like those colors, I wanted something I could keep up all the time, so scrappy colors I thought would work best.

I read lots of tutorials and watched YouTube videos about making these fabric wreaths. Each did things a bit differently. Not only did I see the wire wreaths being used, but one person actually bent a wire hanger into a round shape and kept the hook of the hanger in place to hang it up by. That was a great idea and you only had one wire to cover instead of 3 to 4 tiers of wires as in these wire wreath forms.

I also saw some use green Styrofoam round wreaths and tie longer and wider cut strips to the wreath. I saw some cut squares of fabric and push a pin into the middle of the fabric and attach to the Styrofoam so each square had a gathered fluffy look. I liked that look too. FYI: DT also sells the Styrofoam wreath, but they are more medium size.

All the tutorials I read or watched cut different widths and lengths of fabrics, so I guess you have to decide what to cut based on the look you want the size wreath form you buy, etc. 

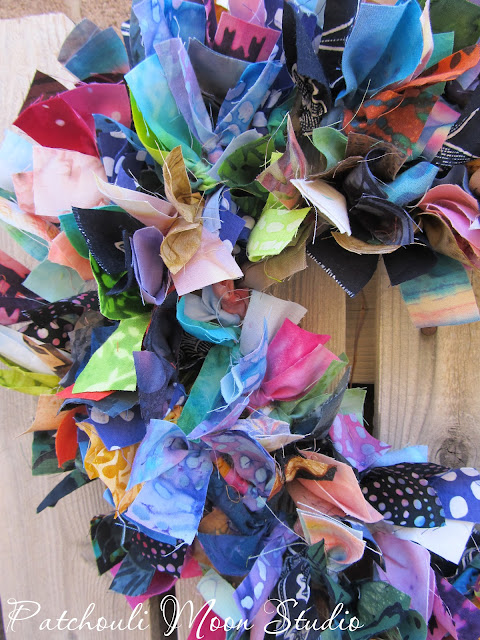
Then there were several ways of tying the fabric strips on too. There is a simple tie like the first part of tying your shoelaces, just cross the fabric on top of the other and pull it under, that's it. Another method was to tie a square knot: right over left and left over right and pull. There was the loop knot, folding the strip in half and putting the 2 ends of fabric through the loop (around the wire) and pulling. I decided to do the loop method for my first wreath here. What I also read was the loop method isn't as fluffy as the others, but it seemed easier to do. I think on the next wreath, I will do the first method I mentioned above.

I do love how it turned out and I really packed on the strips tightly too.
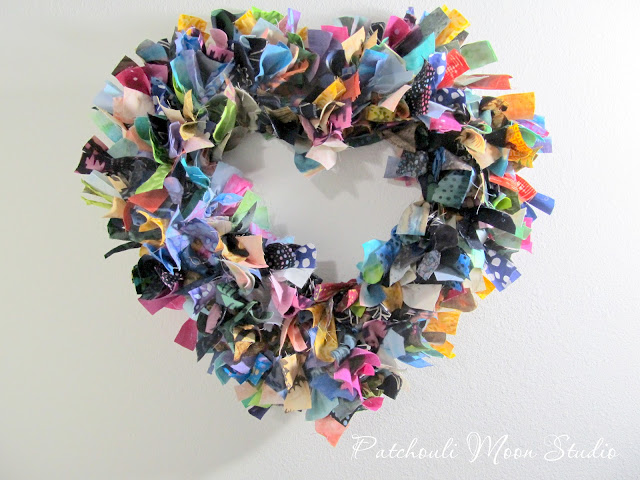


So there you have it, a great fabric scrap busting project. No sewing involved and it only cost $1.00 for the wreath form at DT. 

To make the fabric cutting easier, I used my Crossover II Die Cutting Machine and the 1-inch strip cutting die to cut a variety of scraps into 1-inch widths first, then sub-cut to 6". It's not an exact science, so if some widths or lengths weren't exactly to size, you wouldn't know in this project.
I used my Crossover II Die Cut Machine.

I used the 1-inch strip cutter.


Pin It Now!

Monday, September 3, 2018

Sew a Scrappy Background Tutorial

I have been working on writing a few patterns and today I am sharing a FREE tutorial on how to Sew a Scrappy Background with you that can also be used as the background for the Patchwork Fabric Folder, that is my newest pattern.


We all have scraps piling up and sewing them together to create a background adds interest to your quilt or other small project as well as a great way to use up that never ending pile of scraps!


Not only can you use this scrap sewing method as a background for applique, but by using darker fabrics and prints, you can create a unique quilt all by itself. My tester Maria did just that and will be turning her scrappy creation into cushions.

Maria's Scrappy Blocks.

Make your blocks any size that you want. Sew more than one block together to create a larger piece, it's all up to you and your imagination.

Go to Craftsy and download your FREE Sew a Scrappy Background Tutorial and start using up those scraps today.

Pin It Now!

Wednesday, May 28, 2014

Strip-Easy Pieced Challenge: Scrappy Table Runner

The Strip-Easy Pieced Challenge is here and today I am linking up to Pieced Brain's linky. There will be lots of others linking up what they created too, so be sure to check out all of the blogs who linked up. Great way to get ideas for what to do with your scraps of fabrics.
I used mostly batik scrap strips I had in my scrap bag to create this table runner. See that one strip above that's pink and blue, I pieced it on the diagonal to make a long enough strip. I even used 2 different bias binding scraps I had leftover from other projects for the binding. Plus I also used scraps of batting that you cannot see, but I pieced those batting pieces together as well. So this is a true scrappy project, lol!!!
I used a couple of strips of fabric that I had created using stamps and stencils. The one with the bird stamp above.
Simple straight quilting in a variegated thread is what I used.
I  created this table runner just like the scrappy table runner tutorial pattern that I have for free on Craftsy. Click on the Scrappy Table Runner pattern on the side bar under my Craftsy patterns (scroll through until you see the table runner) to get to that free tutorial and you can download it from Craftsy for free. It's fast, fun and easy to make.
My hubbie wanted a table runner for the top of the computer table where our laptop, scanner and printer sit. Even though this runner is pretty covered up now, it does add a bit of color and protects the table too. He was pleased with it and so am I.
 Please go and check out the other participants in the Strip-Easy Quilt Challenge at Pieced Brain. I will link mine to her link party as soon as I can, so if you don't see mine linked yet it's because we all live in different time zones and I might still be snoozing here, lol!!!! Check back to the link party often so you can see all who do link up.
Sew Fresh Quilts
Also linking up to Let's Bee Social Wednesday Link Up
Pin It Now!

Tuesday, December 3, 2013

Tip if the Morning Tuesday~Can Cozy

I have all kinds of cans and all sizes too. I have decoupaged cans that I had that came with plastic lids in the past. But I have seen all kinds of cozies online for cups, teapots, bottles, cans, jars, etc. Some were knit cozies, some felted cozies and some were quilted cozies too. I got to thinking about making a quilted cozy for a tall can I have that I use for trash that sits on my cutting table. I decided to use scraps because I have so many scraps. But you can use all one fabric too. I made this in basically the same way that I made my Scrappy Table Runner, which is a free pattern on Craftsy. You can use tea tins, coffee tins, soup tins (be sure you have the kind of can opener that opens leaving a smooth edge and doesn't cut the can or your edge will be sharp if you use that type of tin can!)
I sewed scraps to make this quilted can cozy. Then I quilted it and added binding around 3 sides.
I added a flange-like extension piece to which I sewed a piece of Velcro to. I also sewed Velcro to the lining side just under the binding. The Velcro of course is what keeps the cozy on the can.
Looking down into the can.
Turned so you can see the other section of the cozy.

I printed some labels to sew on the cans too. Above is the label I made for my little trash can.

I use this quilted can cozy for trash, but I plan on making some more for:
  • Thread Snips (thread catchers)
  • Safety Pins
  • Glue Sticks
  • Velcro
  • Paper Clips
  • Clips (like Wonder Clips or Binder Clips)
  • Knitting Needles
  • Pens
  • Pencils
  • Q-tips
  • Yarn
  • Paint Brushes
  • Buttons
  • Snaps
  • Zippers

  Pin It Now!
Related Posts Plugin for WordPress, Blogger...