Sunday, May 29, 2022

Sew Powerful Purses #79-84 (for 2022)

Hello all my lovely purse makers and purse lovers. I have finished making 6 more purses for Sew Powerful Purse Project. These all have scrappy flaps and some I added appliqué to as well. I just love using my scraps to give each purse a unique one-of-a-kind look. No two will ever be exactly alike. So no confusion as to whose purse it is if a girl placed it down.
 
This purse flap was mostly made of denim scraps and a bit of homespun plaid. That light denim has little glitter dots embedded into the fabric. The body is also denim upcycled from denim jeans.

This is the back of the purse above, using the back pocket of my daughter's denim jeans for the back of the purse. Hubby's jeans have too large of a pocket to use anywhere on these purses, so I will create something else using those pockets. (Hint: something with a denim pocket will be shared fairly soon on my blog).

Scrappy pieced flap with added heart appliqués and some buttons.

This one is just scrappy pieced like a crazy quilt and added buttons.

The background was pieced scraps and I added this large flower, which is one of my favorite flower appliqué, but not sure where I got it? I traced it onto a plastic template years ago. Too bad I don't have a die cut for this flower, but I did use circle die cuts for the center pieces.

Scrappy with heart appliqué. I bought this heart die cut recently and love that it has the outer and inner hearts in 2 sizes. I can cut the heart this way or flip the fabric over when I run it through the die cut machine for the heart to be the mirror image of how this one leans. That gives me several possibilities in the way I can use these hearts.

Another all scrappy pieced with buttons.

I have more purse kits cut out, so I hope I can get to sewing them soon. But I will have family visiting in June and July, so I will have to sneak a few stitches here and there while they are still asleep in the morning (I get up early).


Pin It Now!

Tuesday, May 24, 2022

Reversible Vintage Style Apron

Hello to all you Food Lovers! I hope you all have been inspired by the first two days of this Foodie Blog Hop. I am here to kick off the middle of the week for this blog hop, brought to you by the lovely Carla of Creatin' in the Sticks.

I hope you have eaten your breakfast, lunch or dinner before you hop along, because you are sure to get hungry seeing all these food-inspired projects! 

For my project, I decided on making this Vintage Style Apron that is reversible, so I got to use up a couple of foodie fabrics in one project. I actually found the pattern for this apron about 3 years ago at a thrift store. The pattern had never been used, becuase I had to cut the pattern pieces out. It's a pattern called, Chatterbox Apron Pattern by Mary Mulari (if you ever watched Sewing with Nancy, you know that Mary was the most frequent guest on Nancy's show over the years.
Here is the cover of the pattern:

Pattern cover photo from Mary Mulari's website.

And here is my version (or should I say versions, since it's 2-sided)?

Hard to get a really good photo, since I don't have a model. This fabric is all about baking tools. I used a red polka fabric as the accent fabric on the pockets, neckline, neck strap and waist ties.

This side of the apron features a retro-looking fabric of a woman (or women) cooking. I used another polka dot accent fabric with larger dots in an aqua color and placed the aqua fabric in the same places as the reverse side.

Another photo of each hanging in the tree with the strap spread out to see it a bit better.

So glad I was finally able to use up these 2 fabrics in something fun and useful.

More Foodie Blog Hop participants are listed below, so please hop over to see what each of them has made. 


  Pin It Now!

Monday, May 23, 2022

3 Fabric Postcards

Hello my postcard loving friends. I created 3 fabric postcards using the Crossover II Die Cutting machine from Crafter's Edge and the Tea Time Set die cut and the 0.5" Increment Circle set die cut.


I used some scrappy pieced neutral colored backgrounds for all 3 postcards and then fused the appliqué pieces on top. Satin stitched the edges all around the postcards in white thread. All 3 postcards measure 5" x 7". I usually make 4" x 6" postcards, but I like this slightly larger size. They would be suitable to frame in a standard 5 x 7 frame or a mat with an opening size that's 5 x 7 with a larger frame.

A single teacup and saucer.

I stacked 2 teacups here.

Appliqué circles.

I stamped all the backs of the postcards like this.

These were a fun little project made faster by using the die cuts. I like to have a few postcards on hand to send out for birthdays and other occasions. 


Pin It Now!

Sunday, May 22, 2022

Foodie Blog Hop Starts May 23rd

Hello all you food lovers. The Foodie Blog Hop is starting May 23rd. So be sure and hop along to see all the yummy projects that are being shared. Not all will be edible, but they will be delicious projects none the less.


Here is the full schedule so that you don't miss a thing:


Pin It Now!

Thursday, May 12, 2022

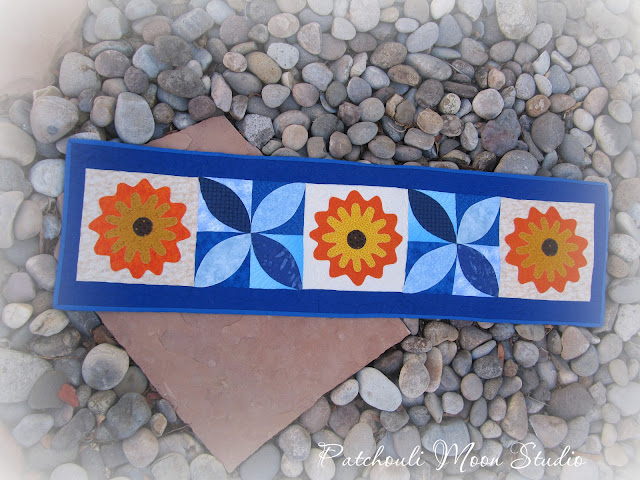
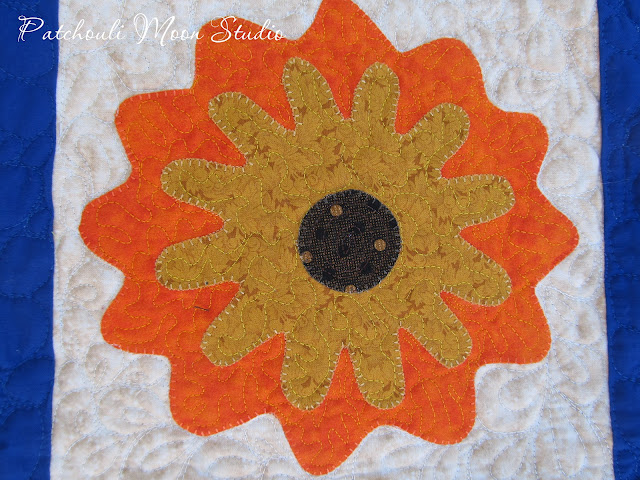
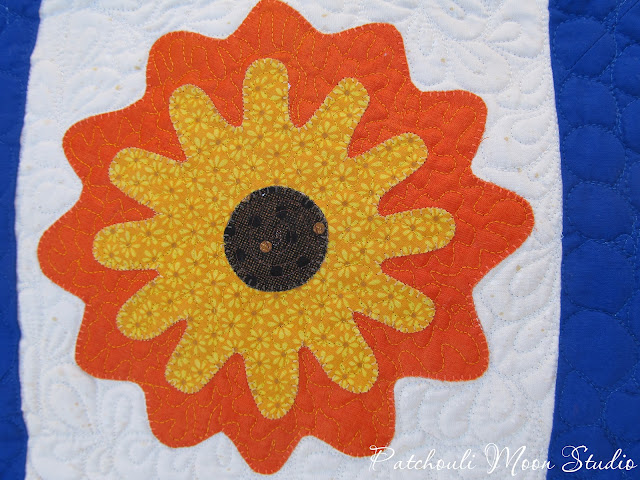
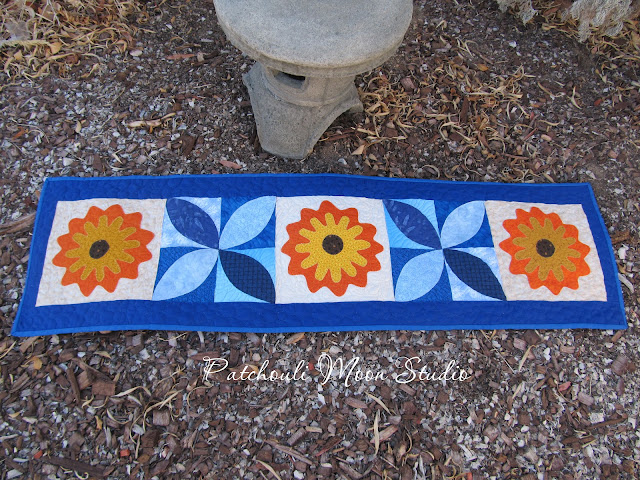
Table Runner: Orange Flowers with Blue Orange Peel

Hello Sunshine! I had cut out blocks to make this table runner a couple of years ago. The plan was to have this to work on at my appliqué group. Then of course Covid put a stop to us meeting. We haven't met together for over 2 years now. I finished this runner in January, so it has taken me a while to even share this with you.

I took the appliqué flowers from a quilt pattern I had (don't ask me what pattern because I don't know what I did with it) and I added some Orange Peel blocks in between the flowers. Ironic that the orange peel blocks are in blue, lol!


That orange and yellow flower fabric came from my mom's quilt shop from the mid 1970's. My sister gave me that fabric just a few years ago after mom passed away. I had the same fabric in a blue colorway. I guess mom must have given us each some fabrics from her shop after she closed it. My sister never made quilts, but did sew clothing.


Not having a table to take photos on makes photographing things like this rather challenging. We have a small round table, 50's style with a red top, so I have to try different photo angles outside. I think you get the idea.

Pin It Now!

Saturday, May 7, 2022

Handknit Dishcloth/Washcloths

Hello beautiful knitters and non-knitters too. I was recently commissioned to knit 6 dishcloths/washcloths for a friend. 

If you knit, most likely you have made a dishcloth before and the most popular dishcloth is knit on the diagonal, adding increases until to reach the halfway point and then you start decreasing until you have just a few stitches left. It is a great way to teach a new knitter how to increase and decrease, but I personally do not like that dishcloth pattern as it ends up misshaped and isn't as thick and tightly knit. 

Years ago I found a pattern on Ravelry for a Waffle Knit dishcloth and made quite a few to use up the miscellaneous partial balls of cotton yarn I had, joining together 2 or more yarn colors to create a dishcloth (although I use them as washcloths in the shower for myself). I cast on fewer stitches because I was using a worsted weight instead of the DK weight yarn, since I didn't want the cloths to end up being too large. But in casting on fewer stitches, it must have also changed the waffle pattern a bit as I was knitting it. It didn't actually look like a waffle stitch, but I really like the stitch it did create, so I just knit them my way. I knew this was the dishcloth pattern I was going to knit for my friend, Cenia. 

I saw her last Sunday to give them to her and she seemed very pleased with them. Happy dishwashing Cenia!

I had a cone of this brown, white and pink variegated cotton yarn and made all 6 out of this yarn. It's fun to watch how the pattern changes a bit with where the colors end up in each dishcloth. I love the soft spongy thick feel of these dishcloths. The colors remind me of Neapolitan ice cream, lol!

I took the photo after I made 5 dishcloths and then I finished the last dishcloth. Since they are all the same, I didn't need to photograph the last one.

I stacked them all on top of one another here.


  Pin It Now!

Wednesday, May 4, 2022

Sew Powerful Purses #73-78 (for 2022)

Hello my sweet butterflies, I have 6 more purses to show you that I am donating to the Sew Powerful Purse Project. 4 of them I upcycled some denim jeans to make them, which is fun to do and makes for a great purse too. I may just have to make one of these purses for myself one day in upcycled denim jeans (only I would need to make mine a bit larger to hold my stuff). 

I had cut out several appliqué shapes years ago that I used some in projects, but there were a lot that I didn't use, so it was time to find a home for some of the butterflies I had already cut and fused and were ready to be stitched onto something. The crumb pieced yellow and orange background fabric I also had stitched a few years ago and I thought they would make cheerful purse flaps by themselves, but when I was auditioning the butterflies on several purse flaps, the patchwork backgrounds here were the ones that just looked the best. So those pretty butterflies flew on top and there they stayed. 

The main body of the purses are from denim jeans I upcycled. I used the front pockets again as the back of the purse and my daughter's jeans were just the right size to be able to use the back pocket for the center purse above. Mostly I have been using husband's jeans and being larger the back pockets are just too large to add anywhere on these purses, so they will be used in other projects. (Maybe that larger version for me? We'll see). I thought it looked fun to be able to leave the waistband and a belt loop on the 2 purses. The pockets didn't sit up as high on the back by leaving the waistband in. I had cut it off on the first ones I made. I am always experimenting and learning.

This is also an upcycled denim jean purse. I used some leftover denim pieces to create the patchwork flap and the light fabric where the buttons are sewed to is the lining of the purse.

Lots of  calico fabrics in this purse. Can we call these fabrics vintage? They seem vintage now to me.

Another patchwork flap with a few buttons. This flap as well as the 2 above this one are sewn crazy quilt style, but without adding all the fancy stitches as in a true crazy quilt. Maybe one flap I just might stitch some machine stitches over the crazy pieces flap. It might be fun to try that.

I am working on about 7 more purses right now too. Most are nearly done. I like to sew with the matching thread color like blue thread on blue purse pieces and pick out all the pieces that need to be sewn with blue thread and sew those. Then if I need to switch to another thread color I do and I finish all the pieces with that thread color. So I usually have purses in various stages of completion, but it makes it easier not to have to keep changing thread colors for each purse and eventually all the purses get done.
Happy stitching my friends.


Pin It Now!
Related Posts Plugin for WordPress, Blogger...