Wednesday, March 9, 2016

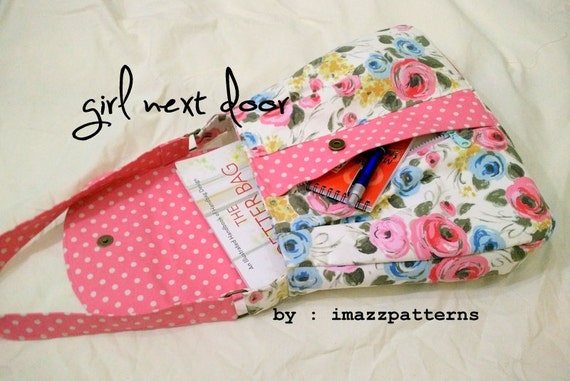
The Girl Next Door Handbag

I tested this darling handbag from Imazz Patterns that is called The Girl Next Door. I love the shape of this bag and Imazz always seems to add a little surprise element to her bags which with this bag is a hidden zippered pocket in the front of the bag. I made this bag with polka dots in black and white. I love it! You can purchase the pattern at Imazz's Craftsy Store or Etsy Store for the intro price of only $4.99! The regular price of this pattern is $7.50. The intro price is good through March 15, so get it now while this price is lower. It's a fairly easy bag to sew and yields fabulous results.

If you would like to purchase this Handbag from me the price is $35.00 plus postage. SOLD! Email me.
Here she is without anything inside of her. She's hungry!

After swallowing up my necessary things, she looks a little more rounded in her tummy, lol!!!

She has a nice curved belly with my things inside.

Looking inside the bag, you can see some of my stuff. While I do have another eyeglasses case and wallet and a few other items in there, they are underneath what you can see here. Believe me there is a lot of things in this bag and yet she doesn't look too full. 

Little closer look and you can see I added a twist lock closure instead of the magnetic snap. That is the only change I made to her. Imazz shows adding a decorative button to the outside of the bags that she made, which adds a nice touch.

Wondering where that secret zippered pocket is? Right here under the middle accent strip. It's a large pocket too. I placed my small notebook (I made a fabric cover for my notebook that also holds my pens) inside of this front pocket. She is all ready to go to town!

Here is Imazz's Girl Next Door:


Pin It Now!

Monday, March 7, 2016

The Lucy Bag

I knit this bag called The Lucy Bag and then tossed it in the washer to felt it. I used some wool yarn that I had knit vests with and didn't like the vests, so I ripped them apart a while back and decided to knit the Lucy Bag using these 2 yarns. I dyed the light pink yarn with a second dying of prickly pear cactus juice and the second dying resulted in a pale pink. The first dying of some other yarn was a darker mauve pink color. The variegated yarn with the green and orange colors was dyed with Kool-Aid. I knew I wouldn't have enough yarn to knit this all out of one of the yarn colors, so I combined them both into this bag.

Here is Lucy after she was knit and before felting:
Lucy Bag knit and ready to toss into the washing machine to felt.

The Lucy Bag after she was felted.

The bag is empty, so it looks rather limp.

One handle is longer so that it loops through the shorter handle.

The bottom of the bag. It is knit like a hat that spirals out.
Pin It Now!

Sunday, March 6, 2016

Let it Snow Block #2

I made the second block in the Let it Snow Mystery Block of the Month series.
I am using flannel for the applique pieces and blanket stitching the appliques by hand.
I am really liking this BOM. 


Pin It Now!

Friday, March 4, 2016

Faith Crosses Quilt For Sale

I am selling this Faith Crosses Quilt. If you are interested please email me. Asking $45.00 + $15.00 shipping. Quilt measures  35² wide x 27.25² tall. There is a hanging sleeve sewn into the back of the quilt. You can add a dowel or a curtain rod and easily hang it on the wall. It's the perfect quilt for Easter or year round enjoyment. I made this to sell last year and never got around to selling it, so I thought I would list it here now to sell. It's priced to sell too! If I open my Etsy store back up I would have to charge more to cover my store fees. So get 'er now while you can.
Sold!

Pin It Now!

Tuesday, March 1, 2016

Splendid Sampler Quilt Blocks

I am making the Splendid Sampler Blocks and so far I have made the first 4 blocks. The blocks are released every Sunday and Thursday and in the end you will end up with 100 6-inch finished quilt blocks. Pat Sloan and Jane Davidson are the women who have organized this event and have invited a lot of well-known quilters to design the quilt blocks. The downloads are free, so even if you don't want to join in and make the blocks each week, you can still download them to make later. I think they will be creating a book later with all of these blocks in the book, so I am saving them all and that way I have them when I want to make them, in case I cannot keep up with making them all now.

Since these all finish at 6-inches, the pieces are small, but hey if you like the block, you can always enlarge them to suit the size you prefer. Some are all pieced, some all applique and some are a combination of pieced and appliqued. As with the Bloom Sew Along, I am using all scraps from my scrap bags to make these blocks.

Here are the first 4 Splendid Sampler Quilt Blocks that I made:
Block 1

Close-up of block 1 showing the stitch I used to sew the heart applique in place.

Block 2. I saw someone else make this block and use 8 rectangles instead of 16 squares and I really liked how hers looked that way. Plus that's 8 fewer squares I would have to sew together! The antennae are optional, but since I embroidered the antennae, I thought I needed to add the body of the butterflies too. I made the 4 corner butterflies face the center, rather than the way the instructions show the top 2 facing out. 

Block 2 close-up

Block 3

Block 4

Close-up of block 4

Block 4 with buttons. I may sew the buttons on this block after I quilt the quilt or whatever I make using this block. I also thought about sewing some trim or sewing a fancy stitch on the vase too. I may do that later if I feel it needs it.

Block 4 close-up of flowers with the button on top. I think the buttons may be what this simple block needs to jazz it up a bit.
Pin It Now!

Sunday, February 28, 2016

Bloom Blocks From Lori Holt's Sew Along

I have been joining in the Bloom Sew Along with Lori Holt from Bee in My Bonnet. I made the first 6 applique flowers blocks, but as most of you know me by now, I made my own changes. I decided to make my blocks the fusible applique method (instead of sewing it with interfacing and turning the pieces). I am sewing my appliques with machine embroidery stitches around the edges. I am not sewing on the borders around each block as Lori is doing because I am not sure how I want to set the quilt, or if I even want to make one quilt. I may decide to use these blocks to make a couple of table runners (or a round table topper, since my table is round). For now I am enjoying just making the blocks. I am using only fabrics in my scrap bags for the applique too.

Here are my first 6 Bloom applique blocks:
Block 1

Block 2

Block 3

Block 4. I used a smaller template to make the leaves because Lori's leaves were too large and looked off-balance to me. I like my smaller leaves better.

Close-up of Block 5

Block 5

Close-up of Block 6

Block 6

Click to get to the Sew Along
Pin It Now!

Tuesday, February 23, 2016

Diamond Jewels Quilt

I finished this lap quilt last month. I used the X-Block ruler to create this quilt. I chose batik fabrics in aqua, turquoise, and orange and white and cream fabrics in regular cotton fabric. I didn't add a border, just sewed on the binding. The X-Block ruler allows you to sew blocks and then cut them with the ruler to create a more complex looking block. The cut off pieces are supposed to be saved and used for the border. I didn't really want a border so I didn't use those cut off pieces. I backed the quilt with a soft flannel fabric. I gave this quilt to my husband and he loves it.

I want to try making some other quilts using the X-Block ruler because it is fun and there are some great looking quilts that you can get from using this ruler.

I quilted the colorful batik sections only. With all those seams it felt a bit like I was jack-hammering!!! So I only quilted along the edge of the white fabrics.


Soft flannel for the backing.
Pin It Now!
Related Posts Plugin for WordPress, Blogger...