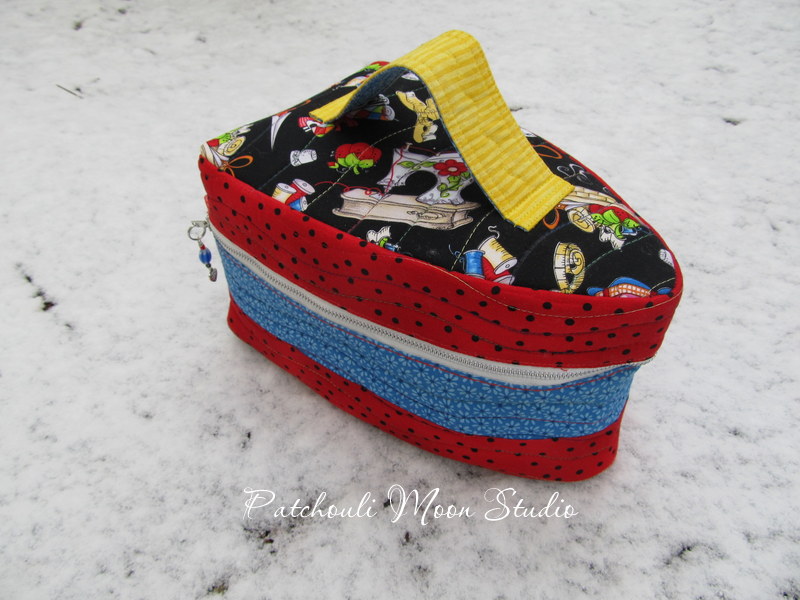
A friend of mine made a cute
iron caddy a few years ago and I thought it was not only cute, but useful too. I borrowed her pattern to make one of my own. Well as cute as this is, the instructions weren't all that clear and there were only a few tiny photos. I had to borrow my friend's finished iron caddy to figure out how to finish making it. Even my friend said the instructions were hard to understand, but when she did figure it out, she went ahead and made about 4 more right away. I looked at her finished caddy and then sewed mine together my own way and didn't even use the instructions.
I also made some changes. I didn't add the ruffle on my iron caddy because it was more work and because I thought the ruffle would get in the way of zipping and unzipping the caddy. I also didn't do the embroidered section because it seemed like a lot of work and you really wouldn't see it (especially if I had added the ruffle). I used a foam stabilizer to give this caddy some structure, rather than using batting. I do like the foam stabilizer so much better. I also sewed a bias binding inside to cover the raw edges. As an afterthought, I sewed a couple of ribbon tabs at each end of the zipper to have something to hold on to when zipping this caddy open and closed.
I wanted to keep one of my irons inside this caddy to keep it dust-free. Well the iron I wanted to store inside this caddy, ended up not fitting inside the caddy! I guess my iron was a tad too long. So I ended up putting my travel iron inside it instead.
 |
| The pattern shows a ruffle all the way around above the zipper. I suppose it looks like a slice of cake with the ruffle and the layers of different colored fabric. But to keep mine simple and avoid the ruffle from getting caught in the zipper, I opted to go ruffle-free, lol!!! |
 |
| I ended up storing my travel iron inside the caddy, because the iron I wanted to store inside was a tad too long! |
 |
| I took these photos several weeks ago when we had a dusting of snow. |
 Pin It Now!

.JPG "Patchouli Moon Studio~ Iron Caddy Jr. in Batik")
.JPG "Patchouli Moon Studio~ Iron Caddy Jr. in Batik")
.JPG "Patchouli Moon Studio~ Iron Caddy Jr. in Batik")
.JPG "Patchouli Moon Studio~ Iron Caddy Jr. in Batik")
.JPG "Patchouli Moon Studio~ Iron Caddy Jr. in Batik")
.JPG "Patchouli Moon Studio~ Iron Caddy Jr. in Batik")


.JPG "Patchouli Moon Studio~ Ironing Caddy Pad Jr. Iron Bag & Ironing Surface All-in-One")
.JPG "Patchouli Moon Studio~ Ironing Caddy Pad Jr. Iron Bag & Ironing Surface All-in-One")
.JPG "Patchouli Moon Studio~ Ironing Caddy Pad Jr. Iron Bag & Ironing Surface All-in-One")
.JPG "Patchouli Moon Studio~ Ironing Caddy Pad Jr. Iron Bag & Ironing Surface All-in-One")
.JPG "Patchouli Moon Studio~ Ironing Caddy Pad Jr. Iron Bag & Ironing Surface All-in-One")
.JPG "Patchouli Moon Studio~ Ironing Caddy Pad Jr. Iron Bag & Ironing Surface All-in-One")
.JPG "Patchouli Moon Studio~ Ironing Caddy Pad Jr. Iron Bag & Ironing Surface All-in-One")