Showing posts with label fabric wallet. Show all posts

Thursday, October 31, 2024

Fabric Mini Wallet

I tested this Fabric Mini Wallet for Around the Bobbin patterns. It was a really fast and easy sew. The pattern is on sale for 25% off and no code is needed! Grab it while it is on sale ( sale is just for a few days) and whip up a few of these wallets for gifts. 

The wallet measures 3" x 4 3/4". So it is small enough to fit in any bag, a pocket, or you could add a hook to hook on your belt loop of your jeans. You can add a keyring too and use the wallet as a key fob wallet too! Or add a lanyard with a swivel hook and hook it on the keyring and wear it like a necklace. See how versatile it can be? And those are just a few of the things that I thought of.

There are 2 card pockets, a cash pocket, a zippered pocket for coins (or cash too) and a loop for a key ring (or swivel hook). 


The back side.

Here you can see the zippered pocket and the slip pocket as well as the card pockets.


Pin It Now!

Monday, March 6, 2023

Pick-a-Pocket Wallet in Brown

I made this custom Pick-a-Pocket Wallet to match the cross body bag that I made for a customer a while back. Luckily I had enough of the fabric leftover from making her bag to use for the exterior fabric for this wallet. I had to use 2 different fabrics for the lining fabric, which I really like together.

The reason the Pick-a-Pocket Wallet has this name is that in the construction you can pick which pocket to add: 8 more card pockets or another zipper pocket. I personally don't have that many cards, so when I made my first Pick-a-Pocket Wallet, testing the pattern for Christine (ChrisW Designs), I chose to add the zipper pocket, giving me two zipper pockets. I use one zipper pocket for coins and the other I put small items inside. My customer chose the second zipper pocket as well. 

Approximate size of wallet when closed: 3 ½" wide x 7 ½" high x 1/2" deep.

This mottled brown fabric looks great as a wallet and matches my customer's cross body bag too.

Inside there are oodles of poodles....I mean pockets! Sorry I just love saying oodles of poodles, lol!!! There are 5 card pockets, including the ID pocket with the clear window. Need more card pockets? The you can choose the additional card pockets to add instead of the extra zipper pocket. You can see the 2 zipper pockets in the photo above.

Not too thick of a wallet (unless you really pack a lot of stuff inside).

Two long slip pockets below the zipper pocket for cash or whatever.

This pocket can be used for your phone or receipts or cash, etc.

Another pocket under the card pockets to stash extra cash or checks, etc.

The wallet opened to show exterior.

This version of the Pick-a-Pocket Wallet has 5 card pockets (including the ID pocket), 2 zipper pockets, and 4 long slip pockets for a total of 11 pockets! Swap the extra zipper pocket for the extra card pockets and you get 8 more card pockets, for 18 total pockets. Now that should keep you organized!!!

Christine not only designed this Pick-a-Pocket Wallet, but she also designed Brandt's Boulevard Wallet, which has fewer pockets and is a bit wider wallet with an optional wrist strap. Then there is the motherload of a wallet, The Penny Inn Wallet which you really need to write down what you put in it and where you put it or you could get lost! Seriously, if you carry tons of cards, your phone, cash, coins and other smaller items, you don't need a bag at all, just The Penny Inn Wallet. Penny Inn has a total of 27 pockets!!! See why I say you could get lost? Plus, it has a wrist strap to carry it or make a cross body strap and carry like a bag. The sides of the wallet, when opened, have pleated or bellowed sides (not sure what you call those?), which allows the wallet to expand with all that stuff people put inside. I guess Christine has designed a wallet (and bag) for every taste out there. I prefer the Pick-a-Pocket or the Brandt's Boulevard wallet for myself.


Pin It Now!

Thursday, February 28, 2019

Brandt's Blvd. Wallet in Turquoise & Purple

I made this Brandt's Blvd. wallet (ChrisW Design pattern) last year. I have been using this wallet for myself for a few months now. I love this wallet. It has plenty of space for cards, a phone, cash, coins and more. Use it as a wallet in a purse or alone with the detachable wrist strap. I made this one in batik and hand dyed fabric.

The wallet when closed measures 7 ¼” wide x 4 1/4” high x 7/8” deep.

I added a snap closure to my wallet. You can add a thumb catch closure as the pattern instructs you to do, but I have a ton of these pearly snaps and they are easy to install, so that is what I prefer to use.

Here she is without anything inside. Card slots on the left and ID slot on the right (this can be made with a clear plastic window, but I prefer fabric because it's easier to remove my ID when I need to show it. The zippered pocket is for coins or other items. Behind the zippered pocket is a slip pocket and behind that is another slip pocket. You can place your cash in one and your phone in the other pocket. There is another large slip pocket behind the card slots too. Lots of pockets to hold all your wallet needs.

Here is a photo showing the 2 slip pockets for cash and phone.

Opened up to show the back.

Folded and closed showing the back of the wallet.
I have made a few of these Brandt Blvd. wallets before, but never one for me.  Here is the first one I made and tested. Here is another one I made to match the Daryl's Drive Bag I also made. Christine has several wallet patterns and I have made them all. I was using the Pick a Pocket wallet I made and tested years ago and I love that wallet too. Both wallets are great and I would be hard pressed to choose a favorite.
Pin It Now!

Friday, December 4, 2015

Brandt's Blvd. Wallet

The second Easy Street Pattern by ChrisW Designs is Brandt's Blvd. which is a wallet. The wallet has an optional removable wrist strap. I chose the option of not making the wrist strap. This wallet even has a pocket to fit your phone (I don't have a mobile phone) or you can use the pocket for receipts and things. I love this style and that it was easy to sew and looks fabulous. I will be making some more of these wallets.

The pattern calls for using a thumb catch closure, but I do not have any of those and do not want to buy a bunch if I am not sure if I will ever use them again. I resisted buying twist lock closures for a long time when everyone was using twist lock closures for bags and waited to use them in a bag only to find that designers were now using thumb catch closures or flip closures. So since I have a lot of twist locks, magnetic snaps and other snaps, I will use those and not buy more closures because chances are there will be another new closure type coming out....and well it gets too expensive and I need to use up what I have already. But those closures the testers used are very pretty and if you do need to buy a closure to make this wallet then you can decide on the type of closure you want to use that will look the best with your fabric choices. Okay enough babbling on from me, LOL!!! On with my version:
I used a snap color that went with this wallet nicely. I added some serpentine stitching down the center of the flap/tab closure too.
The outside opened up so you can see it all.
The inside all opened. There is a zippered coin pocket, 4 credit card slots, and I.D. pocket with a clear window. Behind the I.D./credit card slots is a large pocket for cash. Above the zippered coin pocket is the phone or receipt pocket. And there is even a pocket behind the zippered pocket too.
My "handmade" zipper pull that I made.

My New Mexico driver license. Well you all know how awful those driver license photos are, LOL!!!

Pin It Now!

Thursday, July 2, 2015

Pick-a-Pocket Wallet

I tested another wallet pattern for Christine of ChrisW Designs and she now has the pattern for sale in her newly updated website. She had a contest to name the wallet and Pick-a-Pocket Wallet was the name chosen. (click on the link to buy the pattern and to see all the other tester's wallets at the bottom of her page). You have choices when making this wallet; you can choose more credit card slots or a second zippered pocket if you don't need all those card slots. I chose to make the zippered pocket, giving me 2 zippered pockets because I don't have many cards. Christine even featured my wallet on her blog here too.  The name Pick-a-Pocket Wallet fits nicely. Thanks Christine for another great wallet.

The wallet when closed measures: 3 ½" wide x 7 ½" high x 1/2" deep.

Here is my wallet. I chose to use one fabric for both inside and outside the wallet. Since it is a hand dyed fabric, the colors changed across the fabric and I never knew how it would look for sure until it was finished. I love how it turned out and have been using this wallet since I finished making it. My friends all loved it too when they saw it.
The wallet front closed.
The wallet opened so you can see the front/back all together.
The wallet opened and empty. You can see the clear I.D. pocket and credit card slots above the I.D. pocket. I chose to add the second  zippered pocket. The pocket with the pink zipper is the pocket I made instead of adding more credit card pockets here. So you can pick the pocket you want here.
Wallet opened with all my stuff inside. You can put your cash in this pocket here or above the cards is another pocket for cash or receipts.
Closes with a tab snap closure.
Oh I almost forgot to take a photo with the zipper pulls I made added on.
Just a little finishing touch and makes is easier to grab and zip the zippers too.
 
Pin It Now!

Friday, January 2, 2015

Bi-Fold Fabric Wallets For My Nephews

I made my two nephews each a wallet for Christmas. I used the Bi-Fold Wallet Tutorial.
Wallet when closed measures 4" x 4".

There are several card pockets on the wallet and it opens on long side for cash. I slipped some cash in the wallet for each of them too. It folds in half and closes with a snap.
Closed wallets.
  

Pin It Now!

Sunday, July 6, 2014

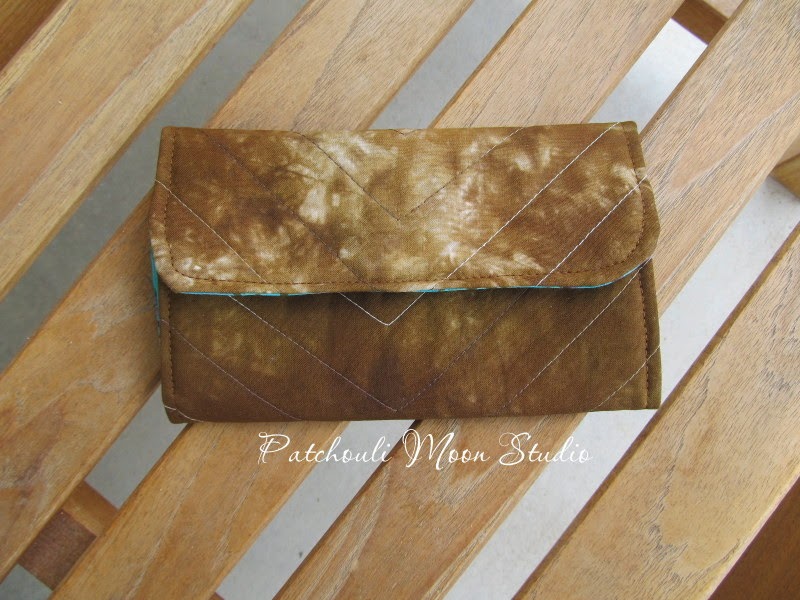
Wallet For My Daughter

I made my daughter a new wallet to match the bag I made her last year.
I used a brown fabric that I hand dyed for the outside. (*Blogger somehow squashed this photo because it doesn't look so squashed on the photo I took, but only when I added it to my blog. Weird!)
The batik fabric with the palm trees is the fabric that matches the exterior of her bag. I couldn't use it for the exterior of the wallet or the tress would be upside down when the flap was folded over. 
  Pin It Now!

Monday, April 7, 2014

Girlfriend Quilted Wallet

I tested a wallet pattern called the Girlfriend Wallet recently and here is the wallet. Amira from Little Mushroom Cap designed this wallet and she now has her wallet pattern for sale in her Craftsy and Etsy shops. She also has all the testers wallets on her blog posting. You can go there to get to her pattern links too.

The wallet measures: 7.5" x 8" opened & 7.5" x 4" closed. 

I quilted it with straight stitching.

Inside are the credit card pockets, a zippered coin pocket and a cash pocket behind the zippered pocket and a magnetic snap closure.

I love this fabric and only had a small piece left. The blue fabric is a hand dyed fabric I dyed that went well with this print.


Pin It Now!

Thursday, March 20, 2014

The Great Getaway Bag, Book Review & More...

I wanted to make a large bag to use as a carry on bag when I travel in July. I had recently made the Convertible Cross Body Bag and a matching wallet for myself out of this floral fabric that my mom sent to me. Then while telling my mom about the cross body bag she wanted me to make her one too. How about a wallet to match Mom? Sure she said and she wanted a tissue holder too. So I have a matching set and so does my mom. I mailed her bag off to her a few days ago, so I am sure she has it by now.
Here is the Great Getaway Bag I just finished making for myself~
My Great Getaway Bag. 
A large zipper goes across the top of the bag.
I like the tabs on both sides of the bag that you can grab a hold of when zipping.
Here is the flapped outside pocket. It closes with a magnetic snap and tab. I copied this idea and used it on my Convertible cross body bag I made for myself and my mom (see below).
I made the piped handles as explained in the book. She uses a plastic tubing inside the handles. I had some tubing and after I made them, I didn't like the feel of them. Perhaps my tubing was too narrow? I ended up making a similar handle without the tubing and removed these.
Inside there is one zippered pocket.
There is also a divided slip pocket. I didn't have enough of the fabric that I used for the zip pocket so I used another floral fabric too. 
While you probably can't tell, these are the new handles I made without the tubing. I like the feel of them better. I  also chose not to add the shoulder strap to the bag.
Nice and roomy inside. It's also so soft because I used headliner foam instead of fusible fleece.
The Convertible Bag I made for my mom. It's just like the one I made for myself, except I used a different lining because I didn't have enough of the lining fabric leftover.
Matching wallet, same as mine except the lining fabric is different. The lining fabric was actually a fabric that my mom  sold in her quilt shop in California way back in the mid 1970's!!! I thought it would be fun for her to have a little memory of that fabric too.
Here is the bag, the wallet and the tissue holder I sent to mom.
The lining for mom's bag.
I made The Great Getaway Bag from a book I checked out at the local library. The book is called The Bag Making Bible, by Lisa Lam.
This is the back cover of the book showing The Great Getaway Bag. Below is the cover of the book.
The book shows mostly how to make certain elements for a bag, like a few different straps, pockets, zippers, closures, etc. There are also a few bags that you can make with directions in the book for those bags specifically, like The Great Getaway Bag. 

Lisa Lam designs great looking bags and is quite talented, however I have to honest and tell you there were some things that I found questionable. For instance, with the Great Getaway Bag the fabric that you cut out that you sew the zipper to the instructions say to cut out 2 exterior fabrics and 2 lining fabrics plus 2 interfacing and fusible fleece. These pieces are all cut on the fold. Then the next step tells you to cut flip the pattern piece over and cut the same number out again in mirror image. Huh? Placing these on the fold and cutting already cuts them in mirror image, so why was I instructed to cut the same amounts again? I ended up wasting fabric, interfacing and headliner foam (which I used instead of the fusible fleece). I also wished there were more photos for certain steps or more written information. Like when I was folding the fabric in half and pressing it. No photo was shown and nothing to explain what size the piece would be once folded in half. I could have folded it in half the wrong direction. It's little things like this that can make it easy to follow a pattern or more difficult for the bag maker. 

There is however a lot of great information in this book. If you want to know how to add a magnetic snap or a twist lock closure to your bag, you flip to those pages and she shows you how to do that. If you want to design your own bag and add certain pockets, closures, etc. it's all in the book. Some of the directions are too brief or there's not always a good photo to go with it though. I got the feeling that she had to edit this book down to a certain number of pages and left out a lot. I would rather she left out some of the actual bag patterns and put more emphasis on the techniques making them much clearer than they were. Also printed in a a gray color rather than black, made it hard on the eyes to read. Since I was making the Great Getaway Bag, for nearly every step I was referred to such and such page, like for the handles go to that page and see how to make them. She also included info about purchased handles like she used on her example of the bag. I don't want to know about purchasing handles, anyone can purchase handles. I want to make them to match my bag. I had to figure out the part that is sewn to the bag on my own, since there was no info about that part of the handle. There is a lot of flipping back and forth to see how certain parts of the bag is made and even then some of the instructions weren't clear enough. If you are a beginner at bag making then this book will be hard to follow. Since I have bag making experience, I was able to figure out how to make things work.

I much prefer to use pdf patterns for this reason. Most good bag designers provide a lot of written text and photos to go along with the text. Since you download the pattern to your computer, the text is nice and large and easy to read and you can click to make it even larger if you need to read or see a bit better while it's on your computer. The pdf bag designers can make their patterns as many pages as they want to since they don't need to edit for printed publication purposes. This makes it better for you and the designers. The bag designers have their website or email address or both on their patterns and you can easily contact them with questions. I found most are really good about getting back to you. They want to help you and they want you to have a successful experience making a bag with their design(s). Most of these designers even allow you to sell a bag made from their design as long as you give them credit and aren't mass producing them. I like that. I think people get a bit too carried away with copyright issues these days. We who are creative have minds that think a lot a like and somewhere someone has created something similar, whether it's a quilt, a bag, a painting, etc. even if they never laid eyes on your creation before. So who is to say if someone stole your idea when we think alike in the first place. 

(Note: these are my own personal opinions and I was not reimbursed in any way by anyone. I truly like when others give an honest review of a product, book, etc. If I like something I will tell you and if I don't like it I want to tell you and why. I think honest reviews help us all. Hopefully manufacturers and authors, etc. will pay attention if they read reviews of their products so they can make improvements in the future. Maybe I'm just a dreamer, though.) 
    Pin It Now!
Related Posts Plugin for WordPress, Blogger...