Showing posts with label fabric folder. Show all posts

Monday, February 11, 2019

(MIY) Make it Yours Bag & Cat Fabric Folder

I finally got around to making the Make it Yours Bag (MIY), designed by my blog friend, Rochelle of eSheep Designs. I had liked this bag for a long time. It is a free pattern on Bluprint (formally Craftsy). As I was making it, I truly did make it my own! I make a lot of changes as I usually do anyhow. I will explain them under each photo.

Fanny Is here modeling the MIY Bag and to show the size of the bag.

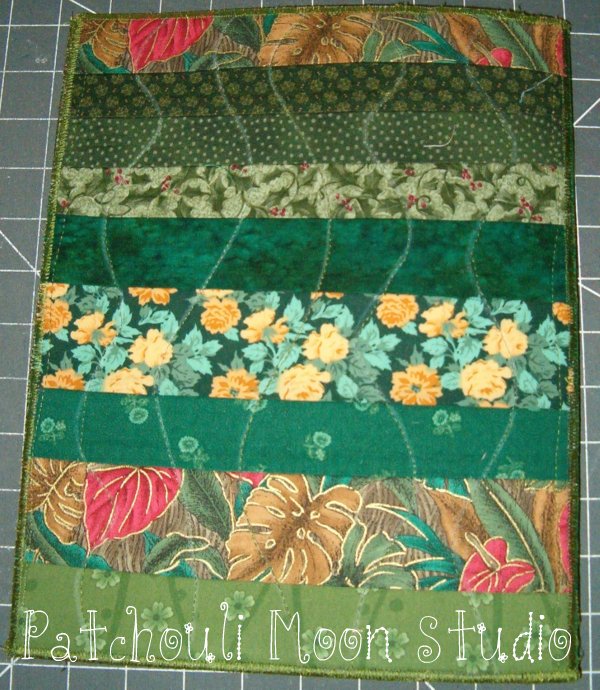
I had this cute black cat fabric and thought it would look great as a bag. I paired it with some large polka dots and a lime green for the straps. I quilted it in wavy lines. I used a foam stabilizer so the bag stand up nicely. I added straps tabs and rivets too both the tabs and the straps.

On the back of the bag I added a zippered pocket. Rochelle does tell you to add whatever pockets you want to inside or out. I thought about adding this zippered pocket on an angle and then decided to just make it as I normally do. You might also notice the shape of my bag is a bit different too. Well I will explain. I started out making the non-pleated version and adding a gusset. But when I added the gusset, I didn't really care for how it looked. Maybe it would have looked better had I gone for the pleated version? So I ripped the gusset off the bag and boxed the corners instead. Since this bag shape was slightly curved, it was a bit different to box the corners on a curve. Well it didn't stop me, lol! So the bag has a bit of a curve that goes into a square boxed bottom. Well Rochelle, you did say to Make it Yours!

Handmade zipper pull I made.

Inside I added another zippered pocket. Apparently I didn't see that little black thread at the top!

On the other side I added a small slip pocket and divided a pen pocket in it. The bag closes with a magnetic snap.

On to the Folder~
I wanted to make an applique pocket for the inside of the MIY bag above, but it ended up being too large of a pocket, especially after the changes I made to the bag. So I decided to make one of my fabric folders (my own pattern) and put this applique cat pocket onto the front of the folder. So I just added another thing you can add to my folder pattern: a pocket outside! See I even make changes on my own patterns, lol!!! You can find the pattern to make a Patchwork or Applique fabric Folder on Makerist, as well as all my patterns there (some are free).

Applique Cat from Alley Tales Primitives: Never Enough Cats pattern. As you can see I used the same fabrics as the MIY Bag above.

Not enough fabric to make the diagonal pocket, so I pieced it together first.

The back of the folder also has a pieced strip. I quilted the folder as well.
Note: Remember this applique cat as you will be seeing more of them in a different project that I made recently too.
Pin It Now!

Monday, September 10, 2018

House Tote Bag & Fabric Folder

Welcome to My House is a fun blog hop brought to you by Carol of Just Let Me Quilt. Rules are simple Carol says, "Just put a House on it" whatever you make. Okay I can do that because I love houses.

I made a huge sized tote bag that I put a house on or rather more like a little village of houses on, lol! I have seen similar styles of these online and have wanted to make one, so this was the perfect opportunity to give it a go. Most of these little villages are completely round, so I made mine a bit different by adding a hill made of rickrack.
Here is my House tote bag. Well it's more of a Village than just a house! I added a black base to the tote and sewed scrappy batiks on the sides. The village is mostly all batik fabrics too.

A couple of trees and clouds were added as well.


A recessed zipper keeps everything inside this tote from coming out.

Open wide! A zippered pocket plus a slip pocket are inside the tote too.

I divided the slip pocket by sewing 2 pen pockets.

On the back of the tote bag I made a slip pocket using a heart orphan block and I used jumbo rickrack around it.


I used foam stabilizer so the tote stands up on it's own and a zippered top closure too. It is a super roomy tote. Not sure if I will keep or sell this one, since I have so many bags already, but I can't stop making them!!! It's my therapy along with making quilts, so even if it doesn't sell, it's cheaper than paying for therapy, right? LOL!!!

The next project I have been working on is writing a pattern of my own, a Patchwork Fabric Folder, that I am now selling on Craftsy.com The folder instructions show you how to make the folder using an orphan quilt block or sewing scraps to make a patchwork background and adding an applique over it. You could also just make the entire thing in one fabric too. So while I do not include any applique designs in the pattern itself, you could make any small quilt block that you want, pieced or appliqued for the front. I chose to make a small house block for the front of this folder.

My little applique house on the front of the Patchwork Fabric Folder I made.
If you would like to create your own Patchwork Fabric Folder, you can go to my Craftsy store to purchase the pattern. There are 2 pockets inside to hold papers and a pen. The folders make great gifts and you can choose to use an orphan block, add an embroidered block by hand or machine, fussy cut a fabric, or make all out of one fabric. So many possibilities to be creative and use up those fabric scraps in the process!

Psst: I have a free tutorial to show how to Sew a Scrappy Background on Craftsy too.

September 10


September 11


September 12

September 13


September 14


Pin It Now!

Tuesday, September 4, 2018

Patchwork Fabric Folder Pattern (available in my PayHip Shop)

This pdf pattern is available to purchase in my PayHip Shop. This folder is fun to make as well as so useful. It is a great pattern for using up fabric scraps, pieced or appliqué orphan quilt blocks, hand or machine embroidered blocks, fussy cut fabric or any fabric that you want to use. While the name "Patchwork" is in the title, you can make it in one fabric as well. I just love finding ways to use up that never-ending pile of scraps!

These folders make awesome gifts for anyone. You can make them for a doctor or nurse you know with a medical appliqué or novelty fabric. Know someone who is a coffee or tea lover? Appliqué a coffee or teacup or pot or find a tea or coffee fabric print to use. Music lover? A musical fabric print would be perfect. You get the idea. Let your imagination run wild. 

The pattern does not include any appliqué designs because we all have different tastes and needs for the folder and so I leave that decision to you what you will put on the cover front. There are oodles of free quilt block designs on the internet, both pieced and applique. Those of you who have embroidery machines, you can embroider a block for the cover.

Here is one of the folders that I made and then the folders that my testers made are following, to give you some ideas.

I made a Scrappy Background from scraps for my folder and added an appliqué. (Hint: I also wrote a free tutorial on how to Sew a Scrappy Background in my PayHip Shop too. I gave this to my sister who has a 5th wheel and she keeps items inside that are need for trips.

Two different pockets inside the folder.

Pockets for paper and elastic for holding a  pen.

Here are the tester's versions~

Joan of Moosestash Quilting.

Sandie of Crazy'Bout Quilts


Jeanna of Slammin' the Screen Door


Tara (no blog).


I want to thank my testers for taking the time to test for me and providing great feedback. Without their help I would have had a few typos, amongst other things, lol!

You can find the pdf pattern here in my PayHip Shop. Feel free to sell your finished folders, just please respect the Copyright and do not copy any part of the pattern without my permission in writing first. Thank you so much.


Pin It Now!

Tuesday, October 13, 2015

Fabric Folder with Pigs Flying High

The annual Albuquerque International Balloon Fiesta is over for this year. The weather really was great this year too and the hot air balloons flew every day, other than a few special shapes that were too tall in the breeze to fly, but most inflated for the spectators to see. I didn't attend the fiesta this year, but watched on TV and saw the balloons fly by my home one day.

I did make something out of a pieced quilt block that I had for a few years. I was never quite sure what to do with this quilt block and since Balloon Fiesta was coming I decided to finally use this block to make a folder with the quilt block on the front. It came out cute and I used up some more of the never-ending piles of fabric scraps I have. I put this in a local consignment shop, but it didn't sell during Balloon Fiesta. Well my daughter loves pigs so if it doesn't sell perhaps she might want it? (*Update: This did sell a week after Balloon Fiesta.)
Three pigs flying high in a hot air balloon. I added some fabric strips to the quilt block to create the front of this fabric folder.
Inside the folder are 2 pockets to hold papers and I sewed a pen/pencil pocket too.
The back of the folder.
Here is the folder standing up and open so you can see the front and the back. I sewed some lace trim on the spine.
Pin It Now!

Sunday, December 19, 2010

Quilted Fabric Folder

I used Shiva Painstiks to stencil the front of this folder. I quilted around the stencil using metallic threads and quilted the background in black.
I also used Shiva Painstiks and texture plates to create the back of the folder.

This is the inside of the folder.
Pin It Now!

Sunday, December 12, 2010

Fabric Folders

I've been having fun making fabric folders and using up scraps (yes!). I used Shiva Paintstiks and texture plates on the black flower. This is the front of the folder:
Opened out to see both back and front:
Inside:
I made this folder for my daughter who loves everything Irish. I used Shiva Paintstiks and a Celtic Knot stencil. I made this folder with batting and I quilted it and added a binding. It still works as a folder, but it softer than the folder above which was made with a heavy interfacing that made it more rigid.
The back and the front:
The inside:
Pin It Now!

Friday, November 19, 2010

Sewing Machine Cover & Folder

My friend Tara's birthday is today and we got together so I could show her how to make this fabric folder (scroll down to see my folder like this). I made her a kit using my fabric scraps and then I showed her how to sew it all together. It turned out great! Tara even used some new embroidery stitches she didn't know she had on her machine. This is the front of the folder:This is the back of the folder:The inside of the folder:
Tara & I went out to celebrate our November birthdays on Wednesday (her birthday is today and my birthday was the 13th). This is the birthday present I made for Tara, it's a bunny sewing machine cover:
Close-up of the little bag I made:
Back of the bunny:
Pin It Now!
Related Posts Plugin for WordPress, Blogger...