Tuesday, June 27, 2017

Evening Home to Seattle Row Quilt

Last summer I was in Washington state visiting my mother, sister and her family and my husband, daughter and grandson also came to visit, as it was my mom's 90th birthday celebration. Sadly she passed away only 2 months after our visit there.

While we were there, my sister, her youngest son, my daughter, grandson and myself took the ferry to Seattle. We walked all over Pike Place Market and a short distance from there is a quilt shop called Undercover Quilts on Virginia Street. I was collecting the Row-by-Row Experience free patterns on our trip, and picked up the pattern for this Seattle Skyline row quilt, called Evening Home to Seattle. I could have purchased the kit for $50, but since I had so much fabric, I just got the free pattern. But I did purchase some other patterns while I was there.

Well as you can see from this quilt there was a lot of teeny tiny cutting on these applique pieces, like the windows! So I traced on the fusible side (thinking I needed to reverse the scene) with a Sharpie marker. When I pressed it to the wrong side of fabric the markers lines stay and it is much easier to cut out those tiny pieces without the paper in the way. Well after I got it all cut and fused, I realized I had a mirror image of the pattern and so the Space Needle should be on the left and Mt. Rainier on the right! Oh well, I couldn't have cut from the paper side without the paper eventually falling off and my lines with it. So those of you who look at this quilt and think something looks odd, well there you go my goof! Still it did turn out looking nice in spite of my goof.

My daughter claimed this quilt for herself even before I chose any fabric for it. Of course I had planned on making and giving it to her anyway. She is a native Washingtonian.


This is how the quilt is supposed have looked with the Space Needle on the left and Mt. Rainier on the right. Mine is opposite. 


Pin It Now!

Monday, June 26, 2017

Diva Envelope Clutch

I made a Diva Envelope Clutch, pattern by eSheep Designs. I wanted to use this hot air balloon fabric, but then totally forgot it is directional and with the flap the balloons would have appeared upside down! So I used the piece I cut out for the exterior fabric and used it for the lining instead and I used the balloon fabric on the bottom piece outside only.  The fabric I was going to use for the lining went on the outside and I appliqued some of the balloons onto the flap so it would look somewhat balanced. Not my best, but at least I was able to make it work.


The lining works here, since you see the correct direction of the balloons.

The back has a zippered pocket and I added a strap handle, but the handle only works if there is something stiff in the folder. Oh well sometimes things don't always go as planned.
Pin It Now!

Saturday, June 24, 2017

Fiona's Freeway an Easy Street Bag Pattern

ChrisW Designs has a new bag in her Easy Street Collection of bag patterns, called Fiona's Freeway. Easy Street patterns are faster and easier to sew than her regular patterns and cost a bit less too. Pop over to see all the tester's bag versions too.

I enjoyed making this bag. I got all artsy and sewed decorative stitches on the flap and that was fun! So here is my Fiona's Freeway~

Fiona is a bucket style bag with a drawstring and a flap with a magnetic snap closure. She is a medium sized bag with an adjustable strap so you can wear it across your body. There is a front zippered pocket that is perfect for holding a cell phone.

I had fun using fancy stitches machine stitches as well as making French knots by hand and couching a piece of rickrack in place. I also sewed on a few tiny buttons.

Side view shows the strap tab and the grommets for the drawstring you can see too.

My signature zipper pull on the front zippered pocket.

Fiona's backside is pretty too!

Here you can see the drawstring and magnetic snap closure.

I didn't have a large enough cord stop to use, so I rummaged around my craft stuff and found this large bead which looks nicer than a cord stop and works really well as an alternative to keeping the cord cinched in.

Inside there is a slip pocket on one side and zippered pocket on the other side.

Slip pocket with my label.

Zippered pocket with another zipper pull I made.

To give you an idea of space I put my wallet, reading glasses and sunglasses cases inside. Not a large bag, but not too small either.

Here you an see the entire flap.

Fiona is having fun swinging in the tree!
This one-of-a-kind Fiona is for sale for $54 plus shipping. Email me if you are interested in purchasing her. SOLD!
Pin It Now!

Tuesday, June 20, 2017

Pick A Pocket Tote

I made a Pick A Pocket tote, which is a small bag with 6 pockets that go around the bag. I first sewed strips of fabric together to create my fabric, then I made the bag. As usual, I made it better by fusing interfacing to the fabric and making the fleece a bit taller, because with the first one I made, there wasn't enough fleece where it gets folded over at the top. This is a free pattern from All People Quilt.
This is how the bag looks on one side.


View from one side of the bag.

The lining has no pockets because all 6 pockets are on the outside of this bag.

This is how the bag looks on the other side.

View from the other side of the bag.

And the pretty bottom of the bag. 
I made this Pick A Pocket Tote first and there wasn't enough fleece at the top and my pink lining fabric wouldn't lie flat as you can see. Plus I didn't like sewing across the handles, especially with the thread being light on the darker fabric.So I also changed that and stitched the handles in place a little below the top of the bag, so I could topstitch the bag all around and move the handles out of the way, as I did in the green tote above. I usually have to make something once and then make changes on the next one (if there is a next one). Some things I can see as I am doing and can make those changes, but some things I cannot until i sew as per instructions and that's when I rewrite my own version. I gave this one to a woman I know who wanted a small bag.

Pin It Now!

Monday, June 19, 2017

Bonnie Slide Knit Shawl


I knit this shawl called the Bonnie Slide, by Taiga Hilliard Designs and it is a free pattern on Craftsy.com. I used a royal blue mohair yarn. I was starting to run out of yarn, so I had to bind off earlier than the pattern called for, but it still turned out to be a nice size shawl. It is easy to knit with a simple lace pattern.
Knit in mohair yarn.


Pin It Now!

Tuesday, June 13, 2017

Tip of the Morning Tuesday~ Best & Easiest Way to Clean Your Iron

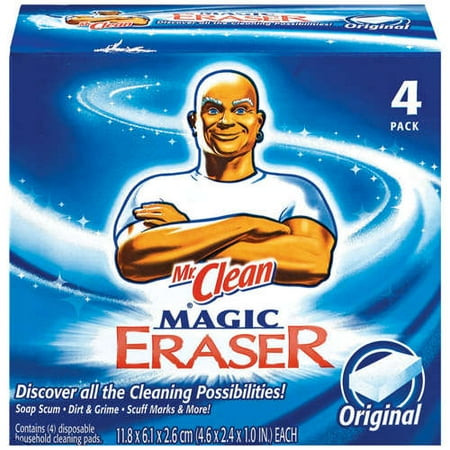
I have a great tip for you about how to clean your iron quick and easily with no mess. Maybe you already know about this, but in case you don't here goes: Purchase a package of Mr. Clean brand Magic Dry Eraser Sponges (no affiliation), and then turn your iron on to get it hot. Meanwhile dampen one of the sponges with a little water and wring out any excess. Once your iron is hot, unplug it and let it cool for a minute, so it's not so hot as to burn you. Then just rub the sponge all over the iron sole plate and especially in the steam holes and you will see your iron getting clean as your sponge gets dirty. It cleans faster and easier than using that iron cleaning paste in the tube and there is no odor! I love this Magic Eraser sponge! It is my new iron cleaning sponge from now on. I will certainly be cleaning my iron more often since it is so much easier and faster to clean.

Sorry I didn't take any before or after photos because I did this last night and wasn't sure what the results would be. I will say the steam vent holes are finally clean as new now. I had never been able to get those vent holes clean no matter what I tried cleaning it with and I tried it all before.

I haven't even used these Magic Erasers for anything else, but I hear they clean other surfaces well too. If you clean other items with these, I would like to know what you clean and well it works for you.


Pin It Now!

Thursday, June 1, 2017

The Minifacto Bag

Christine of ChrisW Designs created not one but 2 bags for the June Bag of the Month Club this year. The Factorium (which I did not make) is a large bag suitable for light travel or for the office to carry papers, laptop or other electronic devices and more. This Minifacto Bag is the smaller bonus bag included in the BOMC and it is a cross body bag for daily use. It can fit inside the larger Factorium bag. I chose to test this smaller Minifacto bag. Some of the testers made both or chose the larger or smaller bag to test only. As always, Christine's instructions are excellent! (*Note you can only get this bag pattern through the Bag of the Month Club now. It will be available for sale by Christine on her website in 6 months, so not until December 2017. If you join the BOMC now, you will get all 6 patterns that came out from January 2017-June 2017, plus this Minifacto BONUS pattern. A new BOMC will start in July for 6 months with 6 new patterns from 6 designers).

To see both the large Factorium and Minifacto bags made by the testers you can go here.

I made a few changes to the bag and noted in the caption what those changes I made were. This is a really nice bag to carry just a few belongings with you. It has a lot of pockets, especially Christine's signature cell phone pocket, which is so handy because you can access your phone (or in my case keys) quickly without having to even open up the bag itself. The bag is not too big or too small.

The strap has an adjustable slide, so it can be adjusted to fit the person wearing it for across the body or on the shoulder. I did not have the type of closure that Christine called for in the pattern to close the front pocket, so I sewed on a large snap. (You can see this pocket open several pictures below).

Zipper opening to the bag. You can see the front pocket is pleated, giving it a bit more space in the pocket.

The strap tabs on the pattern are shorter and are sewn into the top seam, but I wanted my strap tabs to show more, so I made them longer and added a bit of bling to enhance them too. 


See the cell phone pocket and how easy it is to access your cell phone and or keys.


The bag of the bag has a hidden zippered pocket, which you cannot see in this photo.

See the zippered pocket here?

Here the hidden zippered pocket is opened and I put a tin inside so you can see in better. 

Here is the front pocket opened up. See where I sewed a large snap to keep the pocket closed. I did not have the pocket closure called for in the pattern, so I used a snap instead and it works great.

To give you an idea of what can fit inside, I put my wallet, reading glasses and sunglasses, a pen in the slip pocket too.

Inside is a zippered pocket and across from it a slip pocket. Another change I made was to make a sleeve (out of the green exterior fabric) for a stiff corrugated plastic to help make the bottom more rigid. In the pattern, Christine called for a thinner template plastic that is sewed in place before turning the bag right-side-out. I just didn't want to wrestle with the bag doing that, so I made this small change.

Here you can see the slip pocket closer. I like to divide my slip pockets with a pen size division, so you have a place to put a pen or pencil and a slip pocket on each side of the pen pocket division.

 This bag was donated to an auction to raise funds for Alzheimer's Disease 2022.

Pin It Now!
Related Posts Plugin for WordPress, Blogger...