Monday, January 16, 2017

My Sewing Room Re-Do

Hello readers I have my newly updated and organized sewing room to share with you. A few years ago Mr. P built me a huge sewing table with the idea I would be able to sew and quilt on that table. It worked well for a few years, but I ended up piling more and more stuff on the table; like my scissors and bobbins and presser feet, and more because I had no place to put them. Well Mr. P. is very organized and doesn't like a lot of stuff and it drove him crazier than me that I had so much stuff around me. So we started brainstorming ideas to make my small sewing room more functional for me. We talked about finding some cupboards and drawers from the home improvement store in the kitchen department that he could attach to the walls. The only issue with that is the drawers for the built-ins were too deep. That would mean piling stuff on top of stuff in the drawers, which would end up becoming a big mess. So I continued to look at Pinterest for ideas and did Google searches.

I ended up stumbling upon a flat filing cabinet that was a Martha Stewart Living design at Home Decorators online. Apparently Home Decorators is a Home Depot Company. They have a lot of great looking furniture for every room in the house too. (I am not an affiliate.) We had to take measurements and see what would fit and work in my small sewing space. I have a few sewing machines, 2 were in tables and I needed one more table for the machine I use a lot that used to be in the table Mr. P. had built that he took apart. So I got another table first (ordered that table from Amazon..not an affiliate). The flat filing cabinet would work on one wall and the apothecary hutch would fit on top of the hutch and that would store most of my sewing supplies that I used the most. The narrower drawers even came with drawer dividers that can be divided in 2 configurations too! But I needed something else closer to the machines and found the 4-drawer rolling cart, which is perfect for my bobbins, presser feet, and more and I can roll it closer as needed.

Mr. P. had to build all the pieces first, because they are shipped flat and they are heavy! He knows how to build stuff, so it wasn't too hard for him, but I would have no chance if I had to do it by myself. He ran into a couple of issues with the drawers. He needed to shim them so they would glide smoothly. He also screwed the drawer dividers from the bottom in a few places to keep the drawers more rigid in the large filing cabinet. I was putting my thread in one of the narrow drawers and it started to sag from the weight. That's when he decided he needed to add the screws for support. I also decided to put my thread in the smaller bottom drawer.

I am thrilled with my new improved sewing room and the furniture looks fabulous and works well for me. I hope I can keep things tidier now! I also rearranged my cutting and ironing room to make it nicer too. So without further ado, here are my 2 rooms, both the before and after photos~

Before shot when part of the room was empty, except for my stuff piled up on the floor.
After with my wheeling drawer cart in between 2 of my machines.
After photo with my serger and another machine on the floor. What can I say, I love all my machines!!!

Another before photo.
Before photo with mess piled up in anticipation for redo.

Before photo.

Before photo.

Before photo.

Before photo.

After photo of my new flat filing cabinet and hutch.

After photo.

After photo of one sewing machine with drawer cart.

Now onto my cutting and ironing room that I reorganized~

Cutting table and rulers.

Ironing table.

My fabric, computer (need to stand more, so put my computer on top).

Cutting table.

Pin It Now!

Saturday, January 14, 2017

Diva Envelope Clutch

I tested this Diva Envelope Clutch for Rochelle of eSheep Designs late last year. It's a fun pattern and easy to sew. Pop on over to Rochelle's blog to find the link to get this Diva Envelope Clutch pattern at a sale price this weekend. Thanks Rochelle for a great and easy to sew pattern that allowed me to add my own creativity to the flap! You can make yours as per instructions or get creative with the flap too and make it yours.

I made the first test one for a friend for her birthday. I added a flower applique to the front. The flower was not part of the pattern, but just something I wanted to add to make more me.
I added an applique flower with buttons, even though the applique was not part of the pattern.

The back of the clutch has a zippered pocket. Great for holding pens or other things like a credit card or license if you don't want to carry a purse too.

My signature zipper pull.

It holds a legal pad or theme book or folder.

I found the stiffer interfacing called for in the pattern worked well for the exterior fabric, but wrinkled on my lining fabric. I gave Rochelle my suggestions for using a different interfacing for the lining, which I used on my second Diva Envelope Clutch (below) and it worked much nicer.😊
For Diva Envelope Clutch 2, I created fabric by sewing scraps of batik fabrics together to create yardage. Then I cut out the pieces needed and made according to the instructions, only I used a lighter interfacing for the lining this time and it worked out better with no wrinkles. I still used the stiff interfacing for the exterior.

Lining nice and smooth with no wrinkles.

I must have been distracted because I measured and sewed the zipper on the back off center! LOL! Oh well, it still works and this one is mine.
My zipper pull.

Now pop over to see Rochelle's blog and her version of the Diva Envelope Clutch as well as the other testers versions too.
Pin It Now!

Tuesday, January 10, 2017

Sheep Mug Rug

I made a sheep mug rug as a little gift for a friend. She used to have sheep and gave me some yarn that was spun from her sheep. This was a fun little project to make.


Pin It Now!

Thursday, January 5, 2017

Blue and Tan Hand Knit Striped socks

I knit a pair of socks using a blue and tan self-striping yarn.


Pin It Now!

Tuesday, January 3, 2017

Lip Balm Holders

I made some more lip balm holders as gifts, using some ribbon I had for decades! I bought a package of lip balm at before Christmas that had an assortment of flavors like bubble gum, chocolate, Reeses, etc. I used a different swivel hook that has a small D-ring already on it, so I didn't need to add a key ring to these. The tutorial is from Rochelle of eSheep Designs. These are fast and easy to make using ribbon. I made some others using felt too, that I posted here. The felt ones took longer because I added applique and embroidery.

I have had this ribbon in 3 different color ways for decades. I finally found something I could make with this ribbon. Thanks for the tutorial Rochelle!


Pin It Now!

Sunday, January 1, 2017

Happy New Year 2017! Quilted Dog Leash Holder & Fozzie Bear Mug Rug

I hope this New Year is going well for you all. I hope it is the best year ever for you and me too!

I haven't been able to post much the past 6 months, so I will start by sharing some things I have made last year.

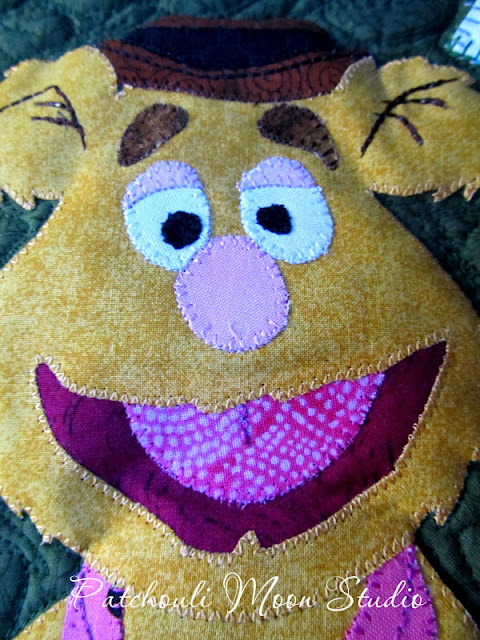
First, I made my sister some gifts, a dog leash holder that she asked me to make for her from a kit she had purchased. I also made her a Fozzie Bear Mug Rug, since she has loved Fozzie Bear since the Muppet Show first aired decades ago.
The kit included the fabrics and the hooks for the dog leash.

Her dog is named Bailey and I used a different font than the pattern included. The font is "Perry" (my last name). I used pigma pens to write the name rather than embroider it.


I made up the Fozzie Bear mug rug. I wanted to include a joke, so I went with the dog joke, since I made the dog leash holder too.


Pin It Now!
Related Posts Plugin for WordPress, Blogger...