Wednesday, March 31, 2021

I Am On The Crafter's Edge Design Team!

I am excited to announce that I was accepted to be a part of the Design Team for Crafter's Edge. Yay!!! Crafter's Edge is a company that sells the Crossover 2 Die Cut Machine and cutting dies and other items too. The machine cuts both fabric and paper. They are located in Phoenix, Arizona and they make the cutting dies right there in Phoenix too.


I received the Crossover 2 machine and some dies last Saturday evening. So I waited until Sunday morning to start learning how to use the machine and playing with the dies. I have never owned a die cut machine before, so it is a new experience for me. I like that the dies are not sharp and you can place them on to the fabric where you want them. It kind of reminds me of using cookie cutters and trying to get as many cookies as you can out of one rolling of cookie dough. The dies even look somewhat like flattened cookie cutters. These dies make it so easy if you want to fussy cut a part of your fabric because the dies are open in the middle allowing to see where you want to place them.
This is the Crossover 2 Die Cutting Machine.
See how you can see through the stars like a cookie cutter. This is great for fussy cutting.

A couple of things that are cool about this die cutting machine is that it has a pressure dial on it to dial up or down the pressure, depending on what you are cutting (info in in the instructions booklet). And the handle can fold up too when the machine is folded up, if you push in the lever to fold it. 

If you already own a die cutting machine like Accquilt or Sizzix, you can use Crafter's Edge dies with your die cutting machine too, although you may need to order and adaptor plate for certain machine.

So in exchange for being on the design team, I have to post on social media one project that I make using the die(s) each month. Being able to cut things out quicker and multiples of each shape at once, leaves more time for the sewing part, so I am already loving that! I can post any time I want during each month, so there is no specific day or time that each designer can post. 

Here are the other design team members that you can visit to see if you would like to follow them and see what they make using the Crafter's Edge dies each month. We all start posting our makes in April, so I hope you get inspired by what you see these designers make; I hope to get inspired too! 


Pin It Now!

Friday, March 26, 2021

Foxglove Yoga Bag

My good friend asked me about making a yoga bag. I was up for the challenge of not only making one, but making the right one that would hold all the items that she need to carry to her hot yoga class. I scoured the internet looking for yoga bag styles, thinking I could design my own bag or use a similar pattern I already have and make changes to. But mostly what I found was a yoga bag that carried a yoga mat and nothing else. That just wouldn't do! 

My friend needs to carry her yoga mat, 2 large yoga blocks, a towel, her face mask, a spray bottle (for hot yoga), her keys, cell phone (I think?) and a couple of smaller items too. The styles of bags I saw online (whether the bag itself was for sale or a pattern) just wasn't going to work at all. Then I found a great bag pattern that can work for a yoga/exercise bag or a diaper bag too. The only changes I made were to add a large divided slip pocket inside instead of the elastic gathered pockets and I added a zippered pocket inside too, I quilted the bottom of the bag and I topstitched around the gusset both inside and out for a nice look and for more added security for the seams, and I used a larger #5 zipper for the front pocket and the closure of the bag, which I think looks much nicer.

I wanted to make sure this bag would work for her, so I decided to make one so she could put all her things in the bag to make sure I didn't need to alter the size or add or subtract anything. If I needed to make any changes, then she could choose the fabric she wanted and I would make it for her. She placed her items inside and everything fit well and she ended up buying this bag from me. I couldn't be more pleased it worked for her and she loved it.

This bag measures: 17.75" W x 12.75" H x 5" D
The print has dragons on it. The front is a pleated zipper pocket, which is large enough to hold most shoes. 

The sides of the bag each have an elastic pocket, which is perfect for holding a spray bottle and a water bottle in the other pocket. Or toss in your keys for easy access if you only need one pocket for water.


The top of the bag is wide for holding the rolled up mat which hooks in place with a D-ring and a swivel hook. The main bag closes with a zipper.

Lots of room inside the bag. A zipper pocket on one side and a divided slip pocket on the other side.

I made this divided slip pocket large.

Fully loaded with the mat secured on top.

Inside the front zipper pocket.

The back of the bag is pleated too, but has no zipper pocket. I can add a second zipper pocket here if needed (for an additional cost of course).

The bottom of the bag has a stabilizer to keep it sturdy and purse feet. I quilted the bottom to really hold the stabilizer in place.

Pin It Now!

Thursday, March 25, 2021

Sneaky Satchel Cross Body Bag & Matching Little Wallet

This is the latest bag from ChrisW Designs, called the Sneaky Satchel, and is the second bag in the Minimise to Maximise Collection. Why is it sneaky you might ask? Well you can wear it as a cross body bag, or shorten the straps to wear on your shoulder, or remove the strap and slip it through the back and wear it as a fanny pack, bum bag,/waist bag. hip bag (or whatever the correct term it is these days). I will point out the features in captions under each photo, so you can see what I am referring to.

This is a video course, which is so popular these days as you can sew along with Christine and you feel like you just got a private lesson.


Here is the bag front, which has a flap with a magnetic closure. You can see the strap clips on to the D-rings at the top sides to wear as a cross body bag or use the adjustable slider to shorten the strap to wear it on your shoulder.

I added a label on the flap.

I made a little wallet to match this Sneaky Satchel.

On the back of the bag is a zipper pocket and a sneaky compartment that is open on the sides, which you will see better in the side view in another photo below.

The inside of the wallet. I like to make matching little wallets to include in the bags that I sell.

Inside the bag has a zippered pocket.


Okay without a model it was really hard to capture that back sneaky part, which I placed a rolled up paper through the back part. This slide through back can be a great place to slide your sweater or a scarf through when the weather warms up, so you can wear your bag and not have to carry your sweater. It is also the place where you can remove the strap and slide it through the back opening to wear as a waist bag. 

Here is the back view again with the rolled paper inserted through the back.

Again, since I had no model, I used my larger flower pot to hook the strap around it's "waist", lol!

Side view showing how the waist bag is worn.

Larger photo showing the waist bag being worn around the flower pot waist, lol!

I needed to take more photos for Christine, because the ones above my camera setting was set for a different size and they weren't clear enough. So I took more photos and I hope you like these too.


I love this train fabric print and I paired it with a gray faux cork fabric (looks like cork, but it's cotton). This would be the perfect bag to take on a train, don't you think? Or a bus, plane, boat too.


My flower pot is loving wearing this Sneaky Satchel as waist/hip bag.


If you want to make this bag, the video course is now available. It also comes with bulleted instructions for those who can remember the steps after viewing the video once and just want to read the steps. If you aren't receiving Christine's newsletter, then sign up for it and you will get a discount on all new releases, plus a free pdf for making the Coco Bag (I made a few modified version of Coco before).

For lots of inspiration, check out the tester versions of the Sneaky Satchel here or join the ChrisW Designs Facebook Group to see what other bag makers have made. Be sure you answer all 3 questions to get into the group. You can mention how you found out about the group, by mentioning my name or my blog (and that I am bag tester for Christine).


If you would like to purchase this Sneaky Satchel bag with the matching wallet that I made, please contact me.
Pin It Now!

Monday, March 22, 2021

Iron Shaped Pincushion

I made this iron shaped pincushion a couple of years ago. For the cord, I wrapped some yarn around a cord. The added cord is not really necessary to add, but I thought I would try it. It turned out cute.


Pin It Now!

Saturday, March 20, 2021

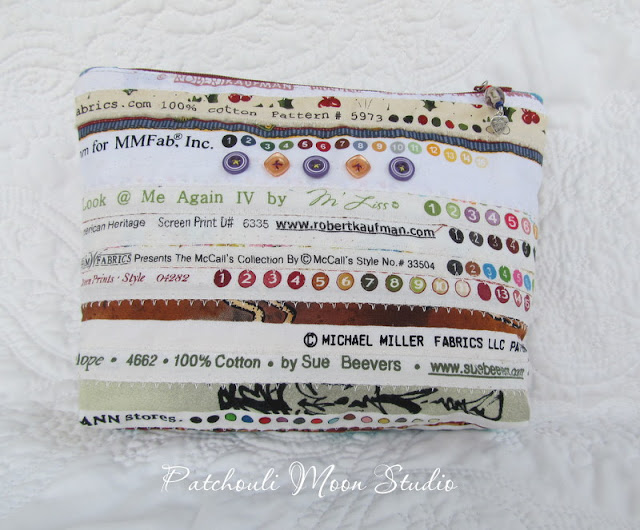
Selvage Mug Rugs & Zippered Pouches

These selvage mug rugs and zippered pouches I made awhile ago. Just now sharing them.

I made a bias binding for this mug rug, since I curved the corners.

This mug rug has traditional binding.

A zippered pouch with added buttons for decoration.


The other side of the pouch.

Zipper pull I made.

Plaid lining.

Pin It Now!

Friday, March 19, 2021

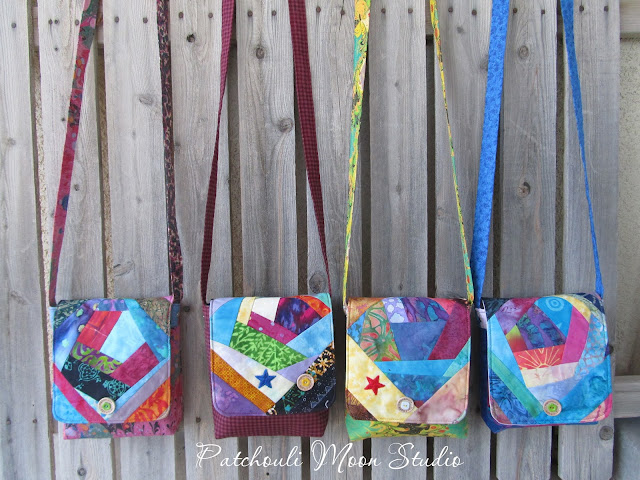
10 More Sew Powerful Purses

I finished 10 more purses to donate to Sew Powerful. 

4 with scrappy pieced flaps.

These are the same 4 purses as above.

Another 4 scrappy pieced flaps. I added some star embroidered appliques that i had for years on some of the flaps.

Some decorative stitches and yarn I couched on the flaps of these 2 flaps.

Pin It Now!
Related Posts Plugin for WordPress, Blogger...